I’ve heard a lot of good things about the Artisan Bread in Five Minutes’ technique from other bread bakers on Twitter and I couldn’t wait to try it for myself. I decided to start with the master artisan free-form loaf. So far this method lives up to its name. Basically, you make the master dough, let it rise for a couple of hours, then store it in the refrigerator for up to 14 days. When you want to bake bread, just take out the amount of dough needed for a particular recipe, shape it, let it rise and bake it. How easy is that? There are a couple of other steps but you get the gist.
Edited 8/4/2013: I made this loaf again and adapted the ingredients a bit. My adapted formula is listed below. Although I adapted the formula, I didn’t update all of the photos or the process from my original attempts. The directions are basically the same for both versions, but you use all of the dough in the updated version instead of cutting off part of it and putting the rest back in the refrigerator.
Here are the notes from the updated version:
- I cut the formula in third, used less water and yeast and a little more flour.
- I also changed the order of the ingredients. I prefer to mix the dry ingredients first, then add in the wet ingredients.
- If you are using active dry yeast instead of instant yeast, add it to the lukewarm water and then mix it with the flour and salt.
- The original version makes four 1-pound loaves. If you want to make that version, refer to the list of ingredients here.
- To make one 1 1/2-pound round freeform loaf, use the following formula.
Artisan Free Form Loaf Boule
Adapted from Artisan Bread in Five Minutes by Jeff Hertzberg and Zoe Francois
Makes: One 1 1/2-pound Round Boule
Ingredients:
- 2 1/4 cups (315 grams) all-purpose flour
- 1 teaspoon instant yeast
- 1/2 tablespoon Kosher salt
- 1 – 1 1/4 cups (237 -281.25 grams) lukewarm water *
- Cornmeal for dusting pizza peel or parchment paper
* Depending on the type of flour used, it could absorb more or less water.
Directions:
First Step: Mixing and Storing the Dough
Measure the flour (with dry-ingredient measuring cups), using the scoop and sweep method. Basically, you just scoop up the flour, then sweep off the top with a knife. Mix together the flour, yeast and salt in a large bowl. Add the lukewarm water (about 100 degrees F.) Use a wooden spoon or a Danish dough whisk to thoroughly mix the ingredients. I mixed the dough with a wooden spoon, and it worked just fine. However, if the dough becomes to stiff to handle with the spoon, you can reach into your mixing bowl with wet hands and finish mixing the dough, but there’s no need to knead it. Do this until everything is moist and you have a dough that is wet and loose. I mixed everything right in the container which makes it really easy to clean up.
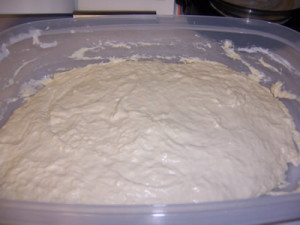
Cover the container with a lid that is not airtight. Allow the dough to rise at room temperature for approximately 2 hours or until it begins to collapse. It may take longer depending on the temperature of the room and the temperature of the water used. You can use a portion of the dough at any time after the rising period. However, it is recommended that you refrigerate the dough overnight or at least 3 hours before shaping a loaf because fully refrigerated wet dough is less sticky and easier to work with that dough at room temperature.
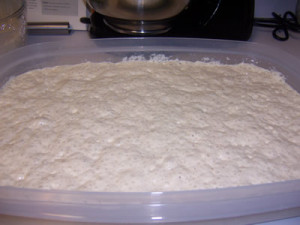
I let the dough rest on the counter for a couple of hours, then placed it in the refrigerator until the next day when I was ready to bake.
Baking Day: 1st Try
Shaping the Dough
First, you prepare a pizza peel (or the back of a baking sheet) by sprinkling it with cornmeal to prevent your loaf from sticking to it when you slide it into the oven. 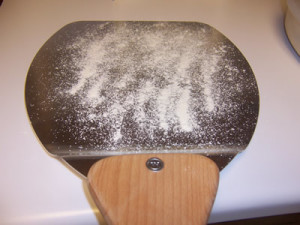 At this point, I thought to myself, “I should use parchment paper to make sure the dough doesn’t stick.” However, I decided to do it the way the recipe suggested so I didn’t use parchment paper. That was my first mistake. You’ll see why in a minute. Then, you sprinkle the refrigerated dough with flour and pull up and cut off a grapefruit-sized piece. Hold the dough in your hands and sprinkle with more flour so it doesn’t stick to your hands. Stretch the surface of the dough around to the bottom on all four sides, rotating it as you go. When it’s correctly shaped, the ball will be smooth and cohesive. This shouldn’t take very long.
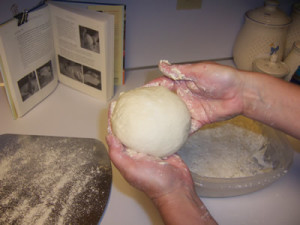 Place the ball on the pizza peel and allow the loaf to rise for about 40 minutes. No covering is necessary.
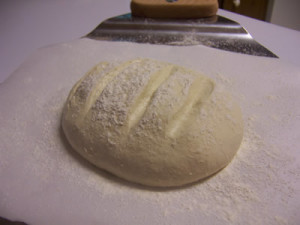
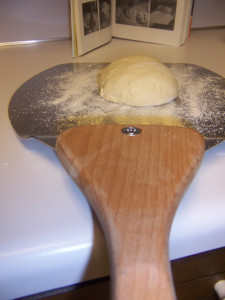 Baking the Boule Twenty minutes before you’re ready to bake, preheat the oven to 450 degrees F, with a baking stone placed on the middle rack. Place an empty pan for holding water on the shelf underneath the baking stone. This is the risen Boule
 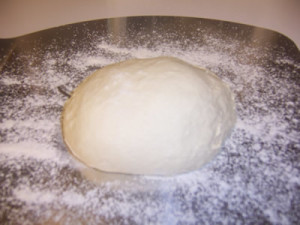 Dust the top of the loaf and make a 1/4-inch slash using a serrated knife. The book offers a few different patterns to choose from. I chose the scallop pattern.
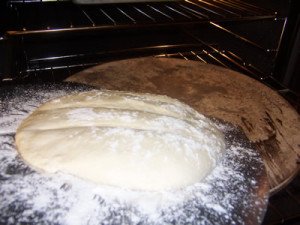
 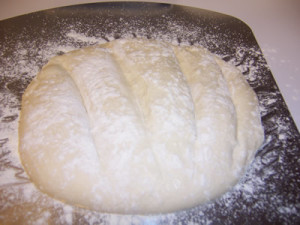 Now, this was the tricky part. The instructions say to give a quick forward jerking motion of the wrist, and slide the loaf off the pizza peel and onto the preheated baking stone. Well, all I can say is that I should’ve gone with my first thought of using parchment paper because this part didn’t work too well. The dough just stuck to the pizza peel. Phooey!
Instead of trying to bake a blob and not be happy with it, I decided to just start over again. I put the dough back in the refrigerator to try again the next night. That’s the good thing about this method. You can always put the dough back in the refrigerator and try it another day.
Baking Day: 2nd Try
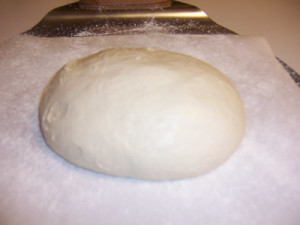
Okay. Let’s try this again… Sprinkle a little flour over the top of the dough and pull off a grapefruit-size ball. Then tightly shape the ball by stretching the surface around to the bottom on all sides. I placed it on the parchment this time to make sure it would come off in the shape I want it to and not stick to the peel. 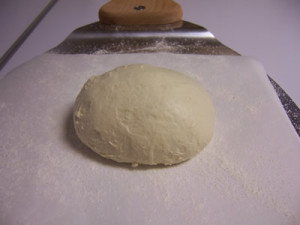
Here is the shaped boule doubled in size. It held it’s shape pretty well during the proofing.
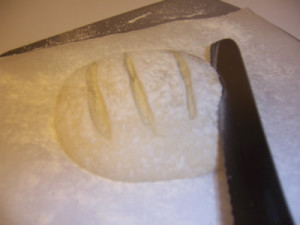
Now we’ll make the slashes. The slashes worked better this time.
It’s ready to bake!
Just slide the shaped and scored loaf (on the parchment paper) onto the preheated baking stone. Then quickly pour hot water into your steam pan. Close the oven door immediately to trap the steam. Bake the bread for about 30 minutes, or until the crust is browned and firm to the touch. Remove the loaf to a wire rack to cool completely before slicing and serving.
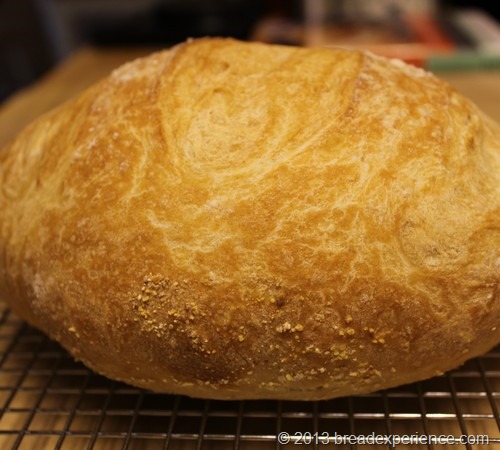
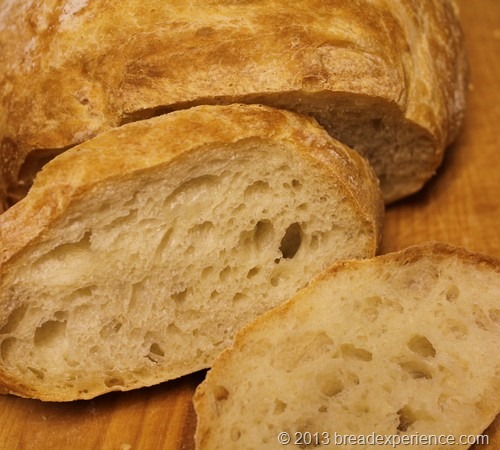
Then slice and enjoy! Look at those holes. I’m very pleased with this version. It tastes so good! It’s great warm with butter. You can also make crostini with it.
Happy Baking!
Cathy

You make it look so easy~ looks like a very forgiving dough that allows you to have a do-over! I do agree, allowing your dough to ferment in the fridge does give it a lot of flavor…
Gotten both sour dough and package yeast breads to the point where they are edible, and do not survive a small crowd. Here is my total puzzlement.
something that happens, every time, no matter how good or bad, what source of yeast is that the dough raises in the bowl, raises the first time after kneading, but…
…NEVER after the “punch down” of the first rising. I am not getting that second rising, even after 18 hours. AND I never get the expected rise in the oven.
My bread tastes better than my saintly mother’s, but hers always rose to fill the stone or pan and overflowed a little.
I was having this same problem until I started adding vital wheat gluten to the recipe. About 1T per cup of flour. I never had to use it when I lived in So. Calif. but in Florida, Mexico and now No. Calif. I just get a brick without it. I would suggest you give it a try.
Hi Terry,
Thanks for visiting. Working with the Artisan Bread in Five Minutes dough is different from regular doughs. I’ve had to put several back in the refrigerator in order to get them to work right.
It’s also possible to overproof the dough on the first rise. I’ve done that as well. I find that when that happens, I don’t get a good rise after it’s been shaped. That’s what happened with this particular bread so rather than baking a flat loaf, I put the dough back in the refrigerator until the next day when the dough and I were less stressed.
I think Terry’s problem is the “punch down” as well as the “kneading”. Artisan bread relies on the delicate air pockets that develop in the dough to create texture, and should be handled gently. The technique designed to shape the ball is specifically to avoid over handling. Try again and good luck!
Hello! I really like your blog!!
I am new to bread-making but this page encourages me to do so. I really want to have a try!
However, I am not living in the U.S. so I wonder if i can just use any yeast for the bread or I have to use the granulated yeast?? And may I use whole grain flour or any flour, instead of the unbleached all-purposed flour for the bread? Will the texture be different?
This bread looks soooooo tasty and easy to make and I really want to have a good start.
Thank you very much!
Hi Jessica, yes you can use any yeast for this recipe. You can use whole grain flour, but the texture will be different. It won’t rise as much unless you use at least some all-purpose flour (if it’s available) and/or some vital wheat gluten.
You might want to try a different recipe that utilizes the Artisan Bread in Five method but includes whole wheat and all-purpose flour. It can be made in a loaf pan or freeform. Here is the link http://breadmakingblog.breadexperience.com/2010/01/hearty-whole-wheat-sandwich-loaf.html
Hello Cathy,
Thanks a lot for your reply!
I have tried your recipe and it worked! It was my first bread and it tasted sooo good 🙂 that I can’t believe it. Neither did my husband believe that I had made it successfully.
thanks again!
Jessica
That’s great Jessica! So glad you enjoyed it. Happy Baking!
thank you SO much for this amazing recipe! I bake all of our bread, and have been searching for a loaf with a perfectly chewy crust & flavorful, springy crumb. Bravo — this is my new go-to bread!!!
Hi Sarah, I’m so glad you like the bread. Good for you for baking all of your bread.
Happy Baking!
Cathy
Hi Cathy,
Just wanted to thank you for posting this recipe. I have been baking bread for a few years now but am by no means an expoertu and usually “cheat” and use a bread machine. I have been in search of the perfect baguette recipe for a while now. I decided to try this recipe for Thanksgiving since I didn’t have to make the dough the day of (made it Tuesday night). I am always nervous about trying new recipes without testing them first, this time I was not disappointed! Everyone raved about it and both loaves were eaten before the second course! I have already baked a second batch and just finished making more dough for a luncheon sunday at church. This is definitely going to be my “go to” recipe. Thanks again!
Mekendry
Thanks Mekendry!
I’m glad you enjoyed this bread. I like this method because it’s an easy and convenient way of making crusty loaves.
Happy Baking!
Cathy
Cathy,
Thanks so much for posting the step-by-step instructions, and even your “mini-fail.” So helpful! I just baked my first loaf and it smells and looks delicious, but the bottom is under-done. The water pan was empty after baking; could that be it?
Alison
Hello Alison,
Thanks for visiting the Bread Experience. Did you bake the loaf directly on a baking stone? If you used parchment paper, which I usually do, then you probably need to remove it partway during the baking cycle to make sure the loaf gets baked through. Also, the loaf should sound hollow on the bottom when it’s done.
Happy Baking!
Cathy
Maybe I missed it, but what temperature does the oven preheat to?
Hello, It’s listed under Baking the Boule. About 20 – 30 minutes before you plan to bake the bread, preheat the oven (and the baking stone) to 450 degrees.
Happy Baking!
Cathy
Have you tried this with freshly milled flour?
I have not tried the artisan free-form loaf with freshly milled flour, but I have made the healthy bread in five master loaf with freshly milled whole wheat. http://breadmakingblog.breadexperience.com/2010/01/hearty-whole-wheat-sandwich-loaf.html
Hi, thanks for the recipe. I’ve made this twice, once using 3/4 ap flour and 1/4 white whole wheat and once using all ap flour. Both times, I ended up with a much denser loaf than the one pictured. It was delicious, but not the texture I was looking for. What am I doing wrong?
Hi Sarah,
A couple of things come to mind as possible issues. 1) Too much flour was incorporated and it changed the hydration level of the dough. and/or, 2) the dough was handled too much causing it to degas (deflate).
Keep in mind that I had to make this bread several times before I got the beautiful holes pictured in the photo. Good bread is worth the effort.
Happy Baking!
Cathy
Hi! Thanks for the cool recipe. My dough came out exactly like your blob except all my relatives were waiting to have home made artisan bread that I had been bragging about all day long with dinner. The pressure was on.
I threw caution to the wind and threw it in anyway and it somehow magicly transformed into a full beautiful loaf in the oven!
Wonderful! It sounds like you came up with a winner.
Cathy
I notice you use all purpose flour in your recipe would it be ok to use strong white flour
Tom
Hello Tom,
10 percent protein is the amount recommended for this bread, but you can use strong white flour. It will give the bread more chew. You might need to decrease the amount of flour used by a couple of tablespoons.
Happy Baking!
Cathy
Hi Cathy – This is the first time I’ve ran across your blog, but your bread looks great! I’m excited to try it out.
My question is regarding the water for steam during the baking process. I’ve tried this once with a bread before, and the crust didn’t really get crunchy and the bread was too moist (almost gooey). I don’t know if that was because the recipe I followed didn’t call for enough flour (the dough was rather gooey to the point I had to keep it in a bread pan to keep it in tack – definitely not what I was used to working with dough-wise), or if I had added too much water in the steam pan (I had probably a 9X13 inch pan in there and filled the water to the point where it covered the bottom of the pan). It cooked for over an hour (I think the temp it called for was around 350, which could have been too cool in the long run).
I guess my question is approximately how much water should you be adding to your steam pan so that it adds enough moisture to your bread without getting soggy.
Thanks so much, and I look forward to reading more on your blog!
Hi Jennifer, thanks for visiting. I’m not sure what type of bread you tried before, but it sounds like the temperature of the oven was too low. Utilizing steam helps to create a crusty crumb. Freeform artisan loaves are best baked on a preheated baking stone at 450 degrees F. You can turn it down to 425 degrees once you put the bread in the oven and pour the water in the steam pan.
As far as the water for the steam, you only need a cup of hot water in a steam pan underneath the baking stone. Or, what I’ve been doing recently is using 3 ice cubes in a cast iron skillet (on the top rack of the oven) with the baking stone on the lowest rack in the oven. I use a small old cast iron skillet that I don’t use for anything else.
Also, keep in mind that a lot of artisan breads have wet doughs. They shouldn’t be gooey (depending on the hydration level) but they might be a bit sticky. A wet dough is necessary to achieve the holes/texture on the inside. The longer fermentation time and folding the dough helps develop the gluten structure. Hope this helps.
Happy Baking,
Cathy
So I want to make the loaf of bread in the picture in the worst way. I have to say up front that while I love cooking, I don’t bake much so my problem may well be inexperience.
I’m on my 3rd try now and the first two had a nice crust but came out way to dense (not nice big air holes like the picture) and even seemed a little doughy when eaten.
I’m curious about your description of the dough being “wet and loose” after it’s mixed. I’ve measured my flour carefully being sure not to pack the measuring cups too tightly, and I’ve used the full cup and a quarter of water. All 3 times my dough has not been wet and loose at that point. I even liberally wet my hands 2 or 3 times and mixed like that, but I still wouldn’t call it wet and loose and I’m afraid to put anymore water in it.
Should I cut out the 1/4 cup of flour as I’ve been tempted to do, or should I not be afraid to just keep adding water until it’s the proper consistency?
Thanks,
Marty
Hello Marty!
Did you ferment your dough in the refrigerator overnight? Also, is it cold and dry where you are? That will affect the hydration. I would say go ahead and add more water and only mix it long enough to incorporate the ingredients. When you shape the dough the next day, handle it carefully so you don’t degas it too much. It might not rise that much during proofing, but it should have good oven spring.
Hope this helps.
Cathy
Wow. Thanks for the fast reply Cathy!
I have been fermenting the dough in the refrigerator overnight. As a matter of fact I just put my batch for tomorrow in. I will go ahead and try it with a cup and a half of water and see what happens.
The other question I had since you mentioned degasing the dough when I handle it the next day. The dough sticks to the side of my mixing bowl, so I’m not sure how to get it out without loosing some of that airy goodness. Do you try and kinda dump it out into your hand and then stretch what was the bottom of the dough, or do you pull it out and stretch the top of the dough?
Thanks again for the recipe and the extra help!
Marty
I usually just ease the dough out as gently as I can onto a lightly floured surface. Then I bring the underside (the side that’s on the flour) into a ball. Hope that makes sense. Let me know how it turns out.
Hi Cathy. I’m hoping you can me, and perhaps many of us, “Can I use 100% Einkorn wheat for thses breads? I no longer bake with modern day wheat.
Karen
Hi Karen,
You could make this boule with 100% Einkorn but it wouldn’t be as light. You could sift some of the bran out. or you might enjoy a different Einkorn loaf. http://breadmakingblog.breadexperience.com/2012/04/einkorn-bread-made-with-overnight.html. It’s made with an overnight sponge. The photos aren’t great, but it tastes good.
Absolutely love your recipe, looks and taste great. I have given 4different friends a plastic bucket with all ingredients except water, and shown them how to make your bread. They are all believers. The bread always taste great, still working on that crusty crust. I think storing it after in a ziplock bag isn’t best, wish I had the paper type bakeries use. Course it doesn’t last too long
Sandi, I’m so glad you like this bread. I agree, in order to keep the crust crusty, it is better to use a paper bag. I sometimes use a grocery bag. Some home bakers just place their breads sliced-side down on a bread board.
Hi I wanted to try out this recipe as it looks great, .but im having trouble shaping the dough. The dough was left lvernight and when I was ready to use it, it wasvery liquidy and hard to shape into a boule. And when I tried it seemed almost completely degassed and I seem to be using too much flour just for it to maintain shape. Anyideas?
Hello, if you are baking in a hot kitchen, you might need to reduce the hydration of the dough. I reduced the amount of water to use from 1 to 1 /2 cups of water, but you may need to reduce the water further.
Did you bake the loaf after shaping it and adding more flour? How did it turn out?
No I didnt bake it as ihad added too much flohr and became very dry may I ask what was the texture of your dough before shaping and how you shpe it into a boule as Im finding it quite difficult.
The dough will be wet so you’ll need to dust it with flour before shaping.
The authors of the BreadIn5 method have some videos on shaping the boule. You might find them helpful http://youtube.com/BreadIn5. Look for the one on “How to Make Artisan Bread in 5 Minutes a Day”.
A little bit confused. You mentioned that the dough should be refrigerated because it’s easier to form a loaf from refrigerated dough but you then said you take the dough out of the fridge and allow it to get to room temperature. Do you form the loaf after it gets to room temperature or as soon as it comes out of the fridge?
Sorry for the confusion. Looks like I need to edit my edits.
With this method, you form the loaf after removing the dough from the refrigerator. Then you let the loaf rest (proof) for about 40 minutes (or more if necessary) before baking. Hope this helps.
I would like to bake about 8 boule’s for a Farmers Market sale. How would you recommend when I bake the loaves and/or how should I store or cover them? My alternative can only be to get up at 4:00 am to get all 8 loaves in and out of the oven. Plus I can only use a cookie tray or cake pans to bake them in????
If you bake them on a baking sheet instead of a baking stone, they will not have the same crust. They will still be good, but they will not look the same as what is shown in this post because you won’t have the benefit of the high heat from the baking stone.
Since you are only making 8 loaves, I recommend that you bake them on that day of the market.That way they are fresh. However, you could shape the loaves and place them in refrigerator overnight for the final rise. Just make sure the boules are shaped tightly and cover them with plastic wrap. Then bake them the next day.
Since the loaves won’t have crusty crusts, you can probably just store them in plastic bread bags.
Happy Baking!
Cathy
When you store your dough for up to 14 days… After so many days do you cover with plastic wrap?
After about 4 days my dough had a very dry skin and what appeared to be mold forming on the top of it. Is it ok to simply take the top of it off and use the dough underneath?
Hello, if you mean should you cover with plastic wrap instead of just the container lid, then yes I would, especially if it’s getting a dry skin. I’ve never kept it for 14 days, but I have left it in the refrigerator for 4 or 5 days without any problems.
If I’m doing the math correctly I get your hydration at about 89%. The master 5 minute recipe is around 75%. This seems like a big difference. Is your dough really that wet? Thanks
Hello Marty, thanks for checking the percentages. The grams for the water should be 237g – 281.25g for 1 – 1 1/4 cups which would make the hydration 75%- 89%. I’ll update the water amount to reflect this. Depending on the type of flour used, it could absorb more or less water. This was somewhat of a wet dough, but I found it easier to work with than the original.
Thank you for the reply about hydration. I am going to give this a try. This my first time seeing your site and it looks pretty interesting.
I see another Marty in the replies so I’ll go to Martyd
Martyd, Thanks for the feedback. Please let me know how it goes.
I followed the recipie EXACTLY snd the dough is so soupy. It bakes nicely but it’s a pile of wet goop. This is afteraving in the fridge for anywhere from 1 day to 10 days. What am I doing wrong? Do I need more flour? The first time it turned out good, but since I wanted to have lots of dough on hand (we love bread!) I followed the recipie from your link of the original which makes 5 1.5lb loaves. What am I doing wrong?
Hi Jen,
Are you saying that the adapted recipe on my site worked fine, but the original recipe on the Artisan Bread in Five web site (which makes more loaves) is the one you are having trouble with? If that is the case, I would suggest reducing the amount of yeast used and the amount of water. Add the water in gradually until it makes a workable dough. The dough should be wet, but not soupy. Since the dough will be fermenting in the refrigerator, you won’t need as much yeast. Also, you might want to reduce the time in the refrigerator. I think the fresher dough works better, but you may just have to play around to find the optimum time for you. Hope this helps.
Cathy
Can this bread, and the artisan recipes, be made with fresh milled soft wheat as the “all purpose” flour?
Since I started grinding my own wheat berries, I have stopped buying “store bought” flours.
Thanks!
Hi Penny, you can certainly use freshly-milled wheat, but for this loaf and other artisan loaves, you should use hard red wheat (winter or spring) and sift out some of the bran to make what’s called high-extraction flour – meaning it’s been sifted to extract some of the bran. Soft wheat works well for biscuits and other quick breads, but not breads that require more protein content to form the gluten structure. You can use whole wheat in breads without sifting it, but the loaves will be denser.
Thanks! do I need to add vital gluten?
I probably wouldn’t use vital wheat gluten, but you might want to try it with and without to see how the bread turns out. Then determine which one you like better.
I want to make the bread you describe above, although it does not sound that easy. Firstly, do I need a pizza stone, I do not have one, will it work just on an oven tray?
Hi Vicky, the bread is actually pretty easy. Most of the time the dough is fermenting in the refrigerator. It will work if you bake it on a baking sheet; it just won’t have the same type of crispy crust on the outside.
I forgot to ask what is a pizza peel please.
A pizza peel is a wooden paddle with a long handle that is used to transfer pizza or bread to the preheated baking stone in the oven. If you are using a baking sheet, you won’t need a pizza peel. If you have a rimless baking sheet, that will work better, but a rimmed baking sheet will be okay. After removing the dough from the refrigerator, sprinkle the baking sheet with cornmeal or line it with parchment paper; shape the dough into a tight round ball and let the boule rise on the baking sheet until it’s ready to bake. Score the loaf, then slide the baking sheet with the loaf on it into the preheated oven.
I just wanted to say how much I enjoy reading your recipes, and that’s because they really are very humorous. Normally I skip through the writing and cut to the chase reading only what I need to.
I have another recipe very similar to yours for what you call Boule bread but it uses twice as much yeast. Having said that everyone agrees that it makes the nicest crusty rolls they have ever tasted, and as you know, that’s because of the steam. Mine also cooks at 220c but today I am going to run with yours and see if there is a difference. I also have a no yeast sourdough starter fed and resting so that tomorrow I can make my first true sourdough loaf, which my mother loves. Began the starter about a week ago I think, and it’s been in the fridge after the initial 3 days, so I am exited, and as I am always saying to people, at my age not much exites me
Thank you and have a great day
Annie from South Australia
Hi Annie, so glad you enjoy my blog. Let me know how you like the boule. I’ve found that when you let dough ferment in the refrigerator, you don’t need as much yeast. Good luck with your first true sourdough loaf. That is exciting! It’s the little things you know. Do let me know how it goes.
Happy Baking!
Cathy
Hi Cathy
Got up this morning to take the final two steps in the sourdough and when I started reading the rest of the recipe, realised I had made a mistake. I added all the ingredients ( it was late last night and I was a little tired ) but I am still going to finish it and I’ll let you know how it turns out. My thoughts are that it won’t rise properly in the last two stages and if that’s the case I’ll start over. Se La Vie..
Although I know what you mean about refrigerating dough, my recipe is identical in that you leave the dough for two hours to rise ( because of the extra yeast mine approximately quadruples in size before it starts to collapse) and then refrigerate it preferably overnight before taking out what you need to make rolls or bread. now that your dough has been refrigerated overnight I will make rolls later today & keep you posted.
Please don’t think you have to answer my comments as I am sure you’re really busy as I am, but thank you for taking the time????
Have a great day
Annie
Hi Cathy
Well as I expected the dough hardly rose but I baked it anyway, and when the lead weight was cooked it really did look great, but no one in.my household has ventured to try it yet, but my mother will this morning. She prefers sour dough toasted anyway.
The rolls were really nice and tasted a bit different from the ones I normally make, but although I cooked them in exactly the same way as I do my others, they came out of the oven really crusty, but did not stay that way once cool, However, they had a really nice chewy texture and good flavour. A definite option for me as both my mother and I really enjoyed them as a change, although my husband prefers my others. Men!!
So I shall bake for my mother as a change, and they really will go well with my home made ham and bacon
As for me. I really don’t eat a lot of bread, cakes etc, but bake them for my husband, mother, family and friends all of whom love them.
Once again, have a great day and I shall visit your spot regularly now.
Would you like my roll recipe?
Annie
Hi Annie, thank you for sharing your experience with this bread. If you would like to share your roll recipe, that would be wonderful! You can submit it here https://www.breadexperience.com/submit-your-favorite-bread-recipe/.
Thank you,
Cathy
Hi Cathy,
So I am planning to try this as my first ever attempt at making break without using a machibe.
My question is about measurements. Are your cup sizes US? If so do you know if UK are the same?
Can’t wait to start experimenting 🙂
Steve.
Hi Steve,
I’m delighted you want to try this loaf. It’s a good one to start with. Yes, my measuring cup sizes are US. From what I understand, there is a slight difference between US and UK measuring cups: 1 cup US= 240mls; 1 cup UK= 250mls; US 1/2 cup= 120mls; UK 1/2 cup= 125mls; 1/4 cup (60mls) is the same. According to this post, http://www.nigella.com/kitchen-queries/view/US-Cup-to-UK-Cup-Measures/3316, you can remove 2 teaspoons from each cup to get close to the US measurement.
For this bread, you could keep the flour amount the same, but just increase the hydration – i.e. add a little more water. Once you’re more comfortable making bread, the best way to ensure a consistent measurement is to use the weight measurements. Hope this helps.
Happy Baking!
Cathy
Hi. I am about to make this loaf, but your original recipe says ‘makes one 1/2 lb. loaf.” In your description, you divide the dough in 2(I think). Does that effect baking time? Thanks in advance. (I didn’t read all the posts…if this has been covered, I apologize.)
Neal
Hi Neal, it should be one 1 1/2-pound loaf. The line was wrapping. I fixed it. The baking time should be about the same. The loaf will be golden brown when done and sound hollow when thumped on the bottom.
Thanks for getting back to me…will give it a go. 🙂
Hi Cathy I am new to your website and saw this recipe and have wanted to try an Artisan bread; but they all looked really complicated. I would say I am not an expert at bread making, but I love to bake bread and stick to the recipes that I know that are tried and true. I bake all our bread as we live in Jamaica WI and I do not like their hard dough bread and the manufactured sliced is not for us. I do have to adjust my recipes for the flour here though. So I have a couple of questions 1. I don’t’ have a pizza peel, what else can I use? 2. I don’t have a baking stone, but could I use a cast iron pan instead? I really want to give this a go. Thanks for a great easy to follow method.
Hi Sharon,
Thank you for visiting my site. You can use the back of a baking sheet instead of a pizza peel or the front if your baking sheet doesn’t have rims all around. A cast iron skillet would work fine for this bread. Just preheat it when you preheat the oven. If you have a cast iron or ceramic dutch oven, you could use that as well. You’ll also need a steam pan to create steam during the beginning of the bake cycle. I use an old iron skillet that I preheat with the baking stone or in your case the iron skillet, then I throw a few ice cubes in the pan right after I place the loaf on the preheated stone. You can also use a deep baking pan and place hot water in it after you’ve placed the loaf in the oven. You’ll probably want to spritz the loaves during the first few minutes as well. Let me know how it goes.
Happy Baking!
Cathy
thanks so much, I will let you know how it turns out and if it is successful, you will get a picture. I am excited to try.
Sharon
I have tried this recipe twice to exacting standards (in my opinion). Each time the dough was to wet and batter-like to manipulate after retrieving from the refrigerator. I used King Arthur’s all-purpose flour. The water was 92 degrees the second time (I didn’t take the water temperature the first time, but I know it was slightly cooler). If there is any guidance you could provide I would be exceedingly grateful.
Hi Luis,
When you say “batter-like”, do you mean it’s pourable like pancake batter or just really wet? It will be wet, but shouldn’t be like pancake batter. Are you letting the dough rest on the counter for 2 hours after mixing and before placing it in the refrigerator overnight? If it’s not developing, you might want to let it rest a little longer on the counter.
Although this method doesn’t require any kneading, you could give it a “stretch and fold” after the 1st hour by stretching the dough from each end (top, bottom, left and right) and folding it back onto itself after each stretch. This helps to strengthen the gluten. You can do the fold on the counter sprinkled with a little flour or in the bowl. Once you’ve folded the dough, place it back in the bowl and let it rest for another hour (or 2 if necessary) before placing in the refrigerator.
KAF AP flour so it should be fine in this recipe.
If the dough is still to wet (for you), you might try holding back some of the water when mixing and add it in gradually, if the dough appears to dry. You could try reducing it by 10% to begin with and see how it does.
Happy Baking! Let me know how it goes!
Cathy
I just started baking bread because my wife got a stand mixer. Tried several recipes that tasted great but were too light and airy. Really like a chewy crust and dense “crumb” as I understand it is called. Tried your five-minute recipe and it was amazing. Perfect chew!!
Now I can start tinkering with flavor combinations. Thanks a million. Ironic that I don’t need the mixer to make it.
Hi JC, thanks for sharing your experience with the Artisan free-form loaf. I find that for breads that require a longer fermentation to develop the dough, a stand mixer isn’t really necessary. But it sure is nice for heavier doughs and enriched doughs.
Happy Baking!
Cathy
I’m quite curious to try this recipe, but I have a few things holding me back. 1-I don’t have any fancy pans, peels whatever, only stainless-steel and glass loaf pans, and 9×13″ pans. How do I use them? 2-I prefer to use whole grains, such as spelt and rye. What changes should I incorporate? 4-How much gluten can/should I add to those flours and what’ll happen if I don’t? Will longer rising times do the trick? 4-I like to make sweeter breads, too, but I’ve heard that sugar affects the rising. How much can I use? Thanks for your patience in answering my looong list of questions!
Hello Rosette,
Based on the variables you’ve mentioned, let me set the expectation.
1) You can make this without fancy pans; however, you won’t get the crusty outside and the nice rise. However, it should still taste good. If you have a baking sheet, bake the loaf freeform and use some sort of steam pan to generate steam. I use an old iron skillet. If you have a shallow stainless-steel baking pan that could work as well.
2) You can use spelt, but I wouldn’t recommend rye for the first attempt. Keep in mind, that whole grains produce a much denser loaf because they include the healthy bran and germ. You may need to reduce or add water with spelt so you might want to hold back some of the water and see how the dough responds.
3) Since you’re using spelt because of it’s nutritional properties, I wouldn’t recommend adding more gluten. That kind of defeats the purpose. I would give the dough a longer rise for the bulk ferment and the final rise. The time will depend on the temperature in your kitchen.
4) This isn’t a sweet bread so I don’t recommend adding any sweetener, but if you want to add some honey you could try a teaspoon or two and see how it does. But I would recommend trying it without any sweetener first.
5) If you are going to give this a longer ferment, reduce the amount of yeast used. You might try 1/2 teaspoon to begin with. Otherwise, it could overproof.
6)Just want to reiterate this will be a dense loaf due to the whole grain spelt, but it sounds like a great experiment. Have fun!
Happy Baking!
Cathy
Talk about a fast reply! Thanks! It was yum! I used 100% whole wheat and cool water to extend the rising time. However, it was way too dry, like a regular (that you have to knead) batter so I added more water, and ended up kneading it quite a bit. Then, in less than 2 hours, it was fully risen, despite the air conditioning running in my house! I put it in the fridge, and a while later, after it rose again, took it out to gently shape. I used regular baking pans, which I didn’t preheat because I didn’t want free-form loaves (we like standard slices, not wedges). The dough didn’t rise anymore during that time, and hardly during the baking. Why did it rise so much the first time and not rise at the end? I handled it very gently. Other than that, it was great, not heavy, just dense like a real whole grain loaf, and a bit sticky in the middle, which a few minutes more in the oven would have taken care of. I used baking paper in the loaf pans and didn’t remove it during the baking, just when I took it out to cool on wire racks and it was great, though not “crusty.”
I know this is an old blog and I might not get a response but thought I would try. This turned out amazing! I made two loaves out of it (grapefruit size). Wondering if I made one large loaf would I need to bake double the length? Or an additional 15 mins to make up for the extra volume? Thanks for your help.
Hi Jen, we’re still here! I’m glad you enjoyed your loaves! You may need to increase the baking time for a larger loaf. Try 10-15 minutes, but keep a close eye on it towards the end of the bake cycle to make sure it doesn’t get burned.
Happy Baking!
Cathy
Thank you so much! This website is just amazing!
I just found this blog and have already tried one of the recipes. Easy and yummy. My question is, instead of pouring water into a pan to create steam, can you use a cloche? If so would you take the top off during the last 5 – 10 minutes to brown the crust? Thank you for a great blog.
Hi Cindy, thank you for visiting my blog. So glad you like it. You can absolutely use a cloche to bake this bread. Just take the lid off the last 10-15 minutes, or sooner, if the bread has opened up enough.
Happy Baking!
Cathy