When you hear the term “artisan bread,” do you automatically think preferment, overnight sponge or sourdough (aka wild yeast)?
Usually when I make an artisan loaf, I like to add some sort of preferment or at least let the dough rest in the refrigerator overnight to help develop the flavor.
However, this past Saturday, I decided to answer the question: Can you make a whole wheat artisan loaf in one day and will it taste good?
I started the effort late morning and chose a multi-grain bread which utilizes the straight dough method. Straight dough means it doesn’t include any preferment such as an overnight poolish or a sponge or sourdough. It’s just a straight dough.
This bread is based on the method for the 75% Whole Wheat Saturday Bread from Flour, Water, Salt & Yeast by Ken Forkish. The total amount of whole grain flour used (375 grams) is seventy-five percent of the total flour used (500 grams). I used a combination of hard red spring wheat, Durum wheat and rye flour for the whole grain portion.
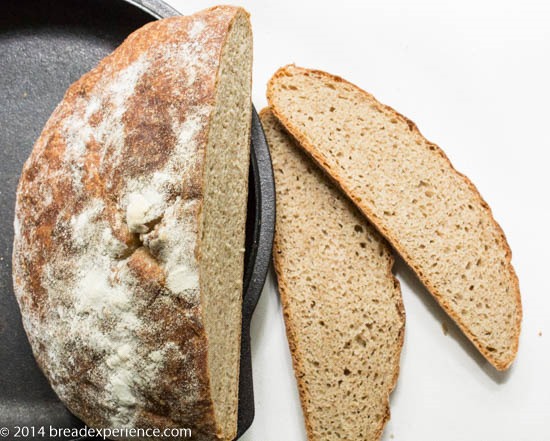
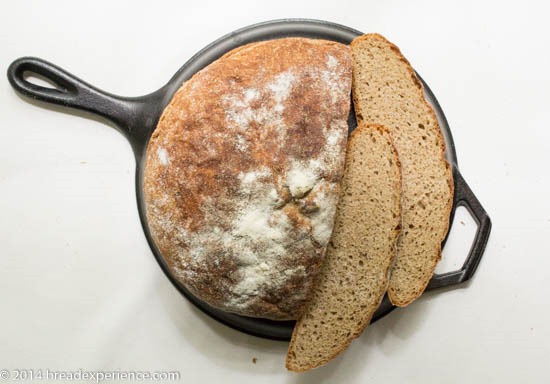
I’m happy to report that you can make a whole wheat artisan loaf in one day and it does taste pretty good, especially with peanut butter, which is my litmus test to see if I like a bread. It also tastes great with butter or cheese. I haven’t tried it other ways because I ran out of it.
75% Whole Grain Saturday Bread
Adapted from: Flour Water Salt Yeast: The Fundamentals of Artisan Bread and Pizza by Ken Forkish
Makes: One loaf (about 1 1/2 pounds)
Ingredients:
- 125 grams (~ 7/8 cup) unbleached all-purpose flour
- 35 grams (scant 1/3 cup) coarse rye flour
- 200 grams (scant 1 1/3 cup) whole wheat flour
- 140 grams (scant 7/8 cup) Durum wheat flour
- 360 grams (~ 1 3/4 cup) warm water (90 degrees F. to 95 degrees F.)
- 10 grams coarse sea salt
- 1/2 teaspoon instant dried yeast
1)Mix the flour and water
Combine the all-purpose, whole wheat, Durum and rye flours and water and mix by hand using a wooden spoon or a Danish dough whisk until thoroughly incorporated.
2) Autolyse (rest the dough)
Cover the dough and let it rest for 20 to 30 minutes.
3) Mix in the Salt and Yeast
After the dough has rested, sprinkle the salt and yeast over the top of the dough. Mix by hand until the salt and yeast are fully incorporated into the dough. Using wet hands for this part makes it really easy. Continue to wet your hands as necessary throughout the mixing process.
4) Fold and Turn the Dough
Instead of kneading the dough, Mr. Forkish uses the pincer method. I love the name of his method, but I’m more proficient with the fold-and-turn method from Chad Robertson’s Tartine Bread so that’s the method I usually use for mixing dough. With the fold-and-turn method, you basically do a series of turns and folds in the bowl to develop the gluten structure.
Refer to my Tartine Bread post for a photo tutorial on performing the fold-and-turn method.
5) Bulk Fermentation
Cover the dough and let it rise. Do two folds during the first 1 1/2 after mixing. The first fold should be done about 10 minutes after mixing and the 2nd fold should be done within the next hour. When you see the dough spread out in the bowl, you’ll know it’s ready to be folded
You can fold the dough a little later if necessary, but be sure to let the dough rest during the last hour of rising. The dough should be triple it’s size in volume after about 5 hours after mixing. I started this process at Noon and the dough was ready to be shaped at 5 pm.
6) Shape the Loaf
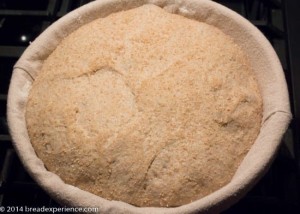
I only made one loaf so I didn’t need to divide the dough. I just shaped it into a ball and placed it in a well-floured banneton basket. A mixture of all-purpose and rice flour works really well for this purpose.
7) Final Proof
Lightly flour the top of the dough. Cover the basket with plastic wrap or a kitchen towel. Let the loaf proof for an hour to an hour and a half. If your kitchen is warm, it will only take about an hour.
Use the finger dent test to see when the loaf is fully proofed and ready to be baked. Watch a demonstration by Ken Forkish of the finger-proof test.
8) Prepare the Oven for Baking
45 minutes to an hour before baking the loaf, preheat the oven to 500 degrees F. Remove the middle rack from the oven and place a Dutch oven on the bottom rack. I used the Dutch oven combo baker for this bread but you can use any Dutch oven.
9) Transfer the Loaf to the Dutch Oven
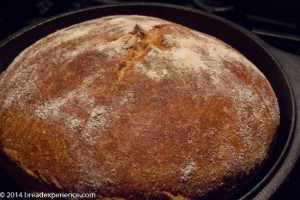
When the loaf is fully proofed and the oven is sufficiently preheated, carefully remove the Dutch oven using heavy oven mitts. Be careful not to burn your arms or hands on the sides of the oven or the pot. Gently invert the loaf from the proofing basket onto the bottom of the Dutch oven combo baker or into the large part of a regular Dutch oven. I sprinkled the bottom of the combo baker with cornmeal before inverting the loaf onto it.
I didn’t score this loaf, but you can if you like.
10) Bake and Enjoy!
Place the Dutch Oven on the bottom rack of the oven and cover it with the lid. Turn the oven down to 450 degrees F. Bake the loaf for 20 minutes with the lid on.
Remove the lid and bake for an additional 20 minutes or until the loaf is a medium dark brown. Just be careful not to burn the bottom of the loaf.
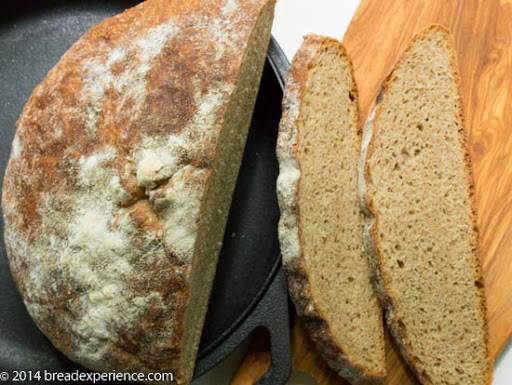
Remove the loaf from the Dutch oven to a wire rack to cool completely before slicing and serving.
I’m sending these loaves to be Yeastspotted and to Bake Your Own Bread.
Happy Baking!
Cathy
Anonymous says
Thanks for the post. Having left my Ken F book at home, I was looking for K’s 75% whole wheat recipe on line and yours popped up first. I’ve been making this with “things that I can find around here” … which is challenging. I’ve made this twice so far. Whole wheat and white flour … none of the other exotics available here. Placed in a thin, enameled pot ant placed into an ancient gas oven that runs at a temperature of ???. Pretty forgiving recipe all in all. No brotform. Oven is so small and pot is smallish that I place the risen dough into a cold pot rather than preheating pot … otherwise I would run a high risk of burning myself … and forget about a parchment paper sling. Parchment paper is unavailable here. I do get a decent loaf with a large crumb … which seems to be missing in the pictures you present … plus Ken always wants you to bake it a bit longer to darken up.
Cathy W. says
Thanks for sharing your experiences making this loaf without all of the comforts of home. That’s the great thing about these breads, they are customizable to each baker’s preferences. I wasn’t aiming for a large crumb on this one because I wanted to eat it with peanut butter. It worked really well, but it sounds like your version works really well for you too. Happy Baking!