Home > Bread Making > Mixing Bread Dough
Home bakers and most bakeries use the conventional process for making dough into bread. With this process, the ingredients are mixed by either the sponge-and-dough method or the straight dough method.

With the sponge-and-dough method, the ingredients are combined in two stages. The first stage mixes all the yeast and about two-thirds of the flour and water or milk. This mixture is called a sponge. The sponge should ferment (rise) at about 85°F for up to 16 hours. Then, the rest of the ingredients are added and the mixture ferments again for a short time.
In the straight dough method, all of the ingredients are combined at once and fermented for about 3 hours at 85°F.
Steps involved in the straight dough method:
Step 1: Mixing the Dough
Bread dough can be mixed by hand or in a machine. You can make it the conventional way, in a bread machine, using your mixer or your food processor. Whatever method you choose, the experience is still rewarding.
Here we focus on kneading the conventional way (by hand).
Step 2: Kneading the dough by hand
When kneading, add just enough flour to the dough and your hands to keep the dough from sticking, then:
- Pat dough into a ball, which may feel sticky.
- Flatten dough and fold it toward you.
- Using the heels of your hands, push the dough away with a rolling motion.
- Rotate dough a quarter turn and repeat the ‘fold, push and turn’ steps.
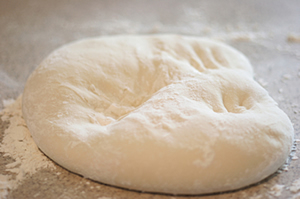
- Keep kneading dough until it becomes smooth and elastic.
- Use a little more flour if dough becomes too sticky, always working the flour into the ball of dough.
- The process is complete in about 4 to 10 minutes, or when the dough is smooth, satiny and elastic, and when you poke it, the dough springs back.
Now that you’ve given the dough a workout, it’s time to let it rest. Learn more about kneading bread dough.
Step 3: First rise
To create maximum resting conditions for the dough:
- Cover the top of the mixing bowl loosely with a damp, clean cloth or plastic wrap sprayed with nonstick cooking spray.
- Set the dough in a warm, draft-free place.
- With Active Dry Yeast keep dough covered until it doubles in size, anywhere from1-2 hours.
With RapidRise Yeast, let the dough rest for 10 minutes. It is not required to double in size.
Step 4: Shaping the dough and the final rise
The type of bread you are making may vary the shaping process. For regular bread loaves:
- Lightly flour the work surface; shape the dough into a smooth ball.
- Use a rolling pin to form a rectangle.
- Beginning at the short end of the rectangle, roll the dough tightly to make a loaf shape.
- Pinch the seam and ends of the rolled dough with your fingers to seal it closed.
- Place dough, seam side down, in greased baking pan.
- If you are using a recipe that requires a distinctive shape, follow these same basic instructions but shape accordingly.
Step 5: Testing
To determine if your bread dough passes the ‘doubled in size’ stage:
- Press the tips of two fingers lightly and quickly about 1/2 inch into the dough.
- If the impression you made stays, the dough is doubled.
Step 6: Baking
- Follow precisely the recipe’s directions for preheating and baking.
- Use an oven thermometer for accuracy.
- Place the baking pans several inches apart on the center oven rack.
- Oven temperatures may vary, so check your loaves about 10 minutes before recipe says they should be done.
- If loaves are browning excessively, remove them from the oven and make an aluminum foil ‘tent’ to shield them, and then return them to the oven.
- Internal temperature should be between 190°F-205°F; baked loaves should be evenly browned.
- After turning bread out of the pan, tap the bottom or side of the loaf. If it sounds hollow, the bread is done.
Sources:
Copyright © 2007 – ACH Food Companies, Inc. All rights reserved.
Clayton, Bernard. Bernard Clayton’s New Complete Book of Breads. 2006 Simon & Schuster.
Hensperger, Beth. Bread Made Easy – A Baker’s First Bread Book. Ten Speed Press 2000.

Leave a Reply