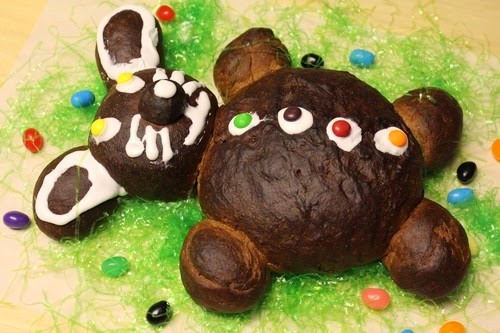
This Chocolate Easter Bunny Bear Bread is my take on the chocolate bunny typically found in Easter baskets. I seem to be better at shaping bears than bunnies so this one looks more like a bear than a bunny.
I have fond memories of Easter with my family. Everyone would get dressed up, even my brother, and after church, we would have our photos taken. I didn’t particularly like getting my photo made. I still don’t, but I did enjoy wearing the matching Easter outfits my mom made for my sisters and I. Sometimes, we even had hats and purses to go with the dresses. That was a lifetime ago when little girls still wore dresses most of the time, even to school.
On Easter Sunday, we sometimes got a chocolate bunny in our basket along with jelly beans and other goodies. It was extra special when you got a chocolate bunny. I continued this tradition with my sons. They always enjoyed biting the bunny’s ear off first. I know, but that’s what little boys do.
This year, I decided to create a new tradition by making Chocolate Easter Bunny Bread. I seem to be better at shaping bears than bunnies so this one looks more like a bear than a bunny.
I’m calling it a Chocolate Bunny Bear Bread because I can. From some angles, he sort of looks like Piglet from Winnie the Pooh and Friends. I like Piglet, but I wanted a bunny so I’m sticking with Bunny-Bear.
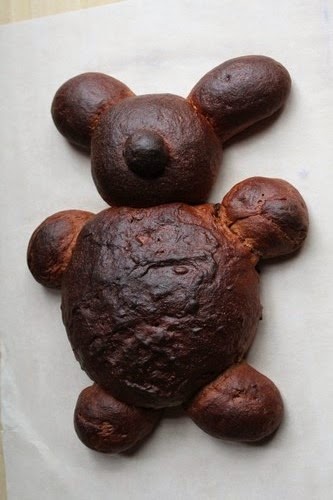
My oldest son told me that most of the chocolate bunnies he got in his Easter baskets had yellow eyes so I used yellow skittles for this bunny-bear’s eyes.
I only had one cup of all-purpose flour so I made up the difference with home-milled white whole wheat flour that I sifted (about five times) to remove a lot of the bran. It worked pretty well. The whole wheat gave the loaf a darker color, but I’m okay with that.
The dough for this chocolate bunny bread is very easy to make. It can be mixed and proofed in a bread machine. Then the dough is removed from the pan, the bunny loaf is shaped and allowed to proof, then you bake it, cool it and decorate (if desired). The dough can be prepared in all-size bread machines.
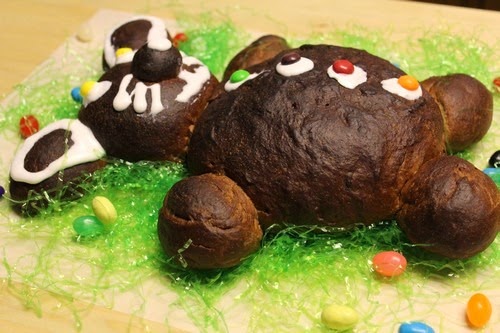
Chocolate Easter Bunny Bear Bread
Makes: 1 Loaf
Adapted from: Chocolate Easter Bunny Bread from Fleishmann Yeast
Ingredients:
Dough
- 2/3 cup milk
- 1 large egg
- 2 tablespoons butter, cut up
- 2 teaspoons pure vanilla extract
- 1/2 teaspoon salt
- 1 cup unbleached all-purpose flour
- 1 1/4 cups white whole wheat, sifted (several times)
- 1/3 cup sugar
- 3 tablespoons unsweetened cocoa powder
- 2 1/2 teaspoonsBread Machine Yeast
- 2 tablespoons milk, for brushing
- chocolate morsels
Decorations (optional)
- Jelly beans or other candy (I used Skittles)
- Decorating icing, optional
Directions
:
Measure milk, egg, butter, vanilla, salt, flours, sugar, cocoa and yeast into bread machine pan in the order suggested by manufacturer.
Process on dough/manual cycle.
When cycle is complete, remove dough to floured surface. If necessary, knead in additional flour to make dough easy to handle. Divide dough in half.
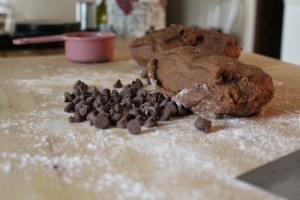
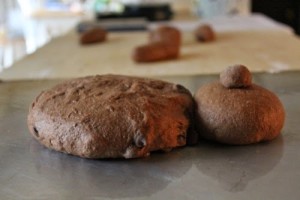
For body, knead chocolate morsels into 1 half; form into ball. Place on bottom end of greased large baking sheet; flatten to make 5-inch round. For head, remove 1/3 of remaining half; form into ball. Place on pan above body; flatten slightly, pinching to attach.
For nose, pinch off 1/2-inch ball from remaining dough; place on center of head.
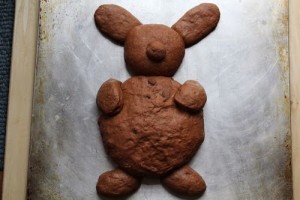
Divide remaining dough into 4 equal pieces; roll each to form 5-inch rope. For arms, arrange 2 ropes across body; attach by tucking one end of each under body.
Shape remaining ropes into ears; arrange above head. Attach by tucking one end of each under head.
 |
 |
 |
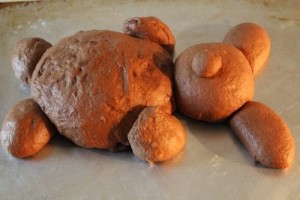 |
I started out following the directions, and he actually looked like a bunny to begin with, but he didn’t have any feet. I just couldn’t bring myself to leave off his feet (per the original instructions) so I took a little bit of dough from his ears and arms and made feet. Then I reshaped the ears and arms. The feet were too small (photo #4 above). So I took a little bit more dough from the ears and arms and shaped bigger feet (photo #5 above). I kept pulling and reshaping the ears to make them longer, but they kept snapping back so I just left them. The arms looked okay until they were proofed. They had a mind of their own.
Cover; let rise in warm, draft-free place until doubled in size, about 30 to 45 minutes.
After the final proof, I brushed the top of the loaf with milk right before I placed it in the oven to bake.
Bake at 350°F for 25 to 35 minutes or until done, covering with aluminum foil after 15 minutes to prevent excess browning. Remove from pan; cool on wire rack. Decorate as desired.
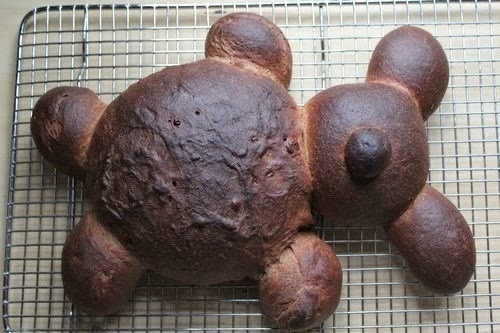
I hope you enjoy my Chocolate Bunny-Bear Bread. I put this loaf in the freezer to enjoy on Easter.
Happy Baking!
Cathy
Leave a Reply