If you’ve been following my blog for a while, then you know I prefer to make breads by hand. Sometimes the bread (or my tennis elbow) dictates otherwise, but for the most part, I enjoy making artisan breads by hand.
I was delighted when I learned about a new book called Baking By Hand: Make the Best Artisanal Breads and Pastries Better Without a Mixer by Andy & Jackie King, the Founders of A & J King Artisan Bakers in Salem, Massachusetts.
I was even more excited when I was invited to participate in a blog tour. This gave me the opportunity to do a few of my favorite things: read a new bread book, bake some bread, and then write about it.
The best part is I’m not keeping all the fun to myself. I’m delighted to be giving away a copy of this book courtesy of the publisher. You’ll find the entry instructions at the end of this post.
I also enjoyed making (and eating) their Cornmeal-Pumpkin Hearth Bread and you can too! Just look for the recipe below the review of the book.
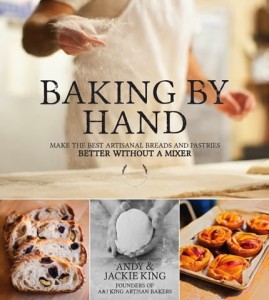
Baking By Hand is a delightful story of how A&J King Artisan Bakers began and how they run their bakery now. Their passion really shines through for their craft, the bakers that work with them, their customers, and especially for the breads; those wonderful breads.
I was hooked the moment I opened the book. Andy King begins by telling the story of their first Valentine’s Day and how he and Jackie gave each other the same gift, wrapped in the same gift wrap from the same bookstore. I’m a hopeless romantic so that did it for me.
I devoured the book. I even took notes. Being a bread geek myself, there is so much about this book that resonates with me. Like how the dough will let you know how it’s doing if you are in tune with it. This is so true. I remember when my cracker dough told me it was bread and not a cracker. For real!
One of the PM Bakers shared a story about the bread dance and what it feels like when you pull a perfect loaf out of the oven. He said, “The bursts, the color, the shape … means I did the dance correctly.” I loved that analogy! I always dance with and for the bread.
This is an inspiring book and an easy read. It provides enough information to get you motivated to bake bread without making your eyes glass over with too much technical jargon. You learn about the cycle of bread, why it’s important to properly ferment the bread, and how you need to scale carefully and without distraction. I had to laugh at the last one because I get distracted so easily when I’m mixing and working the dough.
Speaking of being distracted. It took me longer than it should have to make this Cornmeal-Pumpkin Hearth Bread but I had Irish music on in the background and well, you know the story.
I really enjoyed mixing the dough and getting into the rhythm of the bread dance (and the Irish music). First you mix, then proof, add the salt, yeast, then bulk ferment, fold, bulk ferment, fold again, bulk ferment, then fold one more time. Shape and place into bannetons, then proof and bake on a preheated baking stone.
When it came time to bake the loaves, I decided to try their method for creating steam. Instead of using a steam pan underneath the baking stone to generate steam, I used my small cast iron skillet and placed it on the top rack of the oven with the baking stone on the bottom rack. You only need to place about 3 or 4 ice cubes in the preheated skillet and you don’t even have to pull the rack out to reach the steam pan. How cool is that!
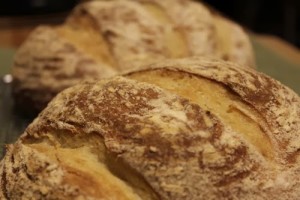
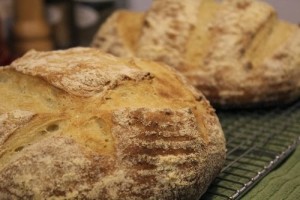
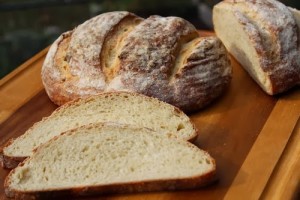
This is a wonderful bread for Fall. It has a tight crumb and makes a great sandwich. It tastes good on its own, but it also tastes great with butter, or as a grilled cheese sandwich or cinnamon toast, to name a few. Since this recipe makes three loaves, I had plenty to share, which I did with a friend. He enjoyed his loaf as well.
To make this Cornmeal-Pumpkin Hearth Bread, you’ll need a baking stone, three proofing baskets, a cast iron skillet, a water mister, a pizza peel (or you can substitute the back of a baking sheet), and a baking scale. You will also need a lame or a very sharp knife to score the hearth loaves right before baking.
Recipe from Baking By Hand by Andy King and Jackie King (Page Street Publishing; August 2013) Printed with permission.
Cornmeal-Pumpkin Hearth Bread
The Farm Stand Special
As soon as school starts in the fall, we begin fielding calls from customers asking when this bread will be back on the shelves. It has a limited life cycle in the bakery, as we bake it during the couple of months when we can source the pumpkins from nearby farms. Notice that we call for corn flour, which has a finer grind than cornmeal and absorbs liquid better, resulting in a smoother final crumb. You can find it in specialty grocery stores and online.
This bread has a sweet, moist, and tighter crumb than some of the other breads we make, and the crust has a bit more give. It makes amazing toast and grilled cheese sandwiches, its yellow hue crisping to a beautiful golden in the pan. You can easily shape these into loaf pans for more convenient sandwich slices; we make them as pumpkinesque rounds.
Note: If you do not have bannetons (the coiled cane molds that bakers use), you can use a large mixing bowl lined with a smooth cotton dish towel.
Overview
- Yield: Three 1 lb 10 oz loaves
- Desired Dough Temperature: 85˚F
- Mixing Time: 40 minutes
- Bulk Fermentation: ~2 hours
- Proofing Time: ~2 hours
- Baking Time: ~25 minutes
- Cooling Time: ~1 hour
12 Hours Before the Bake
Mix your poolish (see page 27)
15 oz 75˚F water
15 oz bread flour
2 g / .5 tsp instant yeast
Baking Day
1 lb 4.75 oz white bread flour
8.75 oz corn flour
1 lb 13.5 oz poolish
8.75 oz 90˚F water
8.75 oz roasted pumpkin (see below)
2.25 oz extra- virgin olive oil
1.5 oz honey
25 g / 3.5 tsp fine sea salt
5 g / 1.25 tsp instant yeast
Combine your flours in your large mixing bowl. In another bowl, mix your poolish, water, roasted pumpkin, olive oil, and honey, and remember to keep that water warm to give your yeast a comfortable atmosphere to grow. Swirl those ingredients around with your hand to combine. Then, dump your flours on top of the liquid ingredients, and mix it by hand for about 30 seconds until it comes together in a shaggy mass. Don’t forget to scrape the bottom and sides of the bowl regularly; you want all of that flour hydrated and don’t want to see any dry spots. Set aside in a warm place, at least 80˚F, for 30 minutes.
Sprinkle the salt and yeast on top of the dough, which will have developed a good deal of strength by now. Grab a four-finger pinch of the dough and pull. It should stretch out like chunky taffy rather than just tear off. Incorporate the salt and yeast into the dough while continuously pushing the sides of the dough into the middle while turning the bowl. After a minute of this, the dough should be pulling away from the sides of the bowl and developing a bit of a sheen, and you shouldn’t feel any crunchy salt crystals. Cover the bowl, and put it in your warm place for 30 minutes.
Turn your dough onto a lightly floured surface and give it your four-fold by gently patting it out, folding the left side into the middle, the right side overlapping the left, the top into the middle, and finally the bottom overlapping the top. It should make a tight little package – this is how we’re building the dough’s strength, and after every fold the dough’s volume should increase. It should consistently feel warm and active. Roll the dough over and place it, seam side down, back into the bowl. Repeat every 30 minutes (you’ll fold the dough three times in total) until the dough is strong but puffy, warm to the touch, and holds a fingerprint when pressed into the surface. The whole process will take about 2 hours with a warm kitchen and warm dough.
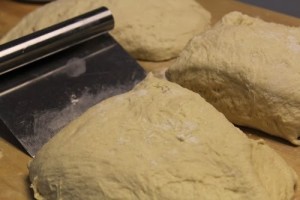
Once your dough is ready to cut, turn it out onto your floured work surface. Using your bench knife and scale, divide into three l lb 10 oz pieces. Gently pre-round the dough into rounds, being careful not to compress the dough too much, and place seam side down on your work surface. Cover and rest for 20 minutes to build a bit more strength into the loaf before final shaping. Dust three bannetons/smooth towel-lined bowls with corn flour.
Then take your rested rounds and gently but firmly shape them into rounds again. If your seams feel like they’re coming undone when you lift the loaf up, give it a few minutes sitting seam side down on the table to seal it and next time, use less flour for shaping. The dough’s moisture should be enough to seal the loaf closed. Place your shaped loaves seam side up in your bannetons/smooth towel-lined bowl,s cover with a cloth or plastic wrap, and place in your trusty warm spot.
While your dough is proofing, place your baking stone on the lowest rack in your oven, and your cast-iron pan on the highest rack. Preheat the oven to 450˚F. Check in on your bread periodically; if the surface feels dried out, spray it with a bit of water to allow for maximum expansion. If it feels cold, make it warmer. This may take up to 2 hours depending on the conditions of your kitchen; remember, proof to a result, not a time. If it doesn’t feel ready to bake, it probably isn’t. The loaf is ready to go in when it feels very airy and holds a fingerprint when pressed into the surface.
Flip the loaves over onto your peel. It might take a couple of batches to bake all your bread, depending on your oven size. Using a sharp paring knife or a razor, slash the surface of the loaves in your desired pattern. Now grab three ice cubes from the freezer. Being careful not to keep the oven door open too long and let the heat out, open the oven, slide your loaf onto the stone, throw the three ice cubes into the cast-iron pan, and close the door. After 5 minutes, quickly open the door and spray the interior of the oven with water. Continue baking until the loaf is evenly browned, about 25 minutes, and has a nice hollow when you tap it on the bottom. Let cool for at least 1 hour before cutting.
Roasted Pumpkin
The best pumpkins for this recipe are the smaller ones called sugar pumpkins. Choose those that are 8 to 10 inches in diameter. Wash any remaining field dirt off the surface, and knock the stem off with a hammer, the side of your table, or the back of a chef’s knife (careful with that last one). Bisect the pumpkin top to bottom (starting at the stem), and scoop out the seeds. Place the two halves cut side down on a sheet pan and roast at 400˚F until the skin starts to collapse and a skewer passes through the flesh easily, 45 to 60 minutes. Let cool, and then scoop the roasted flesh off the skins. Refrigerate until ready to use. Remember to warm the pumpkin to room temperature before using in this recipe (or else you’ll sandbag your dough temperature), and squish it through your fingers to smooth it out a bit before incorporating it into the other ingredients.
This post is part of a blog tour promoting the book, Baking by Hand by Andy & Jackie King. I received a copy of this book from the publisher, as well as a copy to give away.
I know you’ll enjoy this book as much as I do.
Happy Baking and Good luck!
Cathy
Anonymous says
Haven’t made much bread by hand, yet. I’ll be trying a pumpkin challah this weekend.
Cathy W. says
I love pumpkin challah. Happy Baking!
Nicole Shepherd says
I’ve never made artisan bread, and this is why I’d LOVE a copy of this book! I’ve been dying to bake beautiful bread just like yours! <3
Cathy W. says
Baking bread by hand is very rewarding. Good luck!
xpyromania05x says
I love making sourdough bread.
Cathy W. says
Me too!
Rebecca S. says
I haven’t made too many fancy breads, but I didn’t make a really good boule a while back as well as some delicious pizza dough.
Cathy W. says
Sounds delicious! Sometimes the simpler breads are the best.
Sleepy says
I enjoy making baguettes, since they seem to require little tending and always bake up crispy.
Cathy W. says
You must be good at making baguettes if they only require a little bit of tending on your part. 🙂
Sleepy says
I let the mix sit in the fridge for 2 days at a large hydration percentage, then the couche does the rest..lazy but tasty 🙂
Roaming Baker says
I love making warm, dark German breads. I’m starting a home bakery in my area and there’s a lot of German heritage here, so that’s a huge plus!
Cathy W. says
Good for you. This would be a good book to help with your bakery. Happy Baking!
Karen Kerr says
Looks great Cathy! Isn’t this an amazing book?
Cathy W. says
Thanks Karen! Yes, this is an amazing book.
Mahdi Martin says
I love making sourdough bread and beer bread. My man is excellent at making pizza crust!
Cathy W. says
Yum! Sourdough bread and Pizza, delish!
AnnaZed says
I don’t have that much experience with it. I would like to make a classic sour dough round.
*****************
{in the contest I am Margot Core on the Rafflecopter}
Cathy W. says
Thanks Margot! Sourdough is a good choice.
Claire M says
I used to make all my bread by hand although none of them were “artisan” bread. I loved making dinner rolls! Now that I have a bread machine, I don’t have to do it by hand, but I kind of miss making bread by hand. There’s something therapeutic about it.
Cathy W. says
Yes, there is definitely something therapeutic about making breads by hand. Happy Baking!
Anonymous says
I love a good homemade sourdough. Currently experimenting with wheat sourdough!
Cathy W. says
Sourdough is good. I’m assuming you mean whole wheat.
Anonymous says
I haven’t made any which is why I want to win the book so I can learn how to make them.
fruitcrmble AT Comcast DOT net
Cathy W. says
Good luck!
Lou says
The No-Knead bread is easy and delicious.
Meryl says
My favorite bread to bake is a chocolate-cherry round loaf.
Rhonda Cunningham-Phillips says
I’ve made sourdough bread, but I love my recipe, for pizza dough, which can be easily altered, and used for dinner rolls. Great for during this time of the year, as I often make rolls to go along with great soups!
Dragon says
I love, love, love sour dough bread! Big fan of the authors. 🙂
Anonymous says
I love making rye sourdough bread:)
BakinBob62 says
My love for sourdough bread and anything sourdough is by far what I make
skeebo says
French bread!
Arlette says
it looks awesome, I was not a big fan of using cornmeal in bread , now I am trying more recipes with it….
still my favourite type of dough is the Brioche…. as I can use it in many different ways and stuffing, from savoury to sweet.
Tracy Guenther says
I enjoy making foccacia bread.
Heather Schmitt-Gonzalez says
Oh man, that is a toughie…I can hardly choose just one. Buuuutttt, I will – SOURDOUGH! 🙂
Bryan says
I loveeeee Sprouted whole spelt honey and oat groat loaf bread. Best grilled cheese around!
Anonymous says
Thank you so much for the book, Cathy!
-Nicole
Rod says
Why such odd measurements, Cathy? Are they the conversion from metric? Frankly I prefer grams to oz, because they are easy to measure. I’d be distracted with those 1 lb 4.75 oz! Perhaps you could translate the into grams? Just a thought… On to # 5 of Stout and Pumpkin bread! I’ve made it no knead… Heehee! “No need to knead! ” it has become a, please make that bread for me… Yeah! Love your blog!
Cathy says
Hi Rod,
I prefer grams myself, but this formula is from a bakery. They allowed me to use their recipe when I did a review for their book. As such, I didn’t change any of their measurements.
Congrats on making your own version of the Stout and Pumpkin Bread. So glad you like my blog.
Happy Baking!
Cathy