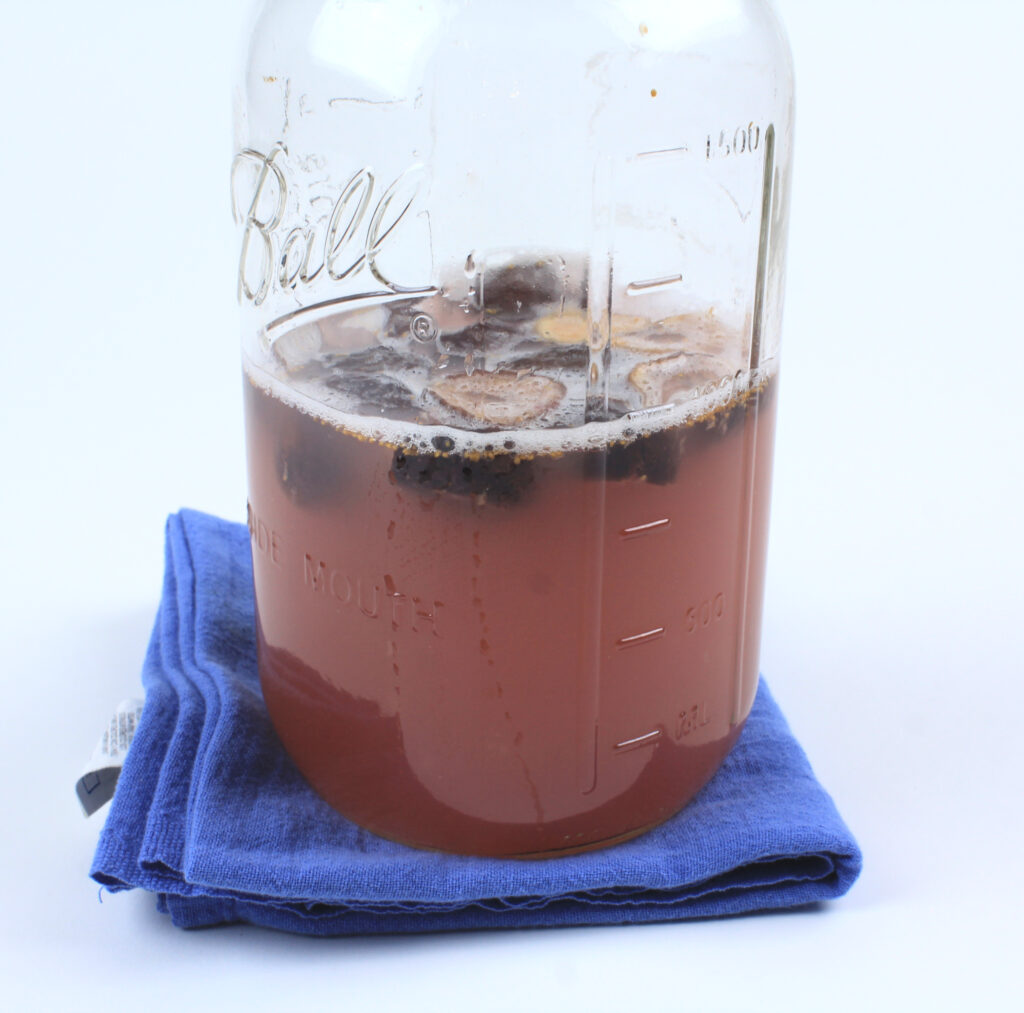
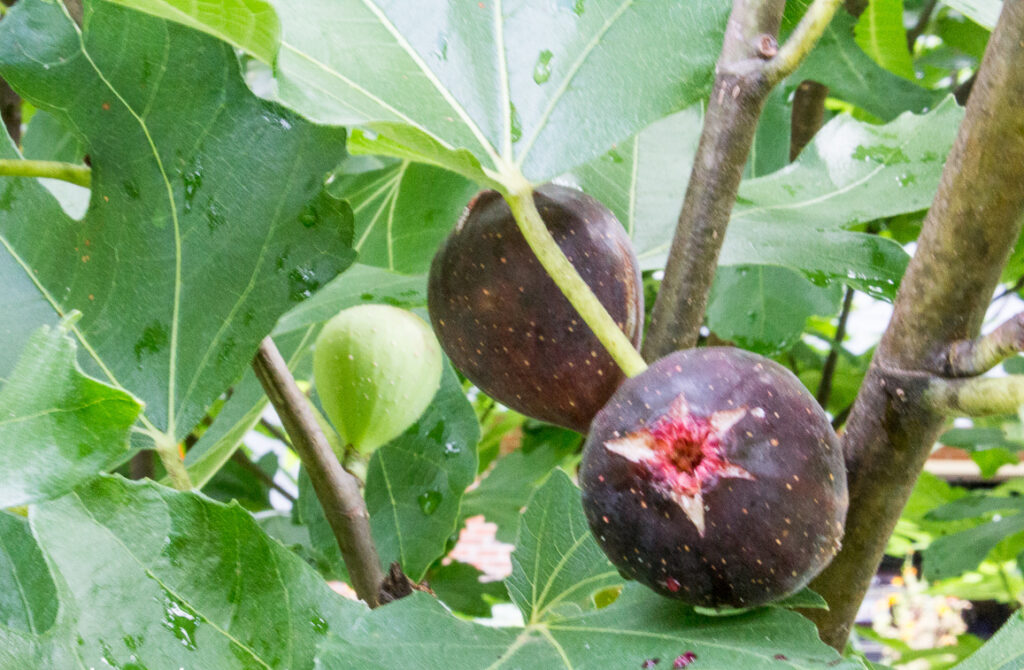
This natural yeast water is made with dried figs harvested from my fig tree and dried in a dehydrator. The sugars and nutrients in the figs attract wild yeasts from the environment, causing fermentation.
Yeast water bread is the challenge for the Bread Baking Babes this month. The process that Judy, of Judy’s Gross Eats, shared is made with dried dates, water, and sugar.
I’ve had another bumper crop of figs this year so I decided to use figs instead of dates. The figs contributed a lovely color and flavor to the yeast water.
What is Yeast Water?
Yeast water is a natural leavening liquid made by fermenting dried fruits, herbs, or flowers in water, allowing wild yeasts and bacteria to thrive. After a few days of gentle bubbling, the yeast water becomes active and ready to use to create a starter to use in bread.
Benefits of Using Natural Yeast Water in Bread Baking
Distinct Flavor Profile –
Yeast water imparts a delicate, slightly sweet flavor to the bread, influenced by the fruit you use.
Natural and Additive-Free – Yeast water is made with only fruit and water, making it a natural alternative to commercial yeast. It brings the benefits of wild yeast without the need for additional ingredients or chemicals.
Healthier Fermentation –The wild yeasts and bacteria in yeast water not only help the dough rise but also contribute to gut health by promoting a more digestible and nutritious bread, similar to sourdough.
Versatile – You can use yeast water in place of commercial yeast for any type of bread, whether you’re making a rustic loaf, sourdough, or other bread, such as focaccia. The fermentation process is slower, which allows deeper flavors to develop over time.
How long does yeast water last?
Each bottle will make several loaves of bread, but, if you want to continue baking with this method, you will need to keep it going.
Make sure to save 200 grams of yeast water and follow the maintenance schedule provided in the recipe below.
Yeast water can last several months in the fridge if well maintained.
Regular feeding will keep it active longer. However, over time, you may notice a decrease in its strength or rising power, and it may be time to refresh it.

Using the fig yeast water in bread
The first time I made this natural yeast water, I followed the process, let it ferment, then fed the starter with wholegrain spelt flour, and used it in classic sourdough bread.
Unfortunately, the power went out in the middle of baking the first loaf. I left it in the oven and amazingly, it baked all the way through. I didn’t get any photos because … the power was out. The power wasn’t out for long, thankfully, but I decided to start over again.
I made the second batch of yeast water using the same process and fed the starter with red fife flour.
For the second bake, I made focaccia with 50% wholegrain Red Fife flour. The yeast water adds a subtle fruity complexity and pairs beautifully with the toppings — dried figs (soaked in marsala), caramelized onions, prosciutto, and sea salt. We liked the focaccia so much I plan to feature it in a separate post.
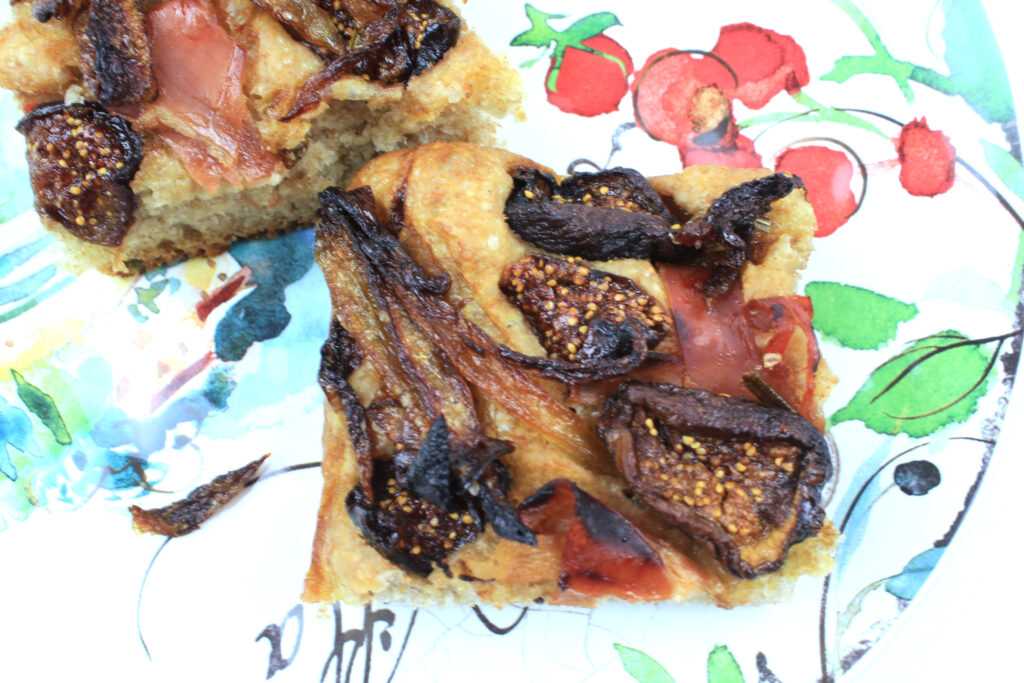
Yeast Water Focaccia topped with dried figs, caramelized onions, prosciutto, and sea salt
Resources
https://makeitdough.com/creating-fruit-yeast-water/
https://www.kingarthurbaking.com/blog/2020/02/24/baking-bread-with-a-yeast-water-starter
https://www.rosemarymark.com/yeast-water-artisan-bread-2/
https://drivemehungry.com/yeast-water/
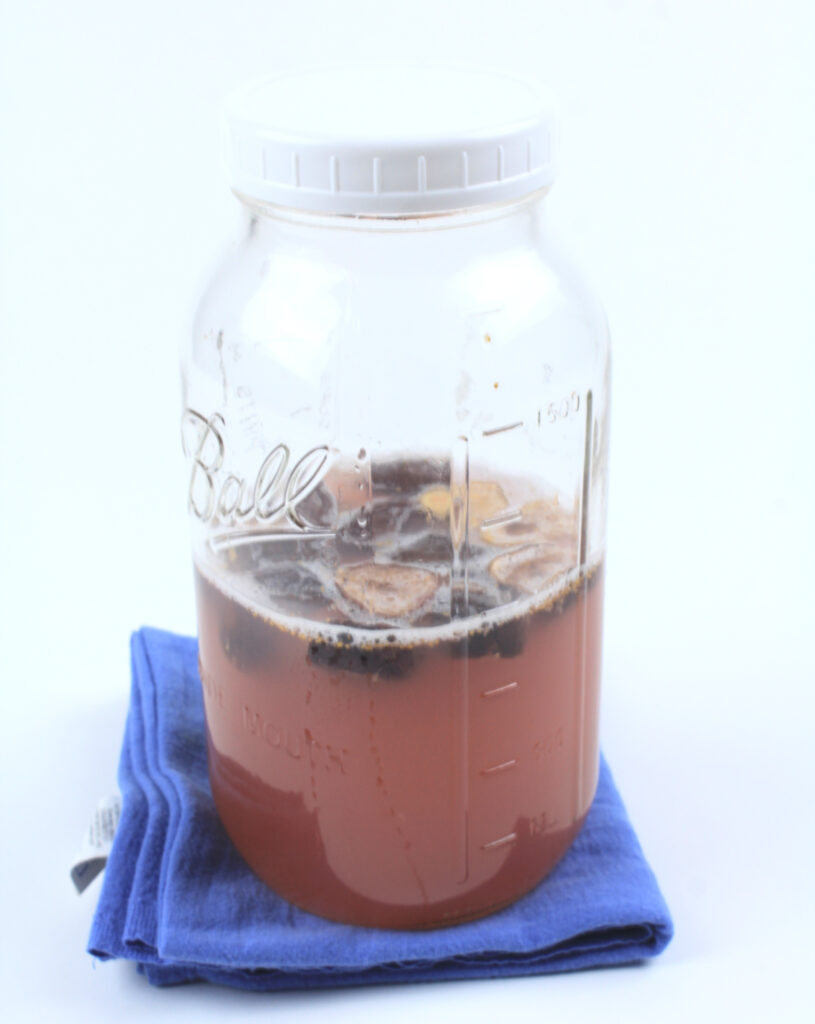
This wide-mouth Ball jar holds up to 8 cups
Experimenting with a Fig Yeast Starter
PrintCreate Natural Yeast Water with Dried Figs
Description
This natural yeast water is made with dried figs that I harvested from my fig tree and dried in a dehydrator. The sugars and nutrients in the figs attract wild yeasts from the environment, causing fermentation.
Ingredients
500 grams (2 1/4 cups) water, filtered
50 grams (1/4 cup) granulated sugar
2–4 dried figs or 2 dried dates (pitted or whole)
Instructions
Step 1: Find your container
Start by finding a jar or bottle that will hold at least 32 ounces, preferably more like 34 ounces (though 32 ounces will do in a pinch). I used a wide-mouth Ball jar that holds 8 cups.
Use a funnel to put water, granulated sugar, and dried fruit into the jar.
Step 2: Shake to dissolve sugar
Screw the cap on the jar and shake vigorously to dissolve the sugar. Loosen the cap a half-turn and put the bottle somewhere warm; 78.8°F is optimal.
Step 3: Shake the bottle
For the next 4 days, shake the bottle twice a day. Unscrew the cap to let out any pressure buildup, screw it back on, then shake it well.
After 24 hours you should see bubbles.
By the end of 4 days, the water should be frothy on top, and you should be able to smell the fruit fermenting: think a combination of orchard and barroom.
Step 4: Feed the yeast water
On day 5, add the following to the bottle:
- 2 dried figs or 1 dried date
- 5g (1 teaspoon) salt
- 20g (1 1/2 tablespoons) granulated sugar
- 400g (1 3/4 cups) water
This is where you might have trouble with a 32-ounce bottle. Adding 400g of water takes you up to about 31 3/4 ounces plus the space the dates take up. To leave a little head space at the top for bubbles and shaking, you’ll probably have to reduce the water a bit.
Shake the bottle vigorously to dissolve the sugar. Put it back in its warm spot, and shake twice a day, uncapping and recapping each time, for 4 more days.
After 8 days, you’re ready to build your final starter and make bread. Depending on the temperature in your kitchen, it may take less time. Mine was ready in five days, but I kept shaking it for a couple more days to be sure.
Step 5: Build the Starter
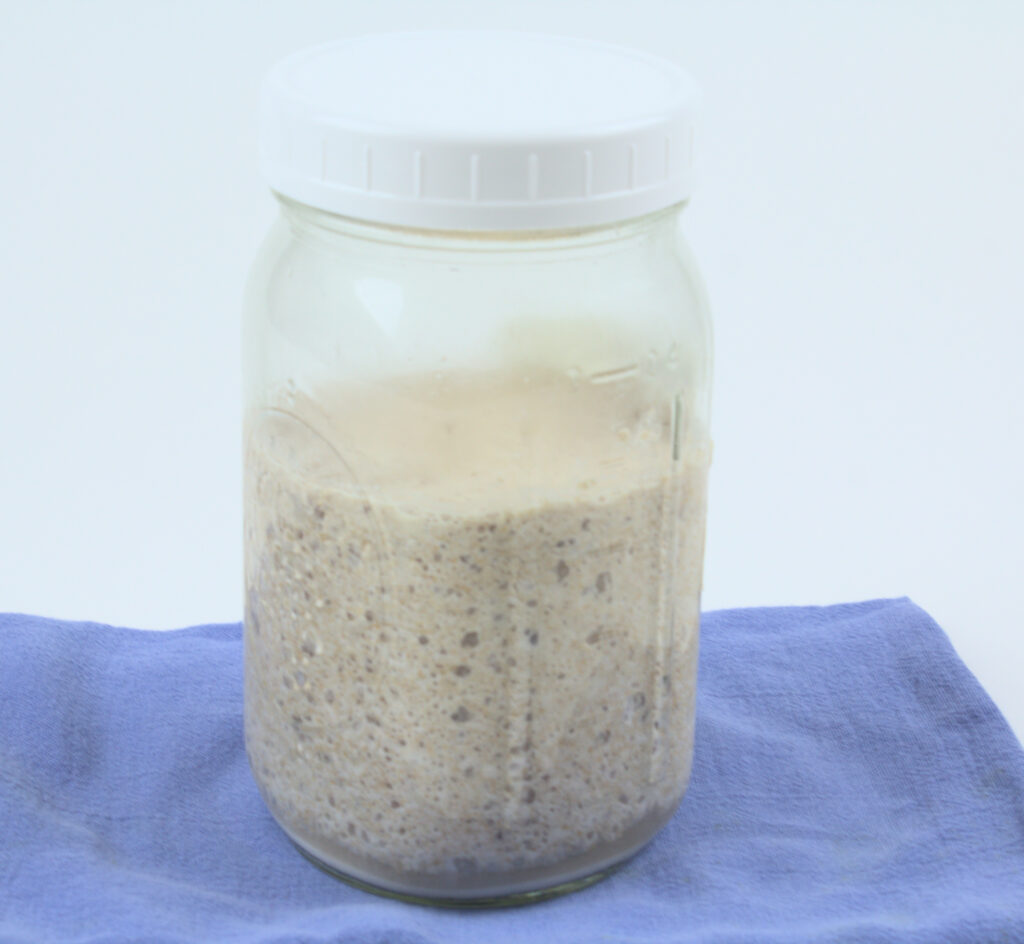
Build a starter by combining yeast water and flour in equal parts (by weight). I used the method from Piotr Lesnianski (one of the admins for the Fermenting and Baking with Wild Yeast and Waters FB Group)
In a separate, clean, and sterilized jar (a quart-size canning jar works well), take 75-100 grams of fig yeast water and mix it with 75-100 grams of whole wheat flour. I used red fife flour. Put a lid on the jar and let it rest at room temperature for 6-8 hours. Feed it again with a 50/50 mixture of whole wheat flour and water and let it rest for another 6-8 hours.
During this time, you should start to see fermentation. It will grow in volume and you should see lots of air bubbles. Piotr feeds his sourdough a 3rd time with a 50/50 mix of 150 grams of flour/water. My starter was ready to go after the 2nd feeding.
Step 6: Make your favorite bread
Use the starter you built in step 5 to make your favorite sourdough bread.
Step 7: Maintaining the yeast water
Each bottle will make several loaves of bread, but, if you want to continue baking with this method, you will need to keep it going. Make sure to save 200 g of yeast water.
Combine the 200 g with 700 g of tap water (might be less because of the volume of the bottle), 35 g of sugar, 3.5 g of salt, and 2 dried dates.
Shake twice a day for 2 to 3 days, until the yeast water is foaming nicely. Strain out the dried fruit, and store water in the refrigerator.
Who are the Bread Baking Babes?
We are a group of breadbakers who get together every month and bake bread! We would love for you to create yeast water bread and share how it turned out and what you thought! Judy, of Judy’s Gross Eats, is the host kitchen this month.
Check out our Facebook group to see the participants’ baking results during that time. If you would like to post your results with a Buddy badge on a blog, let us know in the comments or on the Facebook page.
The Bread Baking Babes
Judy’s Gross Eats – Judy (host kitchen)
Karen’s Kitchen Stories – Karen
A Messy Kitchen – Kelly
blog from OUR kitchen – Elizabeth
Bread Experience – Cathy
Thyme for Cooking – Katie (roundup)
Happy Baking!
Cathy
Elizabeth says
You made yeast water from your very own figs! I love that you made focaccia with some of the figs too. It looks really really really good! I’m looking forward to seeing more detail about it. Well done, You!
(I can’t believe that the bread cooked through in spite of the power outage. Ha. Once again, bread proves that it wants to be bread!)
Cathy says
The dried figs worked great in the yeast water so I’ll probably try it again next year.
I agree, bread just wants to be bread. The loaf had baked for about 15 minutes before the power went out so I guess there was enough heat left after the power went off to finish baking it. It didn’t look great, but it was edible so there you go.
Karen's Kitchen Stories says
I love that you used it with a bread with figs! How appropriate!
Cathy says
I just had to do something with all of those figs.
hobby baker Kelly says
Still jealous of those fresh figs. And that focaccia looks amazing!
Cathy says
Thanks Kelly!