These easy baguettes can be made the same day using the straight dough method, which usually takes about 5 hours from start to finish. Or, you can let the dough rest in the refrigerator overnight, and bake the loaves the next day.
These loaves don’t require the addition of an overnight preferment, such as a poolish or Pâte Fermentée so letting the dough rest in the refrigerator is a good way to develop more flavor. However, if you want to serve baguettes for dinner, and have a few hours, the straight dough method is a good option.
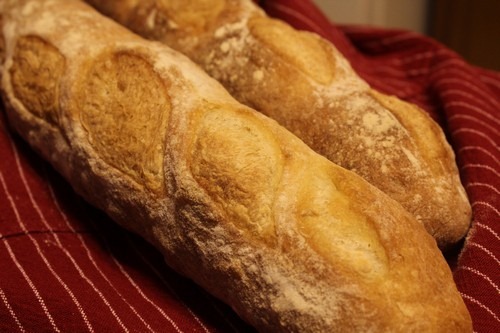
The theme for Bread Baking Day#52 was French Breads. I’m glad Cindy of CindyStarblog chose this theme because I’ve had these easy baguettes on my list to bake for several weeks. I wanted to continue my baguette-making journey and this provided another opportunity… not that I need any motivation to bake bread.
However, I’ve been out-of-town on business so my issue was finding the time to actually make them. I finally got the opportunity to bake bread this weekend. It felt so good.
I started making these baguettes Sunday afternoon, but ran out of steam before I could finish so I retarded the dough in the refrigerator overnight. The next day, I let the dough warm up to room temperature for a couple of hours and then shaped, proofed and baked the baguettes.
My version wouldn’t be considered a straight baguette, but the overnight retard worked better with my schedule and energy level.

You might some of these other baguette recipe:
KAMUT BaguettesPoolish BaguettesSprouted Wheat Poolish BaguettesWhole Grain Poolish Baguettes

Easy Baguettes
- Yield: 2 baguettes 1x
Description
These easy baguettes can be made the same day using the straight dough method, which usually takes about 5 hours from start to finish.
Ingredients
- 383 g (~3 cups) bread flour, plus extra for dusting
- 284 g (~1 1/4 cups) water
- 2 g (3/4 tsp) instant yeast
- 7 g (1 tsp) salt
Instructions
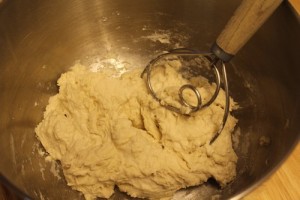
- Mix the bread flour and water until thoroughly blended. Feel free to use an electric stand mixer fitted with a dough hook and mix on low speed, or do what I did, and mix the dough using a Danish dough whisk.
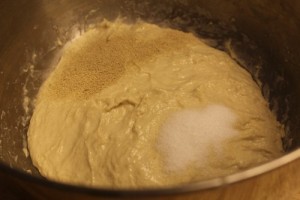
- Let the dough autolyse (rest) for 15 minutes. Then add the salt and yeast and mix until thoroughly blended. The resting period helps the gluten structure start to develop. If necessary, add a little extra water to help dissolve the salt and yeast.
- Scrape dough into the bowl. Don’t add any additional flour, just scrape the wet dough (using a dough scraper or a wooden spoon) into a large greased bowl. Cover the bowl with a kitchen towel or bees wrap, and let the dough rest for 20 minutes.
- Uncover the dough, fold it, then re cover it and let it rest another 20 minutes. Repeat this process a 2nd time and let the dough rest an additional 20 minutes.
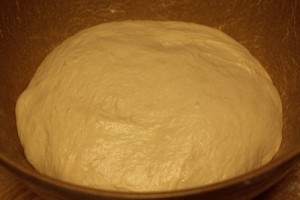
- Final Fold. Uncover the dough again and fold it for the 3rd time, then re cover it. After the 3rd fold, let the dough bulk ferment for 1-2 hours, depending on the temperature in your kitchen. If it is hot, it may take less time. Optionally, let the dough bulk ferment for 30 minutes, then place it in the refrigerator overnight.
- Preheat the oven to 450 degrees F. about an hour before you plan to bake the baguettes. If you are using a baking stone, place it in the oven to preheat along with a steam pan underneath. If you are using a baguette pan, you won’t need the baking stone, just the steam pan.
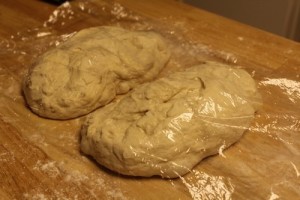
- Uncover the dough, divide it into 2 equal pieces, and form 2 logs on a lightly floured, clean work surface. Cover them with bees wrap or a kitchen towel. Let them rest for 15 minutes.
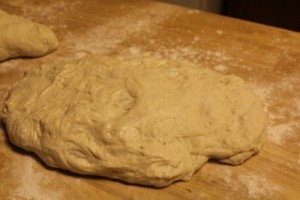
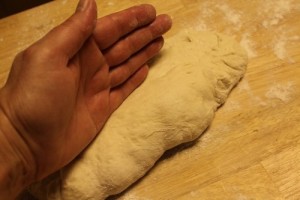
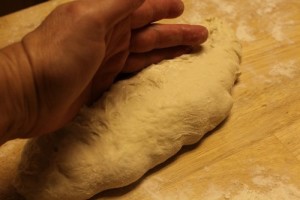
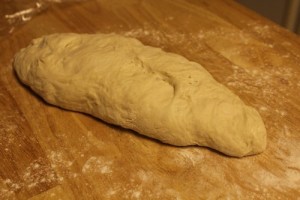
- Shape the logs into batards. Begin by gently pressing on the dough to degas it. Shape it into a rough rectangle. Fold the top of the dough down and seal it with your fingers to degas it somewhat. Then fold the lower section of the dough up and seal it with your fingers. You’ll end up with a rough batard-shaped loaf.
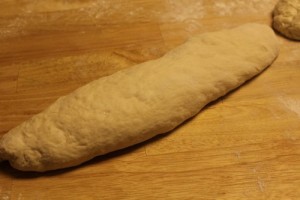
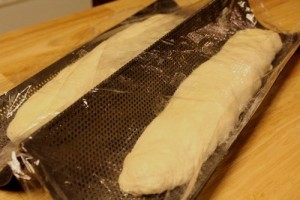
- Turn the dough seam side down and using cupped hands, roll the dough back and forth from the middle out, to extend the dough into the shape of a baguette. Place the loaves seam side down on a baker’s couche or baguette pan. Cover again with bees wrap or a kitchen towel and allow them to proof for 30 minutes.
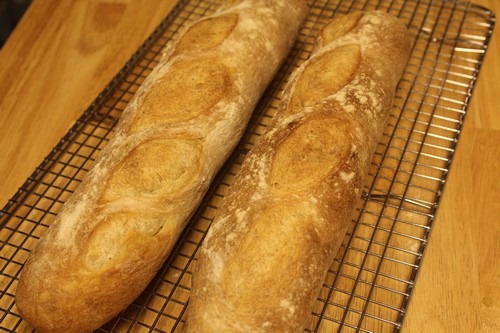
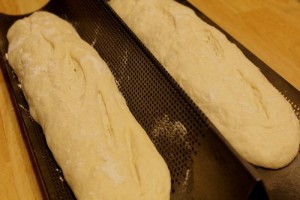
- Uncover the dough, then use a bread lame or razor to score the loaves for baguettes. One option is to make the French cut version, where you score about 4 or 5 vertical, but slightly angled slashes in the dough starting at the top left of the loaf and ending at the bottom right. The slashes should overlap about an inch or so.
- Add 1 cup of ice to the steam pan in the preheated oven and immediately transfer the loaves onto a baking stone (if using) or place the baguette pan in the oven. Let the loaves bake for 25 minutes or until the crust is a deep golden-brown and the sides are firm when you touch them.
- Remove the loaves from the oven and transfer them to a wire rack to cool. Let them cool completely before slicing and serving.
Notes
Adapted from: The Fundamental Techniques of Classic Bread Baking by The French Culinary Institute
- Category: French Baguette
This bread has been YeastSpotted.
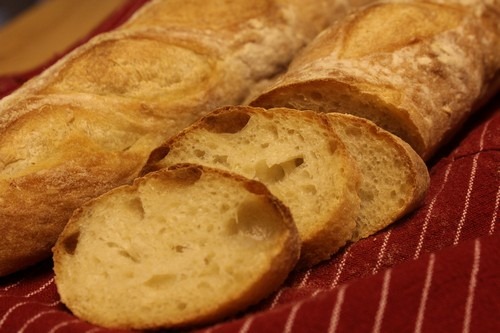
I was pleased with the results and the flavor of these easy baguettes. I heard them crackle when I took them out of the oven and let them cool on the wire rack. I didn’t taste them until the next day, but they tasted good not blah like I expected from a baguette without a preferment.
Happy Baking!
Cathy
Thanks to Cindy for hosting Bread Baking Day #52
BreadBakingDay was created by Zorra of http://kochtopf.twoday.net/stories/4124192/.


IdaBaker says
I would love to try these, but I don’t have the special pan you need to create them, yet.
When I do, I’m sure I’ll be enjoying these often!
Cathy (breadexperience) says
Hi IdaBaker! You don’t have to use a special pan. You can shape the baguettes and let them rise on a baking sheet and bake them directly on the baking sheet or transfer them to the preheated baking stone. Or you can let them rise on a couche (if you have one) and then bake them on a baking stone or tiles.
Cindystar says
Gorgeous baguettes!
Can I have one for breakfast right now? 🙂
Thanks for sharing this recipe, will give a try as soon as I buy a baguete pan, it’s the first item on on my wish-list 🙂
Cathy (breadexperience) says
Hi Cindy! Sorry I ate them already. Good thing I only made two. They are really good! Happy Baking!
Anonymous says
Sad you ate them a day later – baguettes are supposed to have a shelf life of 3 hours at the boulangaire.
Cathy Warner says
I agree baguettes are much better right after they have been baked. If you have the time and the opportunity, fresh from the boulangaire would be great!
Anonymous says
I tried so many baguette recipes, this one was the best, thanks for posting it. I noticed that the flour to water ratio is lower than other recipes. I think that was the trick 🙂
Cheers,
George
Cathy W. says
I’m glad you liked them. I enjoyed these as well.
David Avellan says
A couple of notes:
1 – I don’t think the weights are right for the ingredients. I used a food scale (that I have verified is accurate) to measure out the ingredients and I had to add more water to make the dough “wet” because it was way too dry.
2 – There is a lot of yeast in this recipe, and a good amount of it didn’t really blend into dough. I was worried that this would be a bread disaster because even before putting it in the oven there were some parts were the yeast was still visible in granular form.
3 – I used a pizza stone that was preheated for an hour to bake the bagguettes. While the tops and sides were well browned and crispy, the bottom was not browned at all.
4 – The taste of the bread was a bit yeasty.
That being said, the bread did look amazing from the top, and I was very happy with the crust (thin and crispy), and the meat of the bread was soft with good size holes in the crumb.
The taste was yeasty, but was easily forgotten when eaten with something else like butter or olive oil.
As others have said, easiest and best recipe I have seen online so far, but I still want to rework this a bit to add more flavor and remove the yeastiness of the bread.
Cathy W. says
Hello David, the water-to-flour ratio for the original formula was 75% my version is 74% (284/383) .You can certainly add more water if your dough is too dry. The type of flour used and the temperature/humidity will affect the amount of water needed.
The ratio of yeast/flour (.005%) is correct for this formula for straight baguettes; however, if you ferment the dough overnight like I ended up doing, you can reduce the amount of yeast used because the longer fermentation will alleviate the need for the additional yeast.
It’s possible your pizza stone is not thick enough to hold the heat especially if you let it preheat for an hour and the bottom still didn’t brown. Or, if you are using parchment paper, remove it part way through the baking cycle to allow the bottom to brown.
I don’t remember these baguettes tasting yeasty, but I do agree they taste better with butter or olive oil.
Cathy W. says
To alleviate the issue with the yeast granules not being totally dissolved, you can add some additional water when you incorporate the salt and yeast. Sometimes I will hold back about 50 grams of water from the total amount and add it in at this point. Hope this helps.
Neal says
this the second time I’ve made these baguettes. Recipe is simple and straight foreword. My personal difficulty ( minor) was that, even though weighing the ingredients as listed, and getting plenty of bulk rise, the dough remained quite sticky. No “membrane” development. When tried to slash before baking, razor stuck in the dough. Baked it anyway, got good oven rise and both crust and crumb came out fine. Couldn’t eat until 2 days later, (kept in paper bags)after putting both loaves in the oven at 350 for 6 minutes, the crust crisped up and crumb softened like fresh. Btw: not yeasty tasting at all. Thanks for the recipe!
Cathy says
Hi Neal, I’m glad you enjoyed these baguettes. Sometimes, I sprinkle a little bit of flour on top of the loaves before scoring to reduce the drag in the dough. You might also try increasing the bulk ferment if the gluten isn’t developing enough.