They stayed in their designated corner of the garage for a long time. The white winter wheat berries, along with the buckets of rye, hard red winter and spring wheat berries waited patiently for me to open their sealed containers once again and measure some of the berries into the grain mill to process into flour.

Like a child with a new toy who forsakes all of her other play things, I had relegated all of my modern grains to their resting spot while I experimented with the grains of the ancients.
Once I started baking with ancients grains, I wasn’t sure if I would come back, but my old friends in the garage kept beckoning to me to give them another chance.
The romance of working with ancient grains and the fact that they are more easily tolerated than modern wheat appeals to me immensely so I will continue to incorporate them into my breads. However, I still like regular wheat. I’ve missed working with it.
So when one of the bakers in the Artisan Bread Baker’s FB group posted about her experiments with the Einkorn/Wheat Tartine from Tartine Book No. 3, it peaked my interest. I have the book, of course, but I haven’t tried very many breads. I decided to remedy that.

I like the way Chad Robertson, the author of Tartine 3, blends flours and grains in his loaves. He uses ancient grains, but he also incorporates whole wheat and bread flour in his breads. I decided if he can do it, so can I.
Einkorn Wheat Tartine
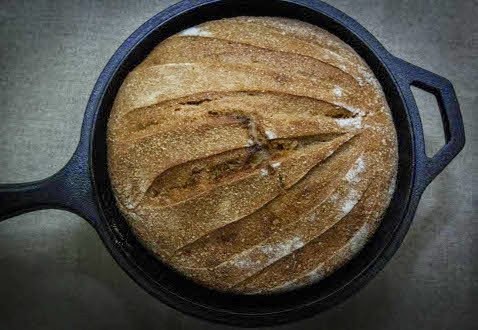
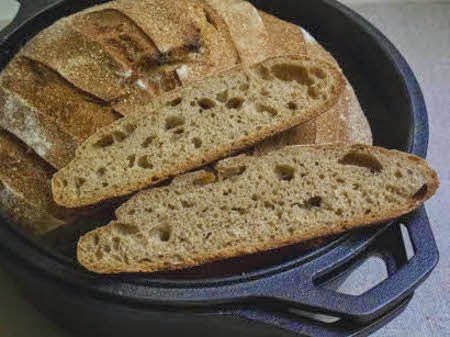
This Einkorn and Wheat Tartine is a marriage between old and new grains; milled and sifted.
Makes: 1 Loaf
Adapted from Tartine Book No. 3 by Chad Robertson
Ingredients:
- 200g white winter wheat, sifted (I used home-milled flour, then sifted it once to remove some of the bran)
- 150g whole grain einkorn flour
- 150g all-purpose einkorn flour
- 75g refreshed levain (100% hydration) *
- 425g warm water (80ºF or 27ºC), reserve 50g to mix with salt
- 12g sea salt
* To make one loaf, you only use 75g of the refreshed starter so you’ll have some left over. See directions below.
Method:
Build your Levain
For the best results, you should start by refreshing, or building your starter. To do this, take 25g of your favorite starter. I used my einkorn starter (aka EK) and to that, added 100g water, 50g all-purpose einkorn flour, and 50g whole grain einkorn flour. Mix well, cover, and let stand at room temperature for 4 – 6 hours.
If you’re making this bread in a colder climate, it might take longer for the levain to be ready for use. To test for doneness, take a spoonful of the levain and drop it in a glass of water. If it floats, it’s ready, if it sinks to the bottom, let it ferment a little longer.
Mix the Dough:
In a large bowl whisk together the flours.
In a separate bowl combine the refreshed starter and the warm water.
Combine the wet and dry mixtures and mix with your hands or with a Danish dough whisk until no dry bits remain.
Autolyse: Cover and let the dough rest (autolyse) for at least 30 minutes.
After the autolyse, add the salt and 50g of warm water.
Mix well to incorporate into the dough. Transfer dough to large bowl, and cover for bulk fermentation.
Bulk Rise: During the bulk rise (3 to 4 hours, depending on temperature), fold and turn the dough every 30 minutes for the first 2 ½ hours. To do a fold, scoop the underside of the dough up and stretch it over itself towards you. Rotate the container one-quarter turn and repeat three to four times. Keep dough covered between folding. After 3 hours and six folds, the dough should feel aerated, billowy, and softer. You will see a 20-30 percent increase in volume. If not, continue bulk rising for 30 minutes to 1 hour longer.
Dividing & Shaping: The next day, or after the bulk rise, turn out the dough onto a clean, un-floured work surface. Lightly flour the top surface of the dough and cut into two pieces. Pre-shape each piece gently into a round by working the dough in a circular motion. Take care to work the dough gently and not de-gas.
Bench Rest: Lightly flour the tops of the rounds, cover with a kitchen towel, and let rest on the work surface for 20-30 minutes. Line two medium baskets or bowls with clean, dry kitchen towels and dust generously with a 50/50 mixture of any wheat and rice flours.
Final Shaping: Refer to the Tartine (Chad Robertson) method for shaping wet dough (here is a helpful video link: http://youtu.be/cIIjV6s-0cA, the shaping starts at the 3:09 minute mark)
Final Rise: Transfer the dough to the floured basket, flipping the dough over so that the seam side is facing up and centered. Cover with a clean, dry kitchen towel and let rise at warm room temperature for 3 to 5 hours or overnight in the refrigerator (bake directly from the refrigerator, if using this option).
I placed the baskets in the refrigerator overnight.
To Bake: Pre-heat the oven to 500F/260C, adjust the oven rack to its lowest position, and place a cast iron Dutch oven, or any other heavy ovenproof pot with a tight-fitting lid into the oven. I used a Dutch oven combo baker to bake this loaf. Pre-heat for at least 30 minutes.
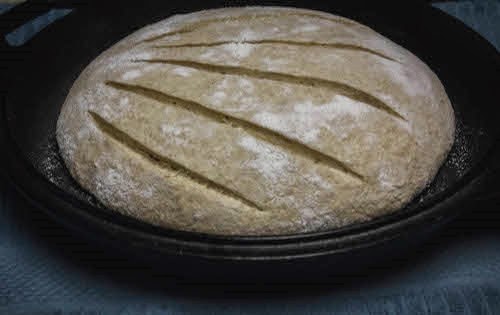
Carefully transfer the dough round into the preheated Dutch oven, tipping it out of the basket into the pot so it is now seam-side down. Score the top of the dough in the pattern of your choice. Cover the pot and return it to the oven.

After 20 minutes, reduce the oven temperature to 450F/230C. Bake another 10 minutes, then carefully remove the lid (being careful of the cloud of steam). Continue to bake for another 20 to 25 minutes, until the crust is a deep golden brown.
When the loaf is done, turn it out onto a wire rack to cool.
Cool completely, then slice, and enjoy!
Happy Baking!
Cathy
Anonymous says
Your breads and blog are lovely Cathy. I am just starting out with home milling and was wondering if you could give me some insight on adjusting hydration.
I live at high altitude and a dry climate and I can’t bake a bread under 72% hydration even with store bought flour. I understand most grains are thirstier when freshly milled and each are different in how you handle them whether sourdough or yeasted.
Cathy W. says
Hello, thank you for visiting.
Baking in high altitudes can be tricky. It’s going to depend on the type of flour as to how much hydration you will need.
With regular bread flour, you generally use 1 to 2 tablespoons extra of liquid. You may need to add an additional 1-2 tablespoons with the home-milled flour, depending on the flour. Whole grain flours generally soak up more water and with home-milled flours at a high altitude, you’ll definitely need more water. You’ll just need to experiment to see what works. I would start with the 72% and adjust up as necessary.
Hope this helps.