I adore soft pretzels and when you pair them with flaky, buttery croissants, what’s not to love!
When I found out we were making pretzel croissants for the Bread Baking Babes, I knew it was going to be good. The problem for me was the timing. I reviewed the directions and wasn’t sure if I could fit these rolls in my schedule. I had to do a bit of planning to make it work, but I’m happy to say I figured it out and it was well worth it! These pretzel croissants are a flaky, crispy and buttery delight!

It’s best to read the instructions all the way through (a couple of times) before you even begin to think about making these croissants. And make sure you’re not rushed or in a grumpy mood when you start. You’ll save yourself a lot of frustration.
I was fussy and grumpy when I started the process of making these croissants. As a result, the dough and I were not in agreement. The dough would not cooperate.
I finally realized (or admitted) that I was the one who wasn’t cooperating so I decided to take a step back. I said “Self, smile. Stop complaining and just enjoy the experience.” Once I did that, things went much smoother.
Remember, it’s all about the dough. It’s best to relax and work with it, not against it.

It takes a few days to make these pretzel croissants, but it is worth it when you bite into one of the crispy, buttery rolls. You’ll be transported into another zone and forget all about the time you spent planning.
I was able to fit these delights in my schedule because the dough can be frozen for up to a week. I made the dough one weekend and baked the croissants the next weekend.
If you want to extend the enjoyment like I did, bake half the croissants one day, refrigerate the remaining dough (wrapped in plastic to keep it from drying out), and bake the rest of the rolls the next day.
I actually waited two days to bake the remaining rolls so I could share them with a friend and not eat them all myself. Both batches tasted great! My taste tester enjoyed them as much as I did.
Kamut Pretzel Croissants
yield: 1 dozen
slightly adapted from Pretzel Making at Home by Andrea Slonecker
Note about timing: The dough takes from 24-48 hours from start to the time you form them. The butter block should be formed sometime while the dough is rising. Baked baking soda is an alternative to using lye; it needs 1 hour in the oven (see notes at end).
For the dough:
1/2 cup (120 ml) lukewarm milk (~110° F)
7 g (1/4 ounce / 2-1/4 teaspoons) active dry yeast
3 tablespoons firmly packed brown sugar (golden or dark)
410 g (3-1/4 cups) unbleached AP flour + more for sprinkling (I used white KAMUT flour instead of all-purpose flour)
2 tsp. fine sea salt 1 ounce (2 T) unsalted butter, cubed, at room temp
1/2 cup (120 ml) cold pilsner-style beer*
*I used water instead of beer. KAMUT flour absorbs more liquid than regular flour so I used 3/4 cups + 2 T of water
For the butter block:
340 g (12 ounces / 24 tablespoons) cold unsalted butter
2 tablespoons unbleached all-purpose flour
To finish:
60 grams (1/4 cup) baked baking soda (see notes at end)
1 egg yolk beaten with 1 tablespoon milk
coarse salt
sesame seeds and/or poppy seeds, optional
Making the dough:
Stir the yeast and 1 tablespoon of the brown sugar into the lukewarm milk and allow to sit until foamy, 5 minutes or so.
Whisk the flour, remaining brown sugar, and salt in a large bowl. Use your fingertips to rub the butter into the flour mixture, breaking it up into tiny flour-coated pieces the size of breadcrumbs. Stir in the yeast mixture and the beer using a wooden spoon or rubber spatula to form a shaggy mass.
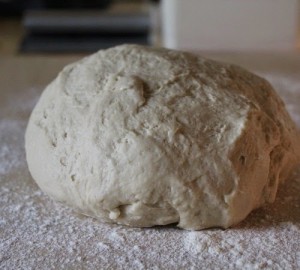
Turn the dough out onto an unfloured work surface and knead eight to ten times, until all of the flour is just incorporated. You don’t want to over work it, because you don’t want the butter to melt too much. The dough will not be a smooth mass; you will see some flecks of butter. It should be soft and tacky, but not sticky. Adjust as needed with flour or water.
Place the dough in a large, clean bowl. You can oil the bowl before placing the dough in it, but I found it wasn’t necessary because of the butter in the dough. Cover with plastic wrap. Place in refrigerator for 8 to 24 hours (24 will give you the best flavor).
Making the butter block:
Beat the butter and flour together in the bowl of a stand mixer, using the paddle attachment until it forms a smooth mass (or by hand, using a lot of elbow grease). This should take about a minute. You want the butter to be pliable without beating air into it or melting it.
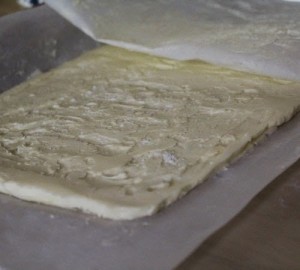
Spread the butter between 2 large sheets of plastic wrap (or parchment or wax paper), and use a rolling pin to shape into a rectangle that is about 8″x9″. Use a straight edge to form corners, but work quickly as you want the butter to stay cool. Wrap in plastic and refrigerate until you’re ready to roll out the dough.
1st turn:
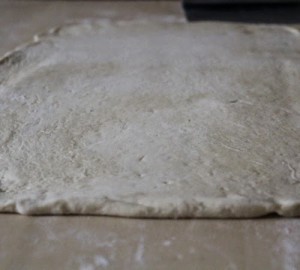
Scatter a little bit of flour on your work surface, then turn the dough out onto it. Roll it out into a rectangle that is 10″x15″ and about 1/4″ thick. Using your hands, gently pull and stretch the dough to form straight edges and sharp corners. Brush excess flour off of the dough. Set the dough with a long edge facing you.
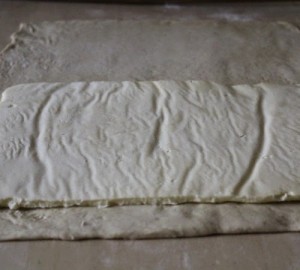
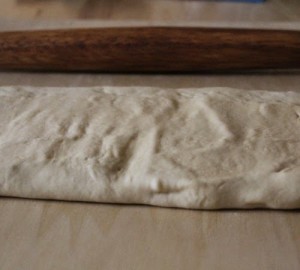
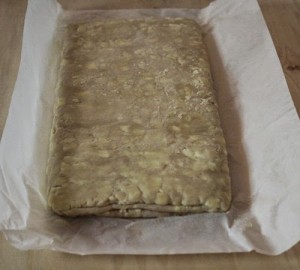
Mentally divide the dough into 3 equal portions. Place the butter block over the right 2/3 of the dough, leaving a 1″ border on the outer edges. Fold the empty left portion of the dough over the middle third. Now, lift and fold the right section of dough over that. You should have 3 layers of dough that encase 2 layers of butter. Pinch the outsides and the seams together and lightly press the layers together using a rolling pin. This completes the first turn. Wrap in plastic and refrigerate for 1 hour.
2nd turn:
Remove the dough from the fridge and set it on your lightly floured work surface. Roll dough out into a 10″x20″ rectangle, pulling and stretching to form straight edges and sharp corners. Brush off any excess flour. Set the dough with a long edge facing you. Fold both of the short ends in to the center, leaving a 1/4″ gap where they meet (think of a book jacket). Fold one side of the dough over the other. Lightly press the layers together using a rolling pin, and square and sharpen the edges and corners. This completes the second turn. Wrap in plastic and refrigerate for 1 hour.
3rd (and final) turn:
Lightly dust your work surface and the top of the dough with flour. Roll dough out into a 10″ by 15″ rectangle. Do another trifold, as done in the first turn (mentally divide into thirds, then fold one third over the center, followed by the last third). Square the edges and sharpen the sides; wipe off excess flour. Wrap in plastic and refrigerate for at least 2 hours, but up to another 24 hours.
(At this point, you can wrap the dough tightly in plastic wrap, slide it into a freezer baggie, and freeze for up to 1 week. Defrost overnight in the refrigerator before proceeding to final shaping.) This is what I did.
 |
 |
 |
 |
 |
 |
Final shaping:
Line two rimmed baking sheets with parchment paper and set aside.
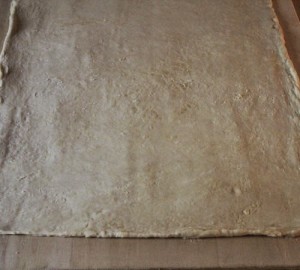
Lightly dust your work surface and top of your dough with flour. Roll out into a 15″x18″ rectangle that is ~1/4″ thick. Pull and stretch to form straight edges and sharp corners. Patch any holes where butter may have popped through by dusting them with flour. Brush any excess flour off the dough.
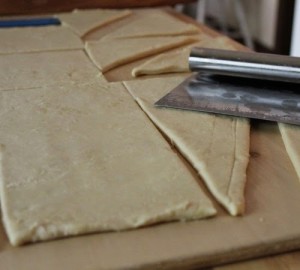
Cut the rectangle in half lengthwise, creating two 15″x9″ sheets of dough. Using a pizza cutter or bench scraper, cut each piece of dough into three equal strips, the short way. Then cut each strip in half diagonally, so that you left with 6 triangles. Repeat with other piece of dough.
Beginning at the base, roll the triangles up, tugging on the tip to elongate it slightly, then gently pressing it into the dough. Place on the prepared baking sheets with the tips tucked under, and curve the ends to form crescent shapes.
Cover the croissants with damp, clean kitchen towels and allow to rise at cool room temperature until they have almost doubled in size and feel spongy, ~2 hours.
At this point, slide the croissants into the refrigerator for 20 minutes while you prepare the dipping solution. Preheat oven to 425° F, positioning one rack in the upper third of the oven, and one in the lower third.
Prepare the dipping solution:
Add the baked baking soda in 8 cups of cold water and stir until completely dissolved. One by one, dip the croissant dough into the dipping solution, allow the excess to drip off, then set back on the lined trays.
Finish them off (finally):
Brush the tops with the egg wash, then sprinkle with coarse salt and sesame seeds or poppy seeds, if using.
Slide into preheated oven immediately and bake for 14-18 minutes (rotating pans from front to back and top to bottom halfway through), until they are deeply browned, crispy, and flaky. They should feel light and airy if you pick them up.
Transfer to a wire rack to cool for 10 minutes before serving. They are best enjoyed the day they are made, ideally warm from the oven. Store any extras in a paper bag for a day. You can reheat them by placing them in a 350° F oven for ~5 minutes.
 |
 |
 |
 |
 |
 |
 |
 |
Notes:
Baked baking soda is an alternative to working with lye that still lends pretzels their dark, burnished crust. To make the baked baking soda, spread 1/4 cup (~70 grams) of baking soda out on a baking tray lined with parchment paper or foil (or in a pie pan). It will decrease in weight, but shouldn’t decrease in volume. Slide it into an oven that has been preheated to 250° F/120° C and bake for 1 hour. Cool completely, then store in an airtight container at room temperature. If you see lots of pretzels in your future, make a large batch to store since it keeps indefinitely.

Remember to smile while you’re making these. You’ll be rewarded. They are fabulous!
Thanks to Heather of girlichef for choosing these rolls as the monthly challenge for the Bread Baking Babes.
The Bread Baking Babes (current dozen) are:
- Bake My Day – Karen
- blog from OUR kitchen – Elizabeth
- Bread Experience – Cathy
- Feeding my Enthusiasms – Pat/Elle
- girlichef – Heather
- Life’s a Feast – Jamie
- Living in the Kitchen with Puppies – Natashya
- Lucullian Delights – Ilva
- My Diverse Kitchen – Aparna
- My Kitchen In Half Cups – Tanna
- Notitie Van Lien – Lien
- Thyme for Cooking – Katie (Bitchin’ Bread Baking Babe Bibliothécaire)

To join in as a Bread Baking Buddy, just make the Pretzel Croissants (you may adapt) – and then email Heather your link at girlichef (at) yahoo (dot) com. Submissions are due by April 29th. Once you’ve posted, you’ll receive a Buddy badge for baking along, then watch for a roundup of all of the BBBuddies posts a few days after the close of submissions.
Happy Baking!
Cathy

Jamie says
I am sorry you started out grumpy but I couldn’t but help smiling at your suggestion to make these fabulous croissants with a smile on one’s face. Mine came out so well because I made sure I was calm, cool and happy when I made them. You are right! Yours look fabulous, just like my local bakeries croissant! This was such a great project/ Next time I will do as you suggest and bake part of the dough at a time.
Cathy W. says
I’m glad it made you smile. I agree this was a great project.
Heather Schmitt-Gonzalez says
I think that that is always a good lesson and reminder…smile. 🙂 Your croissants turned out just beautifully, Cathy!
Cathy W. says
Thanks Heather for challenging us to make these wonderful croissants.
MyKitchenInHalfCups says
What a wonderful idea to freeze the dough one week-end and bake the next! But your even better suggestion is the bake half one day and the second half two days later! Ahhh to have these fresh twice from on batch now that is heavenly.
Gorgeous!
Cathy W. says
Actually, the freezing part wasn’t my idea. It was in the (um) directions. I’ll take credit for saving-the-dough-for-later idea though. 🙂
Baking Soda says
How grown up and mature to realise what was keeping you back and do something about it! And be rewarded with such beauties! And yes ofc ourse sheer brilliance to freeze the dough!
Cathy W. says
I’m not sure how grown up and mature I was. You should’ve heard me fussing at the dough until I finally realized it was winning.
Katie Zeller says
Ah…. ‘Be one with the dough’ They are beautiful. Somehow I don’t think I would have resurrected that smile LOL
Cathy W. says
Thanks Katie!
Elizabeth says
Clearly, I need to take lessons in scheduling from you. How brilliant to freeze the dough and finish making the croissants several days later. I bet you read the recipe first, didn’t you? Showoff.
Your croissants look spectacular. I love the colour! Especially the contrasts between the white sesame seeds, the deep burnished crust, and the creamy coloured crumb. Beautiful!
Cathy W. says
Thanks Elizabeth! I did read the recipe. That’s the only thing that saved me on this one.
Elizabeth says
Excuse me for posting twice in a row to complain about the captcha. Am I really the only one who has to shuffle through several images before finding one that is large enough and not to overly blurry to make out? (It’s not as if my glasses prescription is that old!!)
Cathy W. says
I totally understand! I hate the captchas. I find them very difficult to read myself, but they help weed out the unwanted and unsolicited comments. Unfortunately, it punishes the rest of us. Thanks for commenting anyway.
Elle says
Thanks for the great photos of the process. Looks like you figured out the shaping directions perfectly. Maybe the smile made it easier :). Love the dark color of the flaky outsides that you got. Yum!
Cathy W. says
Yes, I do believe the smile made it easier. 🙂
Lien says
I really love the look of those! HOw delicious making these with Kamut. I adore kamut, such a shame that it’s so expensive overhere. Glad you made them smiling in the end, I believe in tasting the love in our food that you put into it!!
Cathy W. says
Yes, tasting the love is a good thing.
Sleepy says
I’m in the process of making these right now, have a perhaps silly question, can they be frozen after shaping, before they’ve been left to rise for 2 hrs?
thanks
S
Cathy W. says
Hi Sleepy! I have not tried freezing the shaped rolls, but I did freeze the dough with good results. It might work. You’ll probably need to let them thaw in the refrigerator overnight and then let them warm up to room temperature before baking.
Sleepy says
Thanks 🙂 The ones I baked fresh have just been consumed for breakfast..they were awesome, so thanks for bringing the recipe to my attention 🙂
Cathy W. says
I’m so glad you liked them. I agree, they are awesome!
crumbsoflove says
Can anyone stay grumpy when croissants are around? I think not!
Cathy W. says
Very true.
Karen Kerr says
I am jealous of your squared off corners on your rolled out dough! This dough did take some patience, especially the final roll out, but it was worth it. Beautiful!
Cathy W. says
Thanks Karen! I used a bench knife to square off the corners each time I rolled out the dough.
You’re right, it does take some patience, but the pay off is definitely worth it.