Recently, I was inspired to create a special bread for a friend of mine who likes sourdough and rye. I wanted the bread to encapsulate some of his favorite ingredients, but also be unique, so I chose a blend of sourdough, KAMUT and rye.
Once I decided on the flours I wanted to use, I consulted Flour, Water, Salt & Yeast by Ken Forkish for further inspiration. My bread is similar to Field Blend #2, but I used KAMUT instead of regular bread flour and whole wheat, and I utilized a different baking method.
I called this bread “on the spot” because my friend took a bite, pointed at the bread and with mouth full, said “oh this is good!. I asked him to describe what he liked about it. He thought for a minute, then said, “It’s, how do you say it? On the spot!” I think he meant “spot on” but I like “on the spot” better.
This is a friend I met while I was working on my masters; right before I started the Bread Experience. He’s tasted a lot of my breads and has always been a gracious taste tester. He loves sourdough and has suffered through my many attempts before I actually developed my starters into something edible. So when he said it was “on the spot” that meant I had reached it. Woohoo!
I had been pondering whether to bake this bread in a bread baker or freeform on a baking stone when I saw a post on Facebook from one of my fellow bread bakers. He was encouraging us to make use of different baking methods and not just focus on Dutch oven baking. That settled it, I was going to bake these loaves freeform on the baking stone instead of in a pot.
In the process of creating the bread, I also created a new KAMUT starter. It was so easy! I’m not sure why I didn’t do this before.
KAMUT and Rye Levain On the Spot
Adapted from: Flour Water Salt Yeast: The Fundamentals of Artisan Bread and Pizza by Ken Forkish
Makes: Two 1 1/2 lb. loaves or Three 1 lb. loaves
Levain:
- 100g (1/3 cup + 1 1/2 tbsp.) Mature, active levain (I used my Spelt Starter)*
- 400 g (3 cups + 2 tbsp.) KAMUT white flour
- 100 g (3/4 cup + 1/2 tbsp.) KAMUT whole grain flour
- 450 g (~ 2 cups) Water (85 – 90 degrees F.)
*I didn’t have a KAMUT starter so I used my Spelt starter to create the levain. After refreshing it a couple of times with only KAMUT flour, I now have a KAMUT starter. I have a rye starter so I could have used that one, but the Spelt starter had been fed and was ready to go.
Final Dough:
- 540 g (4 cups + 3 tbsp.) White KAMUT flour
- 85 g (2/3 cups) whole grain KAMUT flour
- 175 g (1 3/4 cups) whole grain rye flour
- 620 g (2 3/4 cups) + 30 g (2 tbsp.) Water (90 – 95 degrees F.)
- 21 g (1 tbsp. + 1 scant tsp.) Sea Salt
- 2 g (1/2 tsp.) instant yeast
Create the levain:
Take 100 g of recently fed starter (within 24 hours) and pour in 450 g of warm (80 – 90 degrees F.) water to break up the starter. Add in 400 g white KAMUT flour and 100 g of whole grain KAMUT flour and mix until it is incorporated. Let the levain rest for 6 to 8 hours or overnight at room temperature before mixing the final dough.
Autolyse:
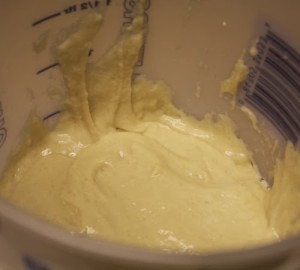
In a large mixing bowl or container, whisk together all of the white KAMUT, whole grain KAMUT and rye flours. Pour in 620 g of water and mix by hand until incorporated but don’t over mix. Cover the bowl and let it rest for 20 to 30 minutes.
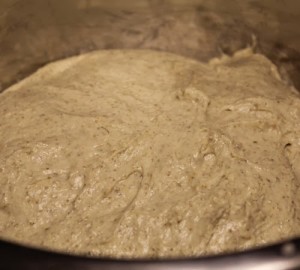
This dough will probably be a little stickier due to the rye flour, but it’s a wonderful dough.
Mix the final dough:
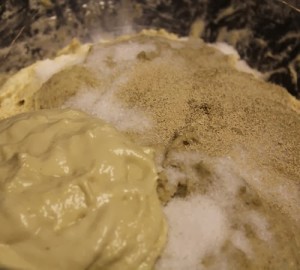
Sprinkle 21 g of sea salt and 1/2 tsp. instant yeast over the top of the dough. Using wet hands transfer 360 g of the levain into the bowl
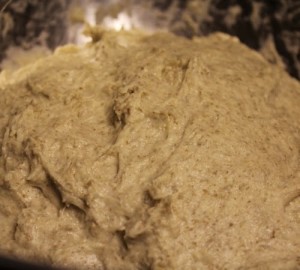
Mix the dough by hand using wet hands to incorporate the salt and yeast thoroughly into the dough. Use the fold and turn method to fully incorporate all of the ingredients. Pour in the remaining 30 g of warm water if needed. My dough needed extra water at this point to help dissolve the salt.
 |
 |
Bulk Fermentation:
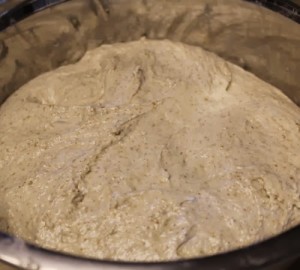
Let the dough bulk ferment for 1 1/2 – 2 hours and perform three or four folds, one every 30 minutes. The dough will be ready to divide once it’s about 2 1/2 times its original volume, about 5 hours. I started this process in the evening so after the 2 hour bulk fermentation (and folds), I retarded the dough in the refrigerator overnight.
Divide the dough:
The next day, remove the dough from the refrigerator and let it warm up to room temperature for a couple of hours before dividing it.
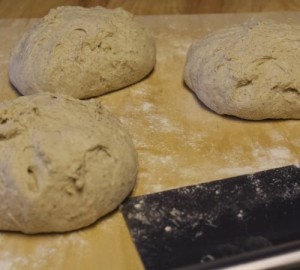
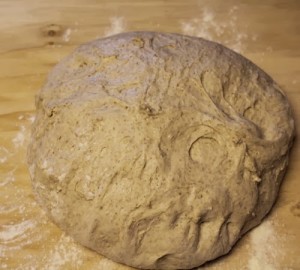
Gently remove the dough to a lightly floured surface. Divide the dough into 2 or 3 equal pieces depending on how big you want your loaves to be.
Shape the loaves:
Preshape the loaves into round boules by sprinkling a little flour on the top of the dough and then flip the pieces over. Shape each piece into a tight ball and let them rest for 15 to 20 minutes.
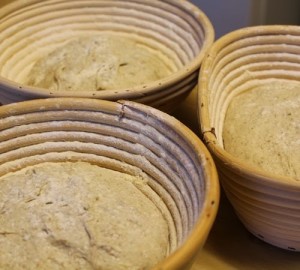
Dust 2 or 3 banneton baskets with a mixture of KAMUT and rice flour. Shape them into tight boules again and place them seam side up in the floured baskets.
 |
 |
Proof the Loaves:
Cover the loaves with plastic wrap or a kitchen towel and place the loaves (in the baskets) in the refrigerator. You can let them proof in the refrigerator overnight if you did the bulk fermentation at room temperature, but I had refrigerated the dough during the bulk fermentation so I only let the loaves proof in the refrigerator for about 5 hours. Then I took them out of the refrigerator and let them warm up to room temperature for about 2 hours.
Prepare the oven for hearth baking:
At least 45 minutes prior to baking, place a baking stone on the bottom shelf of the oven and a steam pan or iron skillet on the top shelf. Preheat the oven to 450 degrees F.
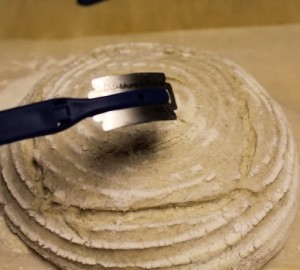
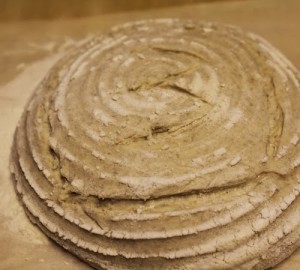
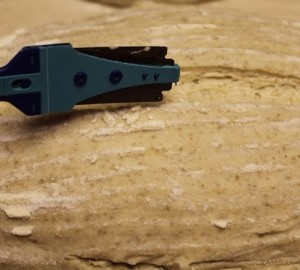
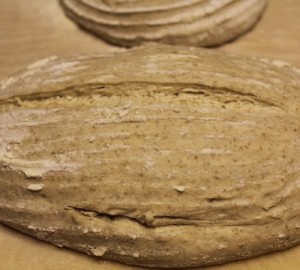
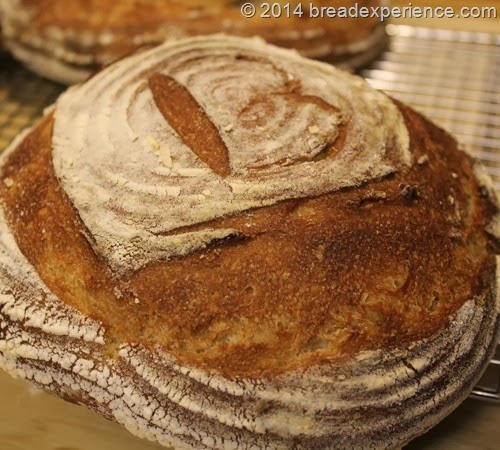
Carefully flip the loaves from the banneton baskets onto parchment paper. Score the loaves in the pattern of your choice. I had two rounds loaves and one oval loaf. I scored one of the round loaves with an M (sort of) for my friend and the other round one (not shown) with a B for (bread). I scored the oval loaf straight down the middle
 |
 |
 |
 |
Using a pizza peel or the back of a baking sheet, carefully transfer the loaves to the preheated baking stone. I baked one round loaf and the oval loaf together and baked the other round loaf separately.
Quickly throw 3 or 4 ices cubes into the iron skillet and shut the oven door. Bake the loaves for about 25 to 40 minutes, depending on the size of the loaves. The loaves should be dark golden brown in color and sound hollow when thumped on the bottom.
Repeat the process with the remaining loaf. Remove the loaves to a wire rack to cool completely before slicing and serving.
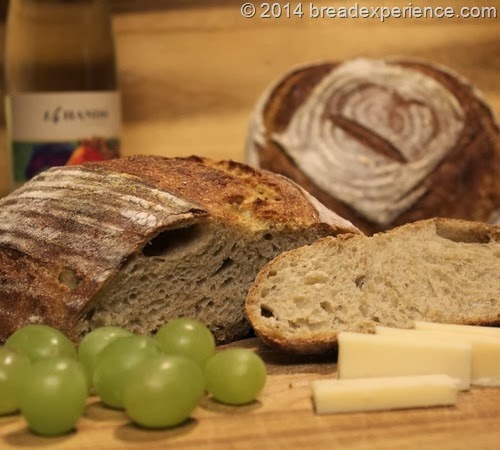
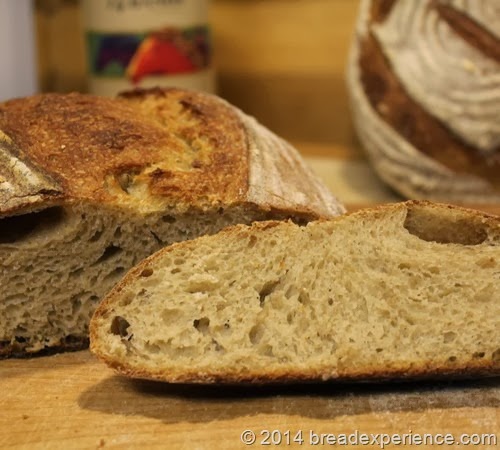
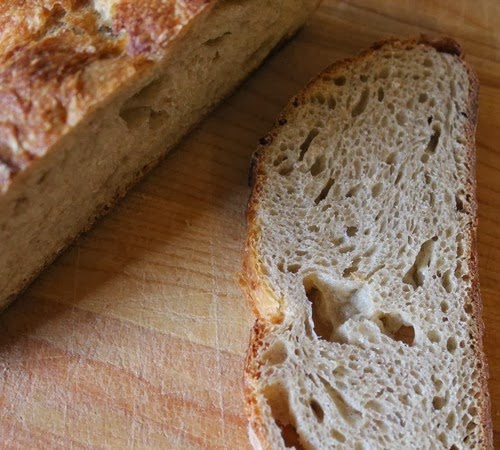
Here is a shot of the crumb. It was delicious!
It was dark when I finished baking the loaves so I didn’t have the wonderful sun shining through my kitchen to capture lovely photos.
My friend had arrived by the time I took the loaves out of the oven, and we had fun photographing and tasting some of the bread. He helped create the still life display. I like the shot even though the lighting is a little yellow. The crumb shot was taken the next day.
The lighting may have been a bit off, but the bread was “on the spot!”
Happy Baking!
Cathy
Claire says
Very interesting combination of flours! I wish I could smell your loaves! Nice scoring too: the “B” for “Best Bread”!
Cathy W. says
Thanks Claire. It was very tasty!
bb says
Do you have a recipe that uses only whole grain rye and kamut, no white flour?
Cathy says
You could use a rye starter and only whole grain rye and KAMUT in this bread if you sift out some of the bran from the KAMUT to get high extraction flour. Otherwise, the bread would be pretty heavy and dense from all of the whole grains.
Sybil Garrison says
Thank you for this lovely recipe. I made it yesterday with a few changes. I substituted 10% of barley and 10% rolled oats for some of the Kamut. I made a soaker with 4 g of salt, all of the water, most of the flour including the barley and rolled oats. I skipped the yeast altogether.
The following day, I combined both the sponge and soaker with the rest of the salt. After adding maybe 100g of einkorn flour, my dough was still wet, so I did the stretch and folds with wet hands and a wet spatula and let it rise the 5 hours. I divided the dough in one pan loaf and one small one, proofed them for 50 minutes (it rose so quickly the second time) and baked them for 40 minutes.
The flavor was fabulous, what a great bread! I just can’t fathom why my dough was so wet, a blob even after the stretch and folds. Oh, well, it doesn’t matter. I will make it again.
Cathy says
Hi Sybil,
Based on the substitutions you made- i.e. using 10% barley and 10% rolled oats instead of KAMUT, I think you may need to reduce the hydration. Keep in mind that KAMUT typically absorbs more liquid than regular bread flour so if you used less KAMUT, then you will most likely need less water. If you do make this loaf again, I would recommend holding back some of the water maybe even 20 – 25% to start with. Did you use a sourdough starter in the soaker rather than creating a levain and a soaker? Also, did you say that you retarded the dough in the refrigerator overnight? That definitely helps.
Sybil Garrison says
Thank you for the feed back.
I did make the levain as per your recipe, then I made a soaker with most of the flour and all of the water. I always leave the levain or starter, and the soaker at room temperature overnight.
I combined them the following day, with the rest of the salt, but did not add the yeast as in your recipe.
I did not retard the dough in the fridge, but let it ferment again at room temperature after the stretch and fold.
I will definitely try it again with less water as this was very good.
Sybil Garrison says
Thank you for the feedback.
I made the levain exactly as in your recipe. I made a separate soaker with most of the flour and all of the water.
I left those to ferment overnight at room temperature.
I did not, at any point, use the fridge, but let the final dough ferment at room temperature, first for 5 hours, including the stretch and folds, then for 50 minutes.
I will try it again with less flour. I am still sadly ignorant re. flours and their hydration levels, which is why I rely on experienced bakers like you.
Should I use the refrigeration method after the stretch and folds and before the last rise?
Cathy says
Hi Sybil, I would recommend refrigerating this dough at some point. I think it really helps. You can retard the dough in the refrigerator after the stretch and folds and keep it in the bowl or go ahead and shape it and place it in a proofing basket (if using), then place it in the fridge. If you let it retard in the refrigerator in the bowl, you might even want to shape it while it’s still cold, then let it warm up to room temperature in the basket or on a parchment-lined baking sheet. I’ve done this recently with a really wet dough and it helped.
Sybil Garrison says
Thank you very much, Cathy, I will make it again following your instructions and report. Sorry about posting the same message 3 times, when it did not appear, I thought it had failed to post.
Cathy says
Sounds good Sybil. Do let me know how it goes and don’t worry about the extra posts. Sometimes browsers are finicky.