When a recipe begins with “…the dough in this recipe is fairly difficult to handle,” it makes you wonder what you’re getting into and if it’s worth the effort.
This KAMUT Water-Proof Bread is called water-proofed because it is proofed in warm water for the first rise. I call it water-logged because it’s a very sticky dough. It can be a bit tricky to handle, but the result is a soft, buttery, and rich brioche-like bread with an eggy flavor. And, yes, it is worth the effort once you get the hang of it.
Elle, the host of the Bread Baking Babes (BBBs) for March, chose this floating loaf as our challenge. The recipe is from Beard on Bread by James Beard. I have the book, but I had never tried this bread. It is a fun bread to make and can be made in an afternoon or evening. Unfortunately, the analytic in me overcomplicated things so the first time I made it, I wasn’t very happy with the results.
First Attempt at Water-Proofed Bread
As I was making the bread the first time, I looked at the amount of yeast and thought “Wow! that’s a lot of yeast, especially for only 3 1/2 cups of flour.” Then I thought “My goodness, that’s a lot of eggs!” I was okay with the amount of butter and sugar because I do enjoy brioche every now and then. Grin.
Even though I was hesitant to use the amount of yeast and eggs the recipe called for, I trudged on and made the bread according to the recipe, with the exception of using white KAMUT flour instead of all-purpose flour.
As I was kneading the dough, I realized I hadn’t adjusted the hydration for KAMUT. KAMUT is more absorbent than bread flour so you either need to add more water or use less flour. I hadn’t incorporated any additional water in the dough and had already dumped the remaining 1/2 cup flour on the bread board (per the instructions) so I used all of it.
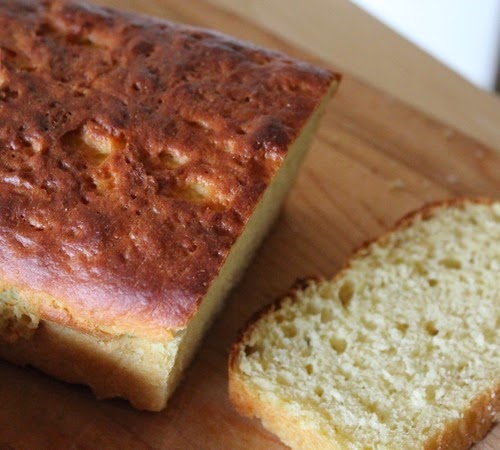
I did not like the results. The loaves were over proofed, and they under delivered. They were not soft and delicate like brioche; they were a little dense and eggy. My first thought when I took a bite, was Yuck!
These loaves are water-proofed and water-logged. They remind me of an eggy-tasting sponge. Not that I’ve eaten a sponge, mind you.
2nd Attempt at Water-Proofed Bread
I decided to try again the next day. This time, I went with my initial instincts and adjusted the amount of yeast and eggs and the final proofing time. I also reduced the baking temperature from 375 to 350 degrees F.
I used 2 teaspoons of active dry yeast instead of two packets and 2 eggs instead of three. I also watched the final proof closely. The first loaves collapsed during baking because they were over proofed. This was due to too much yeast.
This dough makes two loaves, but they are small loaves. Neither one of my batches could have filled a 9 x 5-inch loaf pan which is what the recipe suggested that you bake the loaves in.
The first time I baked the bread, I used 8 -1/2 x 4-1/2-inch glass loaf pans. The second time, I used slightly smaller nonstick pans. The second batch turned out much better.
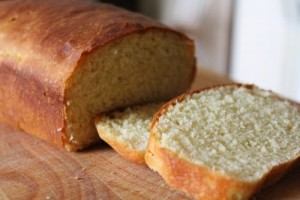
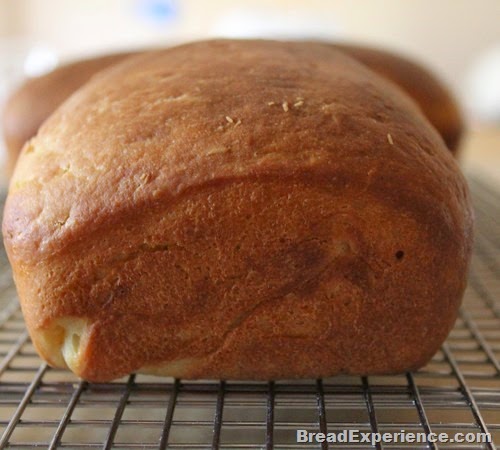
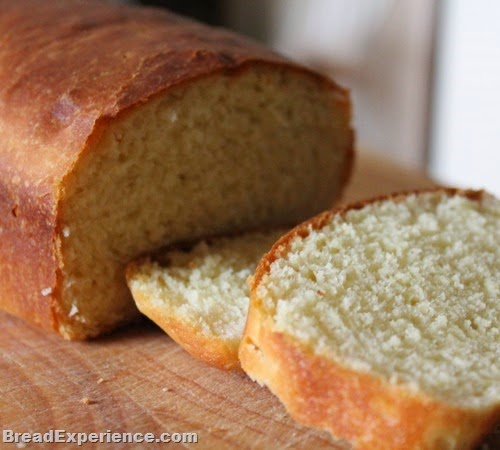
I could tell this version was a winner when I took the loaves out of the oven. When I sliced one of the loaves and tried a piece, it just melted in my mouth. Now, that’s what I’m talking about!
KAMUT Water-Proofed Bread
Adapted from: Beard on Bread by James Beard, 1973
Look for the original recipe on Elle’s blog.
Here is my adapted version:
Ingredients: (2 Small Loaves)
- 2 teaspoons active dry yeast
- 1/2 cup warm water
- 1/4 cup, plus 1 teaspoon sugar, divided
- 1/2 cup warm milk
- 1 stick unsalted butter
- 2 teaspoons Kosher or Sea Salt
- 2 eggs
- 3 1/4 cups KAMUT white flour (or all-purpose flour), divided + more as needed to dust work surface and towel
Instructions:I recommend doing this completely by hand without the aid of a mixer or bread machine, but feel free to use the method you prefer.
Add the yeast, and 1 teaspoon of sugar in a large mixing bowl, pour in the warm water and stir until the yeast dissolves. Let the mixture proof for 5 minutes. In the meantime, heat the milk with the butter and 1/4 cup sugar until lukewarm, then add to the yeast mixture. Add the salt and blend well.
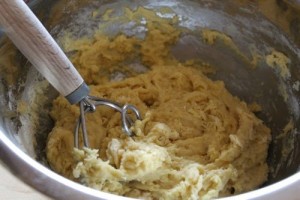
Add the eggs, one at a time, and mix thoroughly. Stir in 3 cups of flour, 1 cup at a time. It will be a very wet and sticky dough. Stir vigorously to incorporate all of the flour. I used a Danish dough whisk.
Sprinkle your work surface with the additional flour. I only used 1/4 cup of the extra flour for kneading and sprinkling the towel, but you may need more.
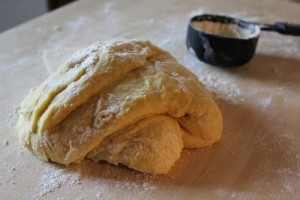
Transfer the dough to your work surface. For this part, it’s helpful to use a dough scraper or large spatula to work in this last portion of flour and make the dough firmer. Scrape the flour up and over the dough, lifting and folding inward. Repeat this process until the flour is well incorporated.
Once you have a workable dough, begin kneading. Knead by hand until the dough can be shaped. (The process of kneading with the scraper and then by hand is very effective for delicate dough. The dough will remain rather sticky, but that’s okay.)
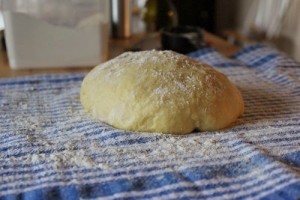
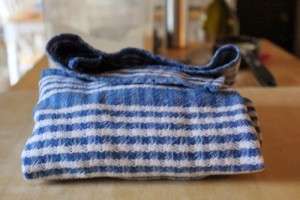
Roll the dough in flour and place it on a clean kitchen towel sprinkled with flour. Wrap the dough in the towel, like you would a package. The original instructions say to tie the packet. I tried this the first time around, but I had to untie it partway through the water-proofing in order to give it room to expand. I didn’t tie the packet the second time around.
 |
 |
 |
 |
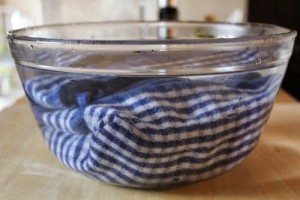
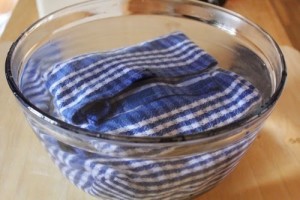
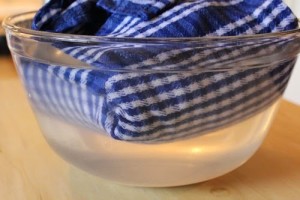
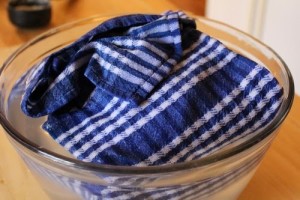
This is the fun part! Gently submerge the packet in a large bowl filled with warm water (about 100 – 115 degrees F, approximately). Watch it sink.
Let sit for about 35 to 40 minutes, or until it rises sufficiently to float on top of the water. The first time I made this bread, it only took about 25 to 30 minutes for the loaf to float because of all the yeast. The second time, I let the dough proof for 1 1/2 hours before it floated.
 |
 |
 |
 |
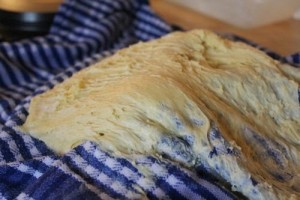
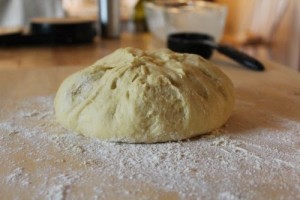
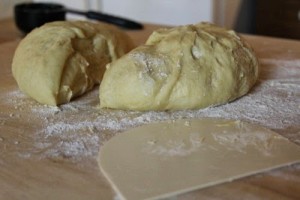
Carefully lift the dough from the water and let the excess water drip off. Un-wrap the towel and turn out the dough to a lightly floured surface. As you can see from the photo below, it will be quite sticky. Scrape off any dough that adheres to the towel. Knead and shape into two loaves, using both dough scraper and your hands. After I had scraped the sticky mess from the towel, I incorporated all of the dough into a ball. The dough that I scraped from the towel was wetter than the other dough so I worked it into the rest of the dough. Then I let the ball of dough rest on the counter for about 10 minutes before shaping the loaves.
Butter two loaf pans and place one loaf in each pan. Cover the loaves with plastic or a kitchen towel. Let them rise, in a warm, draft-free place, until the dough rise slightly above the tops of the pans, or until almost doubled in bulk.
 |
 |
 |
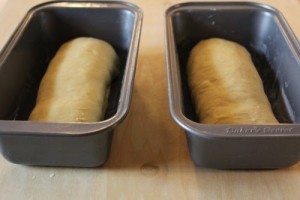 |
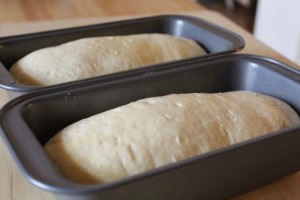
I used 8 x 4-inch loaf pans and the dough still didn’t reach the top of the pans, but it was almost doubled in bulk (see photo below).
Preheat the oven to 350 degrees F. The original instructions say to preheat the oven to 375 degrees F. This was too hot for my oven and the pans I used, but you may need the extra temperature, depending on your oven.
Brush the dough with cold water. Place the loaf pans on the middle rack of the oven and bake for about 30 – 35 minutes, or until the loaves sound hollow when rapped with the knuckles, top and bottom.
When done, place the loaves directly on the oven rack, without their pans, to brown the bottom a little more and crisp the crusts. Cool on racks.
The baking time will vary based on the size of your loaves. I baked the second batch for about 25 minutes, then I removed the loaves from the pans and placed them back on the rack for a few minutes to let the crusts firm up. I turned the oven off so they wouldn’t over bake.
Remove and place on wire racks to cool.
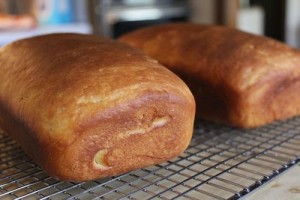
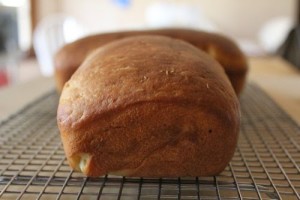
I almost put all of the dough in one 9 x 5-inch pan to make a large loaf, but I’m glad I didn’t. This way, I can enjoy smaller slices for a snack or lunch.
 |
 |
 |
 |
This is a good bread to serve with tea. It tastes great with butter, jam or marmalade and it makes great toast. It can be frozen for up to 3 to 4 weeks. Just wrap it in plastic.
Note on cleanup: The towel will get rather messy from the dough, but it’s not hard to clean. I used a textured towel. I’m not sure if this made a difference or not. After I removed the dough from the towel, I scraped the towel really well with a dough scraper. Then, I used warm water to rinse off the towel in the sink before washing it with some other towels in the washing machine. It came out beautifully clean. Some of the other bakers found that using cold water to soak the towel worked better for them, but I didn’t have any problems with the warm water.
Bread Baking Babes:
- Bake My Day – Karen
- blog from OUR kitchen – Elizabeth
- Bread Experience – Cathy
- Feeding my Enthusiasms – Pat/Elle
- girlichef – Heather
- Life’s a Feast – Jamie
- Living in the Kitchen with Puppies – Natashya
- Lucullian Delights – Ilva
- My Diverse Kitchen – Aparna
- My Kitchen In Half Cups – Tanna
- Notitie Van Lien – Lien
- Thyme for Cooking – Katie
Would you like to join in as a buddy? Elle at Feeding my Enthusiasms is the hosting kitchen this month. If you want to join in, just make the Water-Proofed Bread and send Elle your link (instructions are included in her announcement post). Submissions are due by March 29th. Once you’ve posted, you’ll receive a Buddy badge for baking along.
Happy Baking!
Cathy
Aparna says
Your loaves look lovely. I had planned to make just one small loaf. Now I’m tempted to make two! 🙂
Cathy W. says
Thanks Aparna! I made four loaves so you should at least make two. 🙂
Elle says
I think mine over proofed too. Next time, less yeast! Love the crust on your loaves, too. Really beautiful loaves and post Cathy!
Cathy W. says
Thank you Elle! Thanks for choosing this bread. It was fun!
MyKitchenInHalfCups says
I’m certainly glad to know you don’t eat sponges Cathy!
I do love your packet fold technique, I can see how that would work very well with no need to tie things off. We enjoyed this with tea and terrifically as French toast. Cheers to you for two bakings!
Cathy W. says
No sponges for me except overnight sponges that go in bread. 🙂
Baking Soda says
I so agree with you Cathy! I also adjusted the eggs and the yeast and the butter 😉 and alas let mine overproof…
Yours look lovely! and yes, never eat sponges. that’s a life skill!
Cathy W. says
Thanks Karen! I’m glad I’m not the only one that had a problem with overproofing.
Sleepy says
The things one learns at your blog 🙂
Cathy W. says
I’ll take that as a complement. 🙂
Elizabeth says
Wow. You are a glutton for punishment to make it twice in two days! Especially after the first loaf turned into what looks like pound cake. What did you do with that loaf? Could it be rescued and turned into bread pudding or trifle or something like that?
I’m so glad that your second try worked well. It looks lovely.
Cathy W. says
I guess I am glutton for punishment. It’s that perfectionist in me that wouldn’t let it go until I got it right. I sliced the first loaves and I’ve been enjoying them as French Toast.
Lien says
Yay for making it twice! A shame that your kamut loaf didn’t work (I love kamut!) Your other loaves look very good. Yes the amount of yeast is ridiculous in the original recipe, I wonder if yeast wasn’t as strong way back as it is now. I didn’t mind the eggs or butter, love my brioches with both.
Cathy W. says
I made both loaves with KAMUT. No worries! I didn’t waste the first loaves. They make eggsceptional French Toast with all of those eggs. That’s one dish that’s supposed to taste eggy.
Katie Zeller says
It does sound like a wonderful tea bread – with butter and jam – and well-done doing it twice LOL
Jamie says
I am late on this challenge and kind of glad I am…. I have been reading the Babes adjustments and am happy to learn from your experiences. And looking at your gorgeous lovely loaves I really want to make them now.
crumbsoflove says
Good info about using Kamut flour. It seems to me that all older bread recipes use too much yeast!
Sandie
Naisy says
I made this with 1/2 cup home made yeast. It turned out very tasty.
I did exactly like you said. Thank you so much
Cathy says
So glad you liked it! Thanks for sharing.