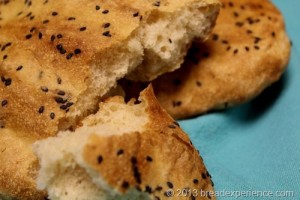
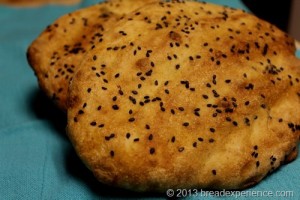
Nan e Barbari is a Persian Flatbread typically served for breakfast with feta cheese and a cup of tea. It has a beautiful golden color and a distinctive odor.
The secret to the lovely color and unique aroma is in the sauce. The sauce, or Romal as it is referred to in Iran, is a mixture of baking soda, flour, and water that is brushed on the dough during the shaping process and again prior to baking.
Elizabeth of Blog from OUR Kitchen, the host kitchen for the Bread Baking Babes this month, chose Nan e Barbari as the featured bread. This sounded like an interesting bread so I joined in the group bake as a BBB Buddy.
We seem to have a theme going with the types of breads we’ve been making recently. We had to beat the Whipped Bread into submission last month and this month’s bread is a slacker as well.
It is a high hydration dough which means it is very wet and slack. When I read the comments from the other bakers, I wondered how I would fare with this dough. It seemed that some of them actually cursed the dough because it was so wet and tricky to handle.
On the day I made this bread, I was not in the mood to deal with a slacker so I made a couple of changes to make the dough more workable.
The first change I made was to hold back some of the water while I was mixing the dough. I ended up adding some of it back but I didn’t use all of it. I also used home-milled whole wheat flour which absorbs more water than commercial wheat flour. Another variable that affected the hydration was the humidity the day I baked this bread. The dough absorbed more water and it was a delight to work with.
Nan e Barbari
Adapted from Blog from OUR Kitchen, adapted from 1001 Recipe
This bread doesn’t take long at all to make. I made it in an afternoon. I halved the original recipe and made two mini-loaves.
Ingredients:
- 3/4 tsp instant yeast
- 150 mL (2/3 cup) warm water, about 90 degrees F.
- 30 gm (~1/4 cup) 100% whole wheat flour (I used home-milled flour)
- 180 g (~1 3/8 cup) unbleached all-purpose flour
- 1/4 tsp baking powder
- 1/2 tsp salt
- black sesame seeds (and/or nigella seeds, blonde/brown sesame seeds or poppy seeds)
Romal (Sauce)
- 1/4 tsp flour
- 1/4 tsp baking soda
- 1/8 cup water
Directions:
1. Mixing the dough
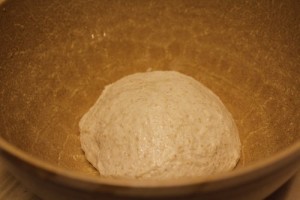
Whisk together the flours, baking powder, salt and yeast in a large bowl. Add the water and stir with a wooden spoon or Danish dough whisk until the dough pulls away from the sides of the bowl.
2. Kneading the Dough
Elizabeth’s method for working with slack dough:
(Watch her Working with slack dough video for more details.)
Turn the dough out onto an un-floured board. Wash and dry the mixing bowl. Using both hands on either side of the dough and thumbs resting on the top in the center, lift it up and flip it over in the air before plopping it back down on the board. Fold the dough in half away from you as you plop the dough down. Keep repeating until the dough is smooth. Every so often, use the dough scraper to clean the board. Stretching the dough is desired on the turns. But this won’t start happening right away. When the dough is smooth, place it in the clean mixing bowl. Cover the bowl with a plate and leave in a draft-free area to rise to double.
My method for kneading this dough:
I’m still dealing with tennis elbow so I didn’t utilize the same method as Elizabeth did for kneading the dough. I used Chad Robertson’s method from Tartine Bread. Basically, you do a series of turns and folds in the bowl.
Refer to my Tartine Bread post for a photo tutorial on performing the fold-and-turn method.
3. Proofing the Dough
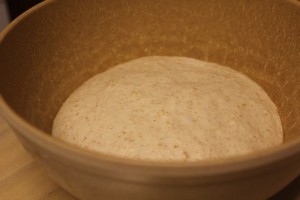
Cover the bowl with a plate. Let it bulk ferment for about an hour, or until the dough has doubled in size. Perform the fold-and-turn process a few times during the first 1/2 hour of bulk fermentation.
4. Prepare the sauce
Whisk flour, baking soda and water in a small pan. Bring it to a boil. Remove from heat and set aside to cool.
5. Pre-Shaping
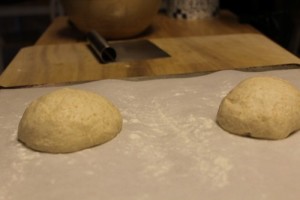
Line a baking sheet with parchment paper and lightly dust it with flour. Cut the dough in half. Form each piece into a ball and place well apart on the baking sheet. Cover the rounds with plastic wrap and allow to rise in a draft-free area for about an hour, or until double in size.
6. Final Shaping
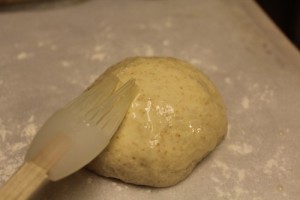
Brush each round with the sauce.
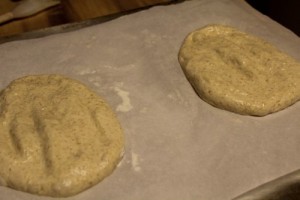
Dip your fingers in the sauce and dimple the rounds down to form two ovals with lengthwise furrows.
7. Final Proof
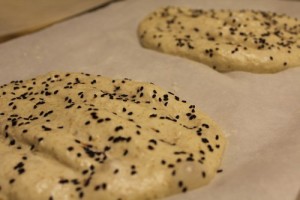
Brush the ovals with the sauce again and sprinkle with the seeds of your choice. Let the ovals rest for about 45 minutes.
8. Baking the Loaves (in a conventional oven)
Preheat the oven to 450 degrees F. with a baking stone on the middle rack. Before placing the loaves onto the stone, pull each oval with your hands to lengthen it. Wet your hands so they won’t stick to the ovals and pull the dough from the bottom with your palms facing downwards. I forgot to do this part so my ovals didn’t get lengthened.
Place the loaves onto the hot baking stone (on the parchment paper). Spray the loaves with water. Bake the loaves for about 15 minutes. Rotate the loaves and remove the parchment paper part way through the bake cycle. Bake the loaves until they are golden brown.
Grilling the Loaves: If you would like to grill these loaves instead of baking them in a conventional oven, refer to Elizabeth’s post for directions on grilling this bread on your gas grill.
9) Cooling and Eating the Loaves
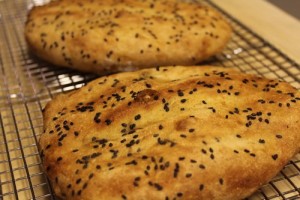
Remove the loaves to a wire rack to cool slightly before enjoying.
I enjoyed one loaf with dinner and the other with lunch and as a snack the next day.
This bread turned out to be fairly easy which was nice because I had some mishaps earlier in the day (not related to bread), and I wasn’t in the mood for anymore mess ups. Baking this bread was a good stress reliever and it was delicious!
Thanks BBBs for another fun and tasty bread!
Happy Baking!
Cathy
Karen Kerr says
Looks great! I kind of did a stretch and fold too before bulk fermentation. Not sure if if helped, but I got lots of holes!
Elizabeth says
Wonderful! I really like that you adapted to hand-knead, using Chad Robertson’s fold in the bowl method. How brilliant are you? And your bread looks wonderful! Many thanks for baking with us!
Cathy W. says
Thanks Karen and Elizabeth! I enjoyed making and eating this bread. They say that necessity is the mother of invention. I’ve definitely had to get creative to bake bread with this tennis elbow.