This month’s BBB (Bread Baking Babes and Friends) is hosted by Lien. She chose Maori Bread as the bread for March. Maori Bread, also known as Rewena paraoa, is a bread from New Zealand that is made using a potato starter. Lien adapted this bread from Dean Brettschneiders Global Baker.
According to the book,
“Rewena is the Maori term for the fermented potato mixture used as a raising agent to make this effect it’s a type of sourdough. It’s difficult to find the exact history of this bread, but it has been suggested that a flat unleavened bread was made with ground-up bulrush plant and water, baked over hot rocks. Traditionally, rewena is baked for large gatherings and the loaf is simply torn apart for sharing amongst friends and family. I have added a little fresh rosemary for flavour because this bread has little salt and can be bland. Stenciling the iconic New Zealand silver fern onto the loaf by dusting with flour and baking gives this loaf a truly New Zealand identity. This rewena needs to be made two to three days ahead.”
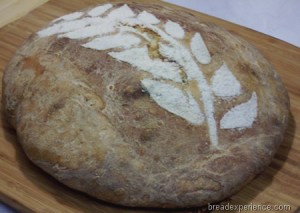
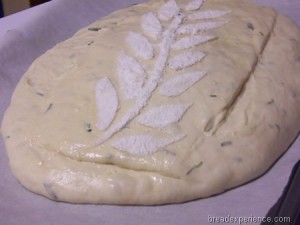
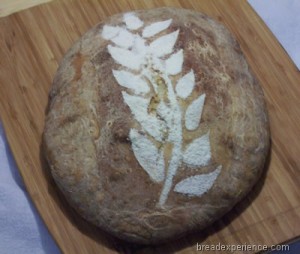
I had a hard time finding a stencil of a silver fern that would be suitable for bread so I used a different fern stencil. This is the first time I’ve used a stencil on bread so it was a new experience for me. This one turned out to be a wee bit too big for the bread. Next time, I think I’ll choose a smaller image.
Rewena paraoa (Maori bread)
Adapted from Dean Brettschneiders Global Baker
Makes: one large loaf
Rewena
- 100 g potato, peeled and thinly sliced
- 165 ml water
- extra water
- 165 g strong bread flour
- 1 tsp liquid honey
Dough
- 400 g strong bread flour
- 1 tsp salt
- 20 g liquid honey
- 1/4 tsp instant active dried yeast
- 1 1/2 tablespoons fresh rosemary leaves, roughly chopped
150 ml water - 330 g rewena, from above
- additional flour, for dusting
Directions:
I started this process Friday morning before work.
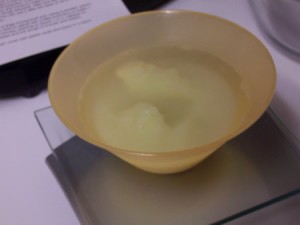
To prepare the rewena, place the potato and water into a saucepan and then boil until the potato is soft, leave the lid off. Mash the cooked potato in the water and add extra water until you have 250 g in total.
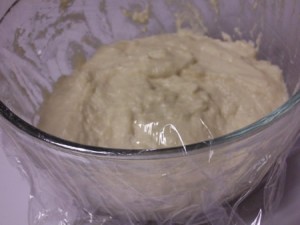
Put into a bowl and cool until lukewarm. If the mashed potatoes are too hot, it will cook the starch in the flour. Mix in the flour and honey to make a soft dough. Cover with plastic wrap and set in a warm place until the dough ferments.
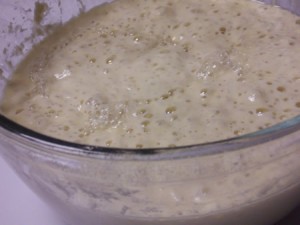
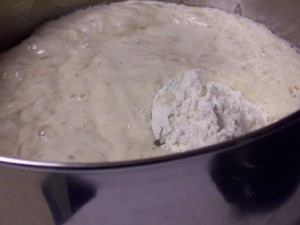
After one day you’ll see a few bubbles on the surface, after two days a lot. You can use it after two days or up to three, if you’ll leave it longer it’ll be over its strongest point.
This is what my starter looked like Sunday morning.
To make the dough, put all the ingredients into a large mixing bowl and, using a wooden spoon, combine to form a soft dough mass. (You may need to adjust with a little more flour or water.) Knead the dough in the spiral mixer for 8 -10 minutes (starting on speed 1 or 2, halfway on speed 3) until the dough (almost) clears the sides and the dough is smooth and elastic.
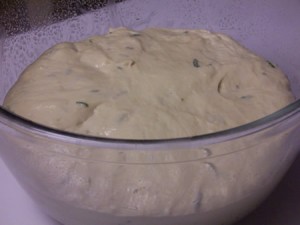
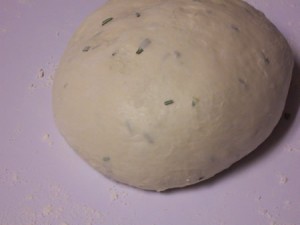
Place the dough into a lightly oiled large bowl, cover with plastic wrap and leave in a warm place. Once the dough has almost doubled in size (this will take approximately 1 hour), tip the dough onto the bench dusted with flour and gently knock it back by folding it onto itself three to four times. Return the dough to the lightly oiled bowl, cover with plastic wrap and leave for a further 30 minutes in a warm place.
Remove the dough from the bowl and fold it to form a large rectangle. This doesn’t need to be exact, just as long as it’s tight and compact.
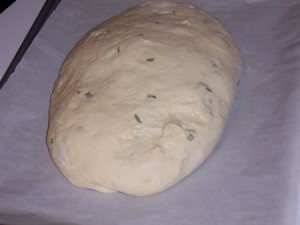
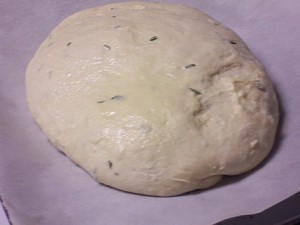
Place on a baking tray lined with non-stick baking paper and cover with plastic wrap. I shaped my dough in an oval shape rather than a rectangle. I thought it might fit the fern stencil a little bit better.
Allow to prove for approximately 60-120 minutes, depending on room temperature.
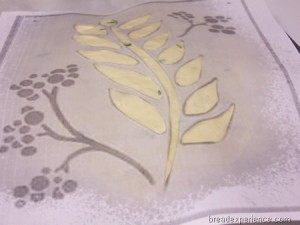
Optional: Cut a silver fern-leaf or Maori moko design stencil out of stiff paper. Remove the plastic wrap from the dough and place the stencil on the dough’s surface (I sprayed the stencil with pan coating, otherwise it would have got stuck on the dough).
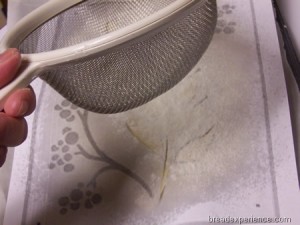
With a fine sieve filled with a little (white rye) flour, lightly dust flour over the stencil so you are left with a pattern on the loaf.
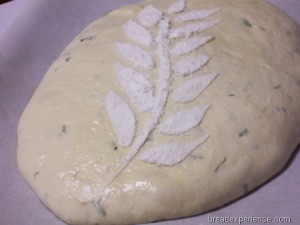
Carefully remove the stencil.
Using a sharp knife or razor blade, cut around the edge of stenciled pattern. I used a serrated knife. The dough was really slack and wet so I had a little trouble getting the scoring to cooperate.
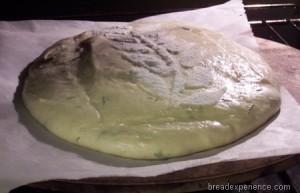
Preheat the oven to 425ºF with a baking stone inside (the stone should really be hot!) and a steam pan on the bottom shelf. Place the loaf (and parchment paper) onto the baking stone and pour hot water into the steam pan. Spray the sides and walls of the oven with water using a spray bottle. Do this three times during the first minute or so of baking.
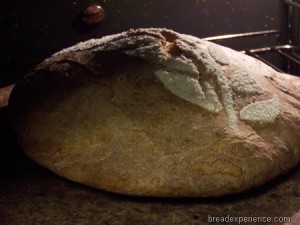
Bake for 10 minutes and then turn the tray around, reduce the oven temperature to 400°F and bake for a further 20-25 minutes, or until the crust is a dark golden brown and the bottom sounds hollow when tapped.
As you can see from the photo above, the loaf didn’t rise very much during the final proofing; however, it had good “oven spring” during the baking cycle.
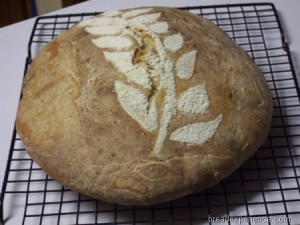
Remove from the oven and place on a cooling rack.
Here is the finished loaf. The crust cracked the middle of the fern a little bit, but not too bad.
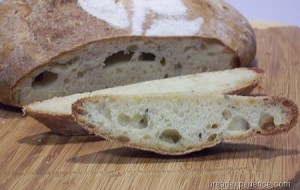
I like this bread. It has a unique flavor due to the rosemary and potato. It’s not quite like other savory potato breads I’ve made. It’s a little bit sweet because of the honey. I was very pleased that the crumb had nice holes and a good texture.
Thanks for joining me in the bread baking blog.
Happy Baking!
Cathy
MyKitchenInHalfCups says
Lovely lovely loaf! Great holes.
My stencil was a four leaf clover for St Pat’s day. It’s good bread no matter what the stencil!
Thanks for baking with us.
Danielle says
what a beautiful loaf of bread! and the crumb!!! very nice
Lien says
Beautiful loaf Cathy. I love how your stencil goes all the way over the bread! Perfect holes.
Thanks for baking with us.
Swathi says
Cathy beautiful bread, love way you stencil it. I will try some time.
Elizabeth says
I’m envious of your stencil success. It’s beautiful! And the crumb looks excellent too. Well done.
hobby baker says
Looks gorgeous! Love the stencil. Mine wanted to crack everywhere but my slashes, but at least not under my fern. ☺
Mary J says
Lovely Loaf. Now that I understand how to stencil, will have to give it a try. Happy Baking.M
Judy's Bakery & Test Kitchen says
What beautiful step by step! I just oohed and awed over your beautiful starter, and all the bubbles.
Thanks for showing how to stencil. It might be a good use for the plastic stencils that have been sitting in my closet. Thanks for explaining how to help keep it from cracking–cut around the edging!
Michelle says
Love the crumb! I’ve used stencils for quilting and there are literally 1000s of them to choose from and most quilting supply stores will have a nice variety of patterns.
Pam De Voe says
What an intriguing bread!
By the way, what do they mean by “strong bread flour?”
Cathy (breadexperience) says
Hi Pam, I just used bread flour to make my version, but you could use high gluten flour which has more gluten than regular bread flour.