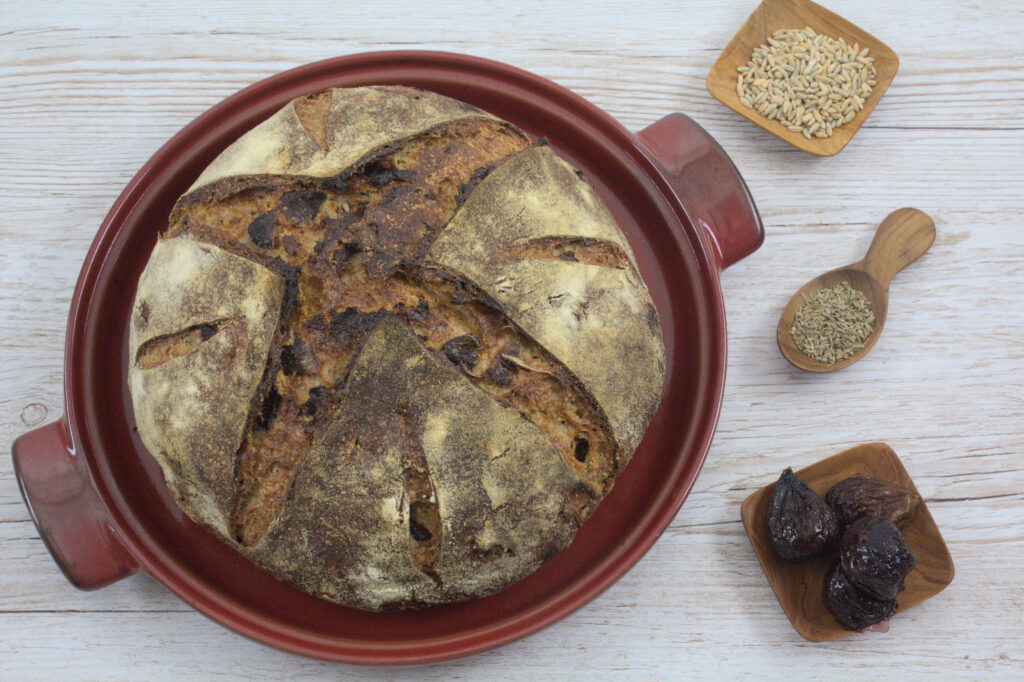
This Mixed Grain Sourdough Fig and Walnut Loaf blends a medley of flours—ranging from all-purpose and whole wheat to rye—into a harmonious base. The loaf is then accentuated with oven-dried figs and toasted walnuts for a complex flavor profile. Orange zest and anise seeds add a touch of citrus aroma and subtle spice, rounding out this unique bread.
The Amazing Fig Tree: A Testament to Growth and Abundance
In 2020, amidst the unpredictable whirlwind of the pandemic, I planted what was supposed to be a dwarf fig sapling in my front yard. Yet, seemingly unaware of its intended size, it has grown immensely. Three years on, this once petite tree stands tall and proud, a testament to resilience, its branches ardently stretching towards the sun.

Each year, in late summer to early Autumn, the tree becomes a delightful spectacle as it generously showers me with its bounty. This year, in particular, has been overwhelming. The tree has been so abundant with figs, I’ve hardly known what to do with them all!
Seeking a solution to this delicious problem, I decided to dry some of this year’s bumper crop. The dried figs, packed with intensified sweetness, await their next destination—a culinary masterpiece, perhaps?
Speaking of masterpieces, I had all of those dried figs at my disposal, so, I was inspired to craft a special fig and walnut sourdough bread. Picture a loaf with pockets of this year’s sweet figs, complemented by the crunch of walnuts, all harmoniously embedded within tangy sourdough. Makes your mouth water, doesn’t it?

With the aroma of fresh sourdough wafting through our kitchens, we’re not just baking a loaf, but narrating a story of persistence, one delectable slice at a time.
Cheers to the journey, the growth, and, of course, the resilient fig tree that began it all!
How to dry figs in a conventional oven
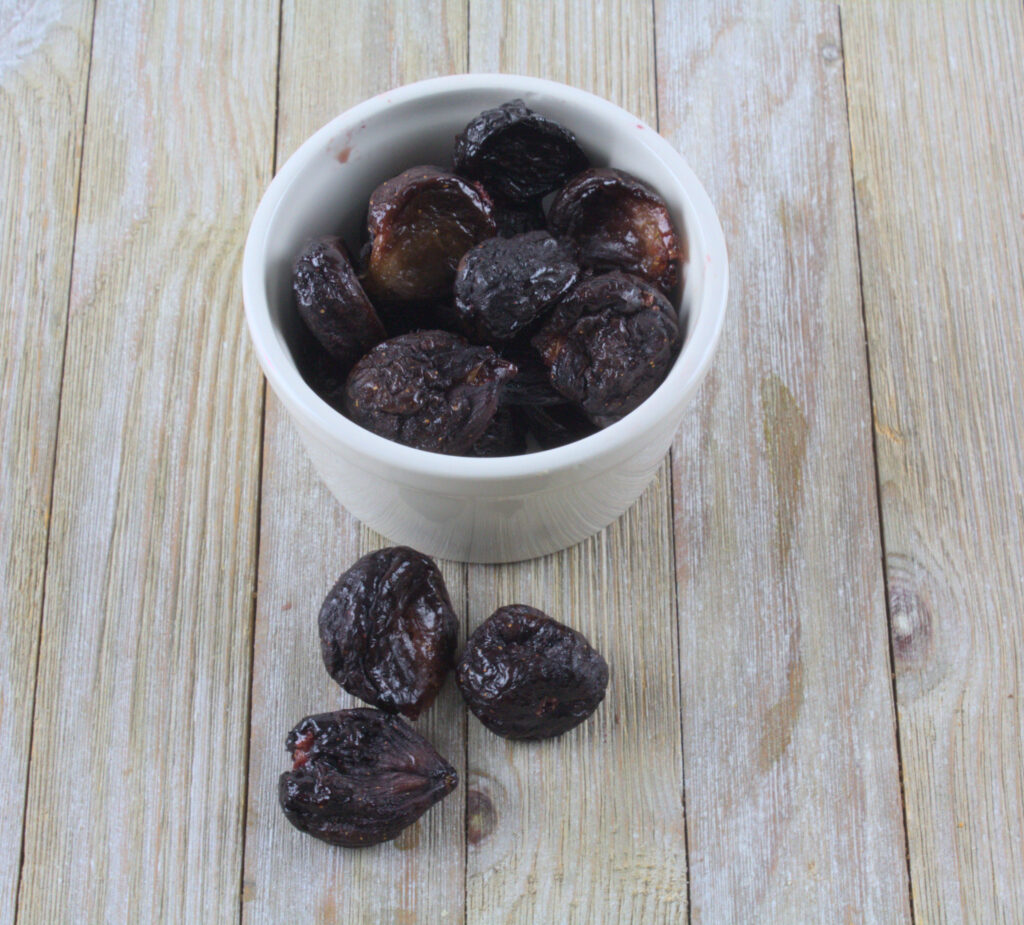
You can use store bought dried figs for this bread. However, if you have an abundance of fresh figs, here is an easy method for drying them in the oven.
- Dry 300 grams of fresh figs for this recipe or more if you want to store extra for snacking.
- Set your oven to the lowest temperature setting, around 170°F (77°C).
- Gently wash the figs under cold running water and pat them dry. Slice the figs in half lengthwise. If the figs are particularly large, you may consider cutting them into quarters. This will help them dry more evenly.
- Line a baking sheet with parchment paper or a silicone baking mat. Place the figs cut-side up on the baking sheet, making sure they are not touching each other. Place the baking sheet in the oven.
- To allow moisture to escape, you can prop the oven door open a couple of inches by sticking a wooden spoon in the door. This step is optional but it can help speed up the drying process.
- Depending on your oven temperature and the size of your figs, drying can take anywhere from 4 to 12 hours. Check the figs every couple of hours. You’re looking for a fig that is leathery but still pliable, not crisp.
- For even drying, you may flip the figs every few hours, although this is not strictly necessary if you’re planning to dry them to a very leathery, almost crispy texture.
- Once the figs have reached the desired dryness, remove them from the oven and allow them to cool completely. They will continue to harden a bit more as they cool.
Store the dried figs in an airtight container. If you’ve properly dried them, they should keep for several months. For longer storage, you can also keep them in the refrigerator or freezer.
And there you have it—your very own oven-dried figs! These are perfect for snacking or incorporating into various recipes like this sourdough fig and walnut loaf.
How to toast walnuts for this Sourdough Fig and Walnut Loaf
- Preheat your oven to 350°F (175°C) to get it ready for toasting the walnuts.
- Spread the walnuts on a baking sheet in a single layer. It’s best to use a baking sheet with edges or a rimmed baking pan to prevent the walnuts from rolling off.
- Place the baking sheet with the walnuts in the preheated oven. Toast the walnuts for approximately 6 to 8 minutes. Keep a close eye on them as they toast quickly and can easily burn.
- The walnuts are ready when they turn golden-brown and release a rich nutty aroma. If you see any dark spots or the walnuts have a burnt smell, they have toasted for too long.
- Remove the baking sheet from the oven and transfer the toasted walnuts to a cool plate or a separate baking sheet. Allow them to cool completely before using them in your Fig and Walnut Sourdough Bread recipe. The walnuts will continue to crisp up as they cool.
- Optional: Rub Off Skins (if desired): If your walnuts have the skins on, you can optionally rub them in a clean kitchen towel to remove some of the bitter skins. While this step is not necessary, it can enhance the flavor and appearance of your bread.
Once the walnuts are toasted and cooled, proceed with the Sourdough Fig and Walnut Loaf recipe, incorporating the toasted walnuts and dried figs into the dough during the mix-in step. The combination of toasted walnuts and dried figs will add a delightful flavor and texture to your sourdough bread.
More ideas for enjoying an abundant harvest of figs
- These Fig Preserves with Fennel & Bay utilize an Italian method for preserving figs. The preserves taste lovely spread on this Sourdough Fig and Walnut Loaf.
- Try this Sourdough Fig Walnut Flatbread with Caramelized Onions – made with a soft and slightly sticky, naturally leavened dough. The flatbread dough, which is flavored with chopped fresh rosemary, and enriched with rosemary-infused olive oil, and potato water, is very tasty in its own right. When you add the toppings – wine-soaked dried figs, caramelized onions flavored with orange zest, and toasted walnuts – it’s over the top
- Sourdough Ekmak with Fig Jam – a delightful sweet bread shaped like a boat, is made with an enriched dough filled with ricotta cheese and topped with jam.
Mixed Grain Sourdough Fig and Walnut Loaf
- Yield: 1 Large Loaf (1200 grams) 1x
Description
This Mixed Grain Sourdough Fig and Walnut Loaf blends a medley of flours—ranging from all-purpose and whole wheat to rye—into a harmonious base. The loaf is then accentuated with oven-dried figs and toasted walnuts for a complex flavor profile. Orange zest and anise seeds add a touch of citrus aroma and subtle spice, rounding out this unique bread.
Ingredients
- 100g (1/3 cup + 1/2 Tbsp.) active sourdough starter (100% hydration)
- 400g (3.2 cups) all-purpose flour + additional for sprinkling
- 100g (scant 3/4 cup) whole wheat flour
- 100g (~1 cup) rye flour
- 300ml-350ml water (divided)
- 12g (2 rounded tsp.) sea salt
- 30 grams (~1 1/2 Tbsp.) honey
- 1–2 tsp (1 small) orange, finely zested
- 1 tsp. Anise seeds, optional
- 150g (5.35 oz.) dried figs, chopped (store bought or dry your own)
- 75g (3/4 cup) toasted walnuts, chopped, optional
Instructions
Autolyse:
- In the bowl of a stand mixer, combine the starter with 300 grams of water. Stir to disperse. Add in the all-purpose, whole wheat, and rye flours. Mix on low speed 2-3 minutes until there are no dry bits of flour. The dough may be a bit dry at this point, but it will become more hydrated after adding the figs. Cover the bowl with a damp cloth and let it rest at room temperature for 45 minutes. This resting period is called the autolyse and helps improve dough hydration and gluten development.
Add the Salt:
- After the autolyse, add the salt and continue mixing until everything is well combined. Sprinkle in additional water as necessary to dissolve the salt. Cover, and let rest 15 minutes.
Add the Mix-ins:
- Add the honey, orange zest, and anise seeds (if using) and mix on low speed until combined. Remove the dough to a lightly floured work surface, and gently fold in the dried figs and walnuts (if using), until they are evenly distributed throughout the dough.
Bulk Fermentation:
- Place the dough in a large bowl. Cover with a damp cloth, and let the dough rest at room temperature for about 3-4 hours. During this time, perform a series of folds, 2-3 times, every 30 minutes for the first 1 1/2 hours. To do a stretch and fold, wet your hands, then grab one side of the dough, stretch it gently, and fold it over the center of the dough. Repeat this process for all four sides of the dough. Cover, then allow the dough to rest for an additional 1 – 1 ½ hours.
Shaping:
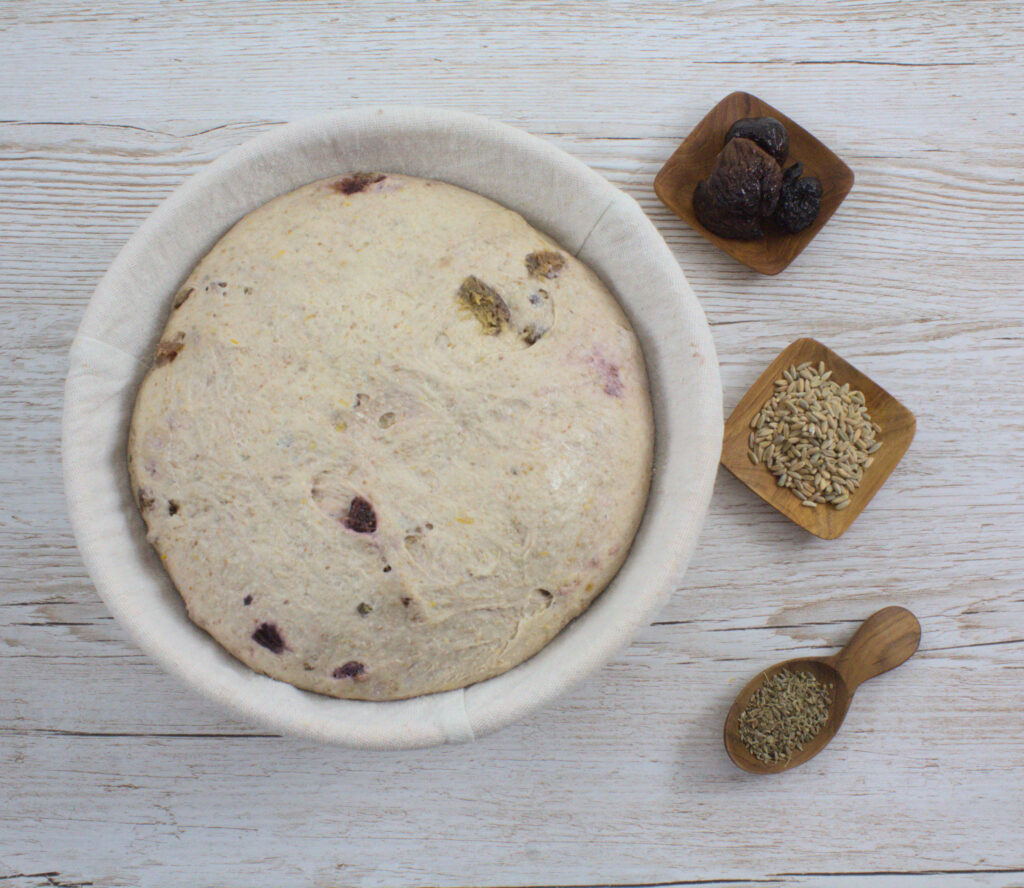
- Lightly flour your work surface and carefully shape the dough into a round boule. To do this, fold the edges of the dough towards the center, creating tension on the surface. Once the dough is shaped, place it seam side up in a lined 9-inch round proofing basket.
Final Proof:
- Cover the dough with a clean kitchen towel or a plastic produce bag to prevent drying. Allow the dough to proof at room temperature for about 1.5 to 2 hours, or until it has visibly risen and is ready for baking. To check if it’s ready, lightly press the dough with your finger; it should spring back slowly.
- Alternately, allow it to proof on the counter for 1 hour, then place in the refrigerator overnight.
Preheat the Oven and Baking Stone or Bread Pot:
- About 30-45 minutes before the dough has finished its final proofing, preheat your oven to 450°F (230°C). If using a baking stone or baking steel, place it on the middle rack of the oven while it preheats.
- Carefully transfer the proofed dough onto parchment paper or a floured peel. Score the top of the dough with a sharp knife or bread lame to allow for controlled expansion during baking.
- If using a baking stone or baking steel, slide the dough, along with the parchment paper, onto the preheated stone or steel.
- If using a Dutch oven, or bread cloche, carefully invert the dough from the proofing basket to the parchment paper and carefully place the loaf, on the parchment onto the base of the preheated pot.
Baking with Baking Stone or Baking Steel:
- Bake the bread for 25-35 minutes, or until it has a golden-brown crust.
Baking with a Dutch Oven or Bread Cloche:
- If using a Dutch oven or bread cloche, cover the pot with its lid and bake for 20-25 minutes. Then, remove the lid and continue baking for an additional 15-20 minutes, or until the crust is golden brown.
Cooling:
- Once the bread is baked, remove it from the oven and allow it to cool on a wire rack for at least 2 hours, preferably overnight, before slicing. This allows the crumb to set, the flavors to meld, and results in a better texture.
- Category: Sourdough Fig Bread
- Method: Sourdough
Happy Baking!
Cathy
Enya says
Very delicious ! Thank you for this nice receipt witch is for everyone the best taste in our family !
Your website have great photos and a nice description for you receipt ! Thank you for all and go on !