This Sprouted KAMUT Bread is naturally sweet and tender due to the sprouted grains.
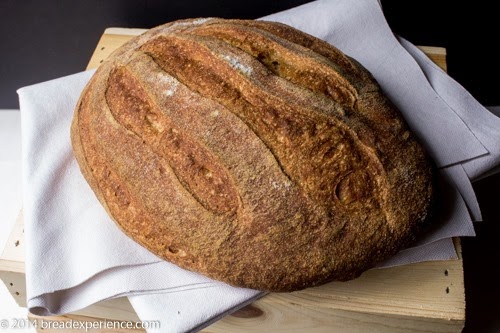
Incorporating sprouted grains into loaves makes them more easily digestible and improves the nutritional quality of the bread. Using sprouted wheat also allows the natural sweetness and tenderness of the wheat to shine through.
I’ve experimented with different types of sprouted breads over the past several years. So I was delighted when Peter Reinhart released his new book, Bread Revolution, which focuses on breads made with sprouted wheat and other grains. Now, I can experiment some more.
I have several of his books. He always seems to be on the cusp of what is going on in the world of bread baking. I’m looking forward to learning more from him at this year’s Asheville Bread Festival.
Last year, at the Asheville Bread Festival, in addition to the great teaching, I also met the owners of To Your Health Sprouted Flour Co and bought several bags of their sprouted flour.
When I was cleaning out my cupboards to make the Mixed Grain Loaf the other day, I realized the sprouted KAMUT flour needed to be used soon so I started experimenting with that flour first.
For this loaf, I began with the master formula for making sprouted whole wheat bread. I learned this formula in one of Peter Reinhart’s workshops a couple of years ago. It’s the one I used for this Whole Wheat Bread with no added fat or sweetener.
This time, I used 500 grams of sprouted KAMUT flour and adjusted the rest of the ingredients using bakers’ percentages.
I wanted a different type of loaf so I shaped it as an oval and baked it on a baking stone rather than in a loaf pan. I attempted to slash this loaf to resemble sprouts, but I ended up with a tear-shaped loaf. Or, perhaps if you use your imagination, it could be considered a wheat berry shape.
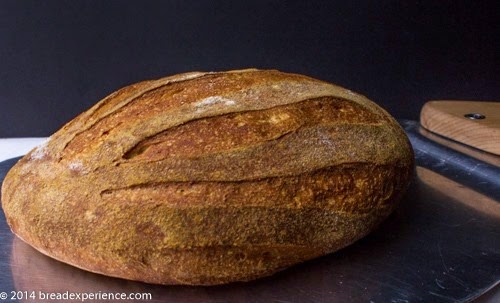
Sprouted KAMUT Bread
Makes: 1 large loaf
Adapted from this sprouted bread formula and Peter Reinhart’s Bread Revolution
| Ingredient | Grams | % |
| Sprouted KAMUT flour | 500 grams | 100% |
| Fine sea salt | 8 grams | 1.6% |
| Instant yeast | 5 grams | 1.0% |
| Water, room temperature | 450 grams | 90% |
Mix the Dough
In a large bowl, whisk together the sprouted flour, salt, and yeast. Pour in the water gradually and mix with a Danish dough whisk or big wooden spoon until the dough is fully hydrated. You can also use a stand mixer for this, but it’s not necessary.
Don’t add any additional flour. Allow the dough to absorb the water. Let it rest uncovered for 5 minutes. Then continue mixing with the Danish dough whisk or by doing turns-and-folds in the bowl until the dough begins to develop. During this time, the dough should thicken but it will still be sticky.
Stretch and fold the dough
Using a dough scraper or spatula, transfer the dough to a lightly oiled area. Stretch and fold the dough over itself from the top, bottom, and sides. You can use oiled hands for this part to make it easier. I didn’t want to add any oil, so I did the folds and turns in the bowl and used the dough scraper to scrape down the sides of the bowl.
Refer to this post for a photo tutorial of the fold-and-turn method.
The dough should firm up some after the fold and turns, but it will still be soft. If you do the folds and turns on the work surface, cover the dough with the bowl. If you do them in the bowl, like I did, cover the bowl with plastic wrap or a kitchen towel.
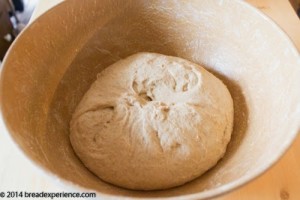
Perform 3-4 additional stretch and folds of the dough at 15-minute intervals. The intervals can be between 5 and 20 minutes. I found that 15 minutes worked well. The dough should firm up each time you perform the stretch and fold. After the final one, it should be soft and supple and tacky, but not sticky.
Bulk Ferment at room temperature or cold ferment in the fridge overnight
At this point, you can let the dough bulk ferment for 1 1/2 to 2 hours, then bake the loaf or place it in the refrigerator to ferment overnight. I opted to let it ferment overnight in the refrigerator.
Shaping the loaf
After the bulk ferment, shape the loaf into a boule and let it rest on the counter for 10 –15 minutes. Then shape it into an oval (or the desired shape) and place it in a lined banneton basket sprinkled heavily with (brown or white) rice flour.
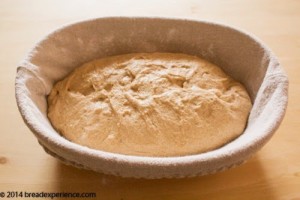
Alternately, you can shape it into a loaf shape and place it in a 9” x 5” loaf pan to proof.
Proof the loaf
Cover the loaf with plastic wrap and let it proof for 1 to 1 1/2 hours at room temperature. During this time, the dough should only increase in size by 1 1/2 times it size. You’ll know it’s ready when it springs back when you poke it with your finger. If it doesn’t spring back, but holds the dimple, it’s over proofed. If it over proofs, it will be too heavy and might fall during the bake cycle.
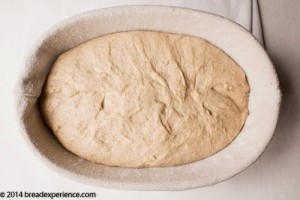
Bake the loaf
If you are baking a hearth loaf, about 45 minutes before you plan to bake the loaf, preheat the oven to 450 degrees F. with a baking stone on the bottom rack and a steam pan (or iron skillet) on the top rack.
After the final proof, carefully flip the loaf out of the proofing basket and onto a floured baking peel or parchment paper. Score the loaf in the pattern of your choice. Then, using a baking peel, slide the loaf (on the parchment paper) onto the preheated baking stone. Spritz the loaf with water and quickly add 3 or 4 ice cubes to the steam pan. Then close the oven door.
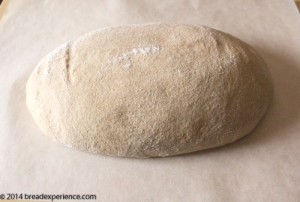
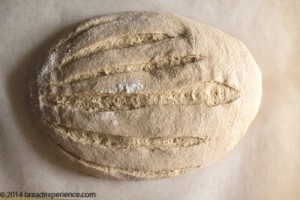
Bake the loaf for 15 minutes, then rotate it for even baking, then bake the loaf for 15 – 20 more minutes until it is golden brown and sounds hollow when thumped. The internal temperature of this loaf should be 200 degrees F.
Transfer the loaf to a wire rack to cool for at least 30 minutes before slicing and serving.
If you are baking it in a loaf pan, just preheat the oven to 375 degrees F. and bake the loaf for 25 minutes, and then rotate and bake it for an additional 25 to 40 minutes. The loaf should be golden brown and the sides should be firm and not squishy to the tough. If using an instant-read thermometer, it should read 190 degrees F. Let the loaf cool in the pan for 10 minutes before removing to a wire rack to cool completely.
Pay close attention because you want to make sure this bread gets done all the way through or it will be gummy on the inside.
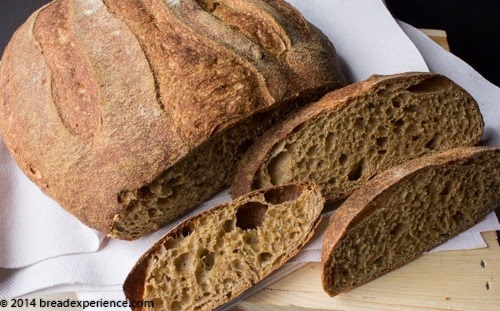
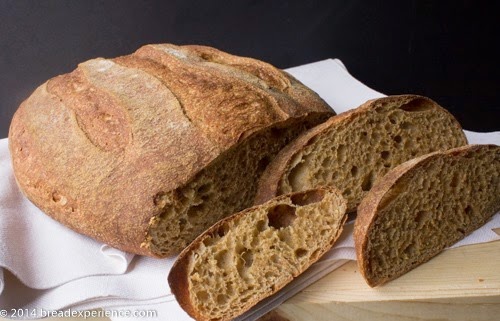
This bread has a complex and earthy smell and a sweet, non-bitter flavor. The texture is perfect for a slice of toast or a sandwich. It is crusty on the outside and soft and fluffy on the inside. It tastes good toasted with cheese on it.
I placed my loaf in a plastic bag to store it and although the texture started out being chewy, it softened up. If you prefer an artisan-type loaf with a chewy crust, then don’t place it in a plastic bag.
Happy Baking!
Cathy
Leave a Reply