This old-fashioned Blackberry Jam is made the traditional way with no pectin, just fresh fruit and sugar and a little lemon juice to assist in the gel setting.
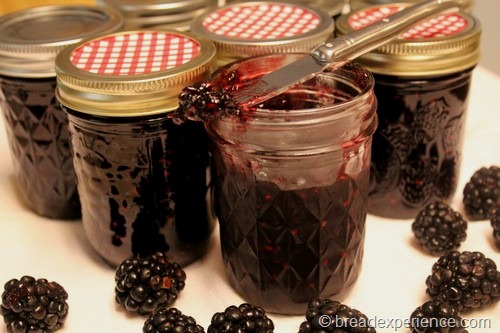
My taste tester and I visited one of my favorite farms on the 4th of July. I got a flat of blackberries and a peck of peaches. You know what that means? It’s time to jam!
I started my jam session with this old-fashioned Blackberry Jam. It’s a good thing we got a whole flat because I ate a bunch before I got around to making the jam. The berries and the jam are exceptional! I look forward to enjoying this jam when the berry season is over.
This jam is considered a long-boil soft spread, similar to the strawberry jam I made in June. For these types of jams, it’s best to use three parts fully-ripe fruit to one part slightly under-ripe fruit so that the under-ripe fruit (which usually has a higher pectin content), will help the gel set.
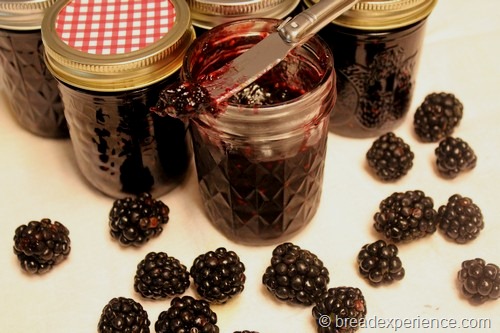
Old-Fashioned Blackberry Jam
Yield: About seven or eight 8-ounce (250 mL) jars
Adapted from: Ball Complete Book of Home Preserving and Keeping The Harvest: Discover the Homegrown Goodness of Putting Up Your Own Fruits, Vegetables and Herbs by Nancy Chioffi & Gretchen Mead
Ingredients:
- About 10 cups crushed blackberries (3 quarts berries)
- 6 3/4 cups granulated sugar (about 3/4 cup for each cup of fruit) I used about 6 1/4 cups
- 4 T lemon juice
- 2 tsp organic butter (optional, to reduce foam)
Directions:
1)Prepare canner, jars, and lids.
For detailed instructions on water-bath canning, refer to the instructions at the National Center for Home Preservation.
2) Crush and measure the berries. Place the berries into a large, deep, stainless steel pot or kettle. Add the sugar and lemon juice (if using). Bring to a boil over medium heat, stirring constantly to dissolve the sugar. You can remove some of the seeds using a sieve if desired. I just crushed the berries seeds and all.
3) Boil until gel sets. Boil rapidly, stirring frequently until the mixture thickens (or for a firm jam, boil until the mixture reaches nine degrees over the boiling point of water). I used the plate-in-the-freezer method to determine when the gel was set. With this method, you place a plate in the freezer and test the gel periodically by placing a drop of gel on the plate. When the jam doesn’t run, the gel is set.
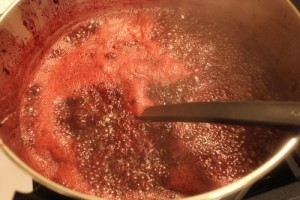
4) Remove from heat and skim off the foam. I added a couple of teaspoons of organic butter to the gel at this stage to reduce the foam. I forgot to take a photo but before I added the butter, the foam was covering the pot. In the photo below, the foam is almost gone.
5) Ladle the jam into hot, sterilized canning jars. Leave 1/4 inch headspace. Remove air bubbles if necessary with a bubble remover and headspace tool. Wipe the edges clean. Center lid on jar. Then screw the band down until resistance is met, then increase to fingertip-tight.
6) Process in a boiling-water bath. Place the jars in the canner, ensuring they are completely covered with water. Bring to a boil and process for 10 minutes in altitudes up to 1,000 feet.
If you live at a higher altitude or need more detailed instructions on water-bath canning, please refer to the instructions at the National Center for Home Preservation.
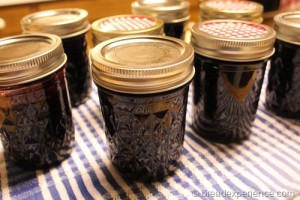
I had 7 full jars and 1 jar that was 3/4 full so it didn’t go in the boiling-water bath. It went in the refrigerator after it cooled down.
7) Remove the jars and store. Remove canner lid. Wait 5 minutes, then remove the jars, and let them sit on the counter for 24 hours to cool and ensure they are sealed correctly. You should hear the lids pop if they are sealed properly. Place the sealed jars in a cool, dry place for storage for up to a year. If any of the jars do not seal properly, place them in the refrigerator. They will last for a couple of months in the refrigerator.
I enjoyed some of the jam in the unprocessed jar, and then placed it in the refrigerator. The rest of the jars are going in my jam cabinet to give away as gifts.
You might also enjoy Blackberry Jam with Pectin
https://www.breadexperience.com/making-jam-blackberry-jam-using-pectin/
Happy Canning and Baking!
Cathy
Annie says
Yummy, can’t wait til our blackberries are ready, sometime in August!
Elwood says
Great minds think alike! This weekend we are heading up to the local upick farm for blackberries and peaches. I also am going to make jam. Your’s look yummy.
Cathy (breadexperience) says
Hi Elwood! Good to hear from you. Yes, great minds do think alike! Have fun picking and jamming.
Woodworkin' & Good Eats says
Hi, I’ll tell you the truth, I’m surfing the web trying to pick up a few new followers. I came across your blog, and wow, you have some truly good looking dishes here. My neighbor just bought over a huge bag of black cherries, do you have any good recipes using them? Maybe a black cherry easy jam, I’ve never tried making jam. My blog is a mix of cooking (grilling, smoking, and outdoor slow barbecue, and woodworking projects. Come on over, if you follow I will follow you back. Lets build up our follower’s lists, Steve
P.S. I’m just a beginner to blogging and needing a little morale boost.
Cathy (breadexperience) says
Hello Steve! Thanks for stopping by. Your blog looks great! You’re off to a good start. I have a recipe for cherry preserves here http://breadmakingblog.breadexperience.com/2010/07/making-jam-cherry-preserves.html
Anonymous says
just picked the berries and made this jam this morning – sensational taste and vibrant colour 🙂 thanks
Cathy W. says
So glad you enjoyed it