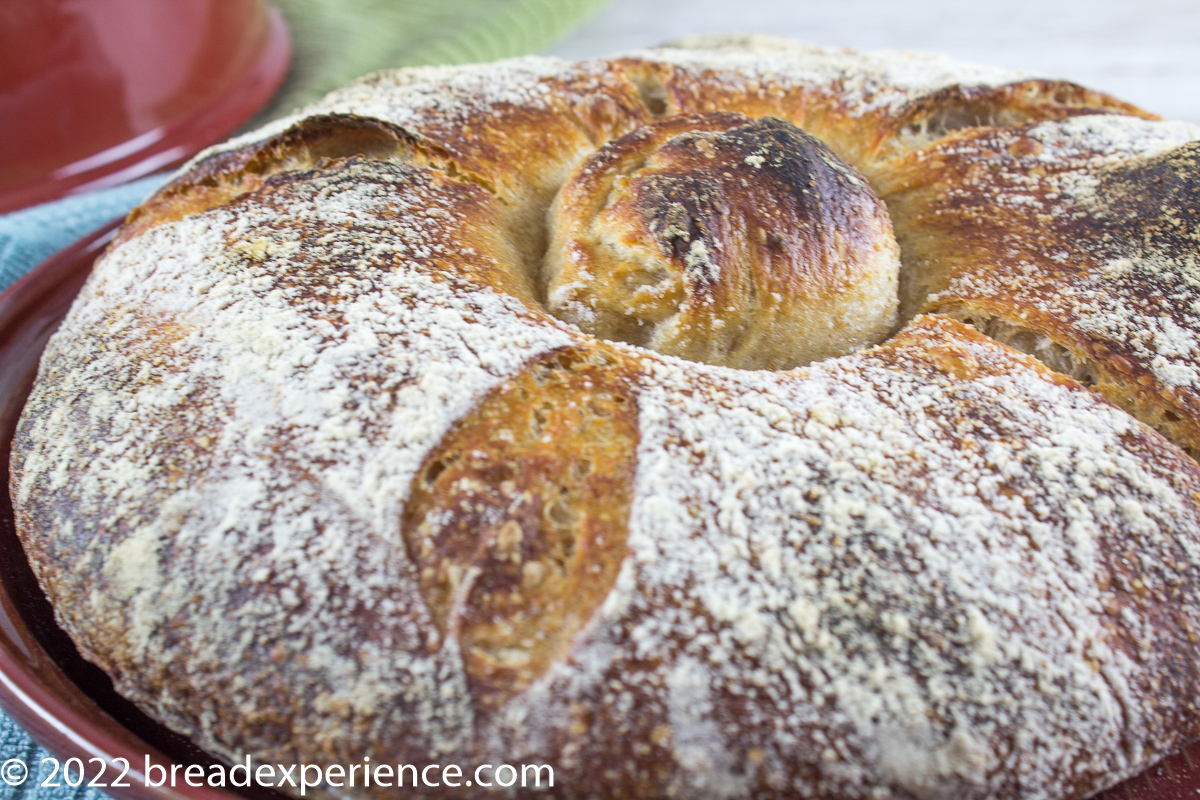
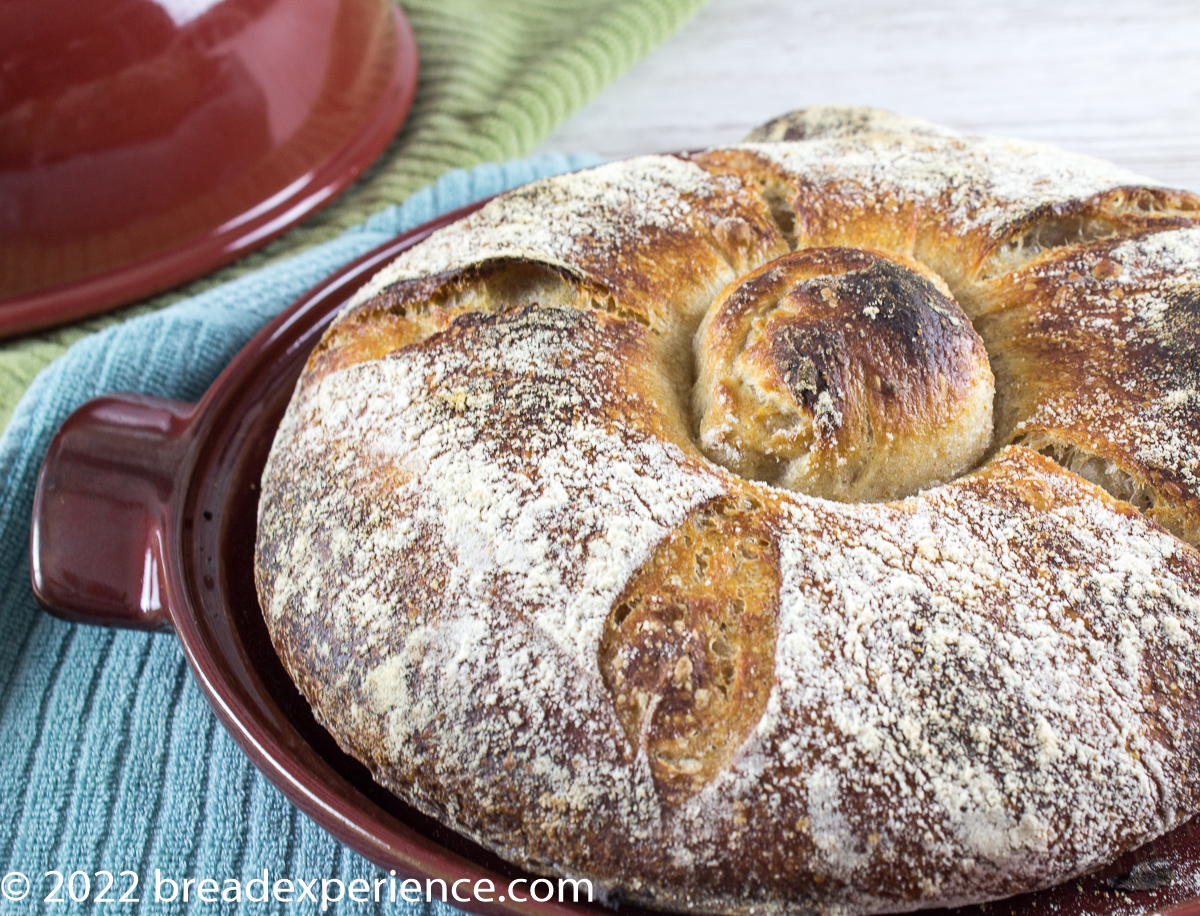
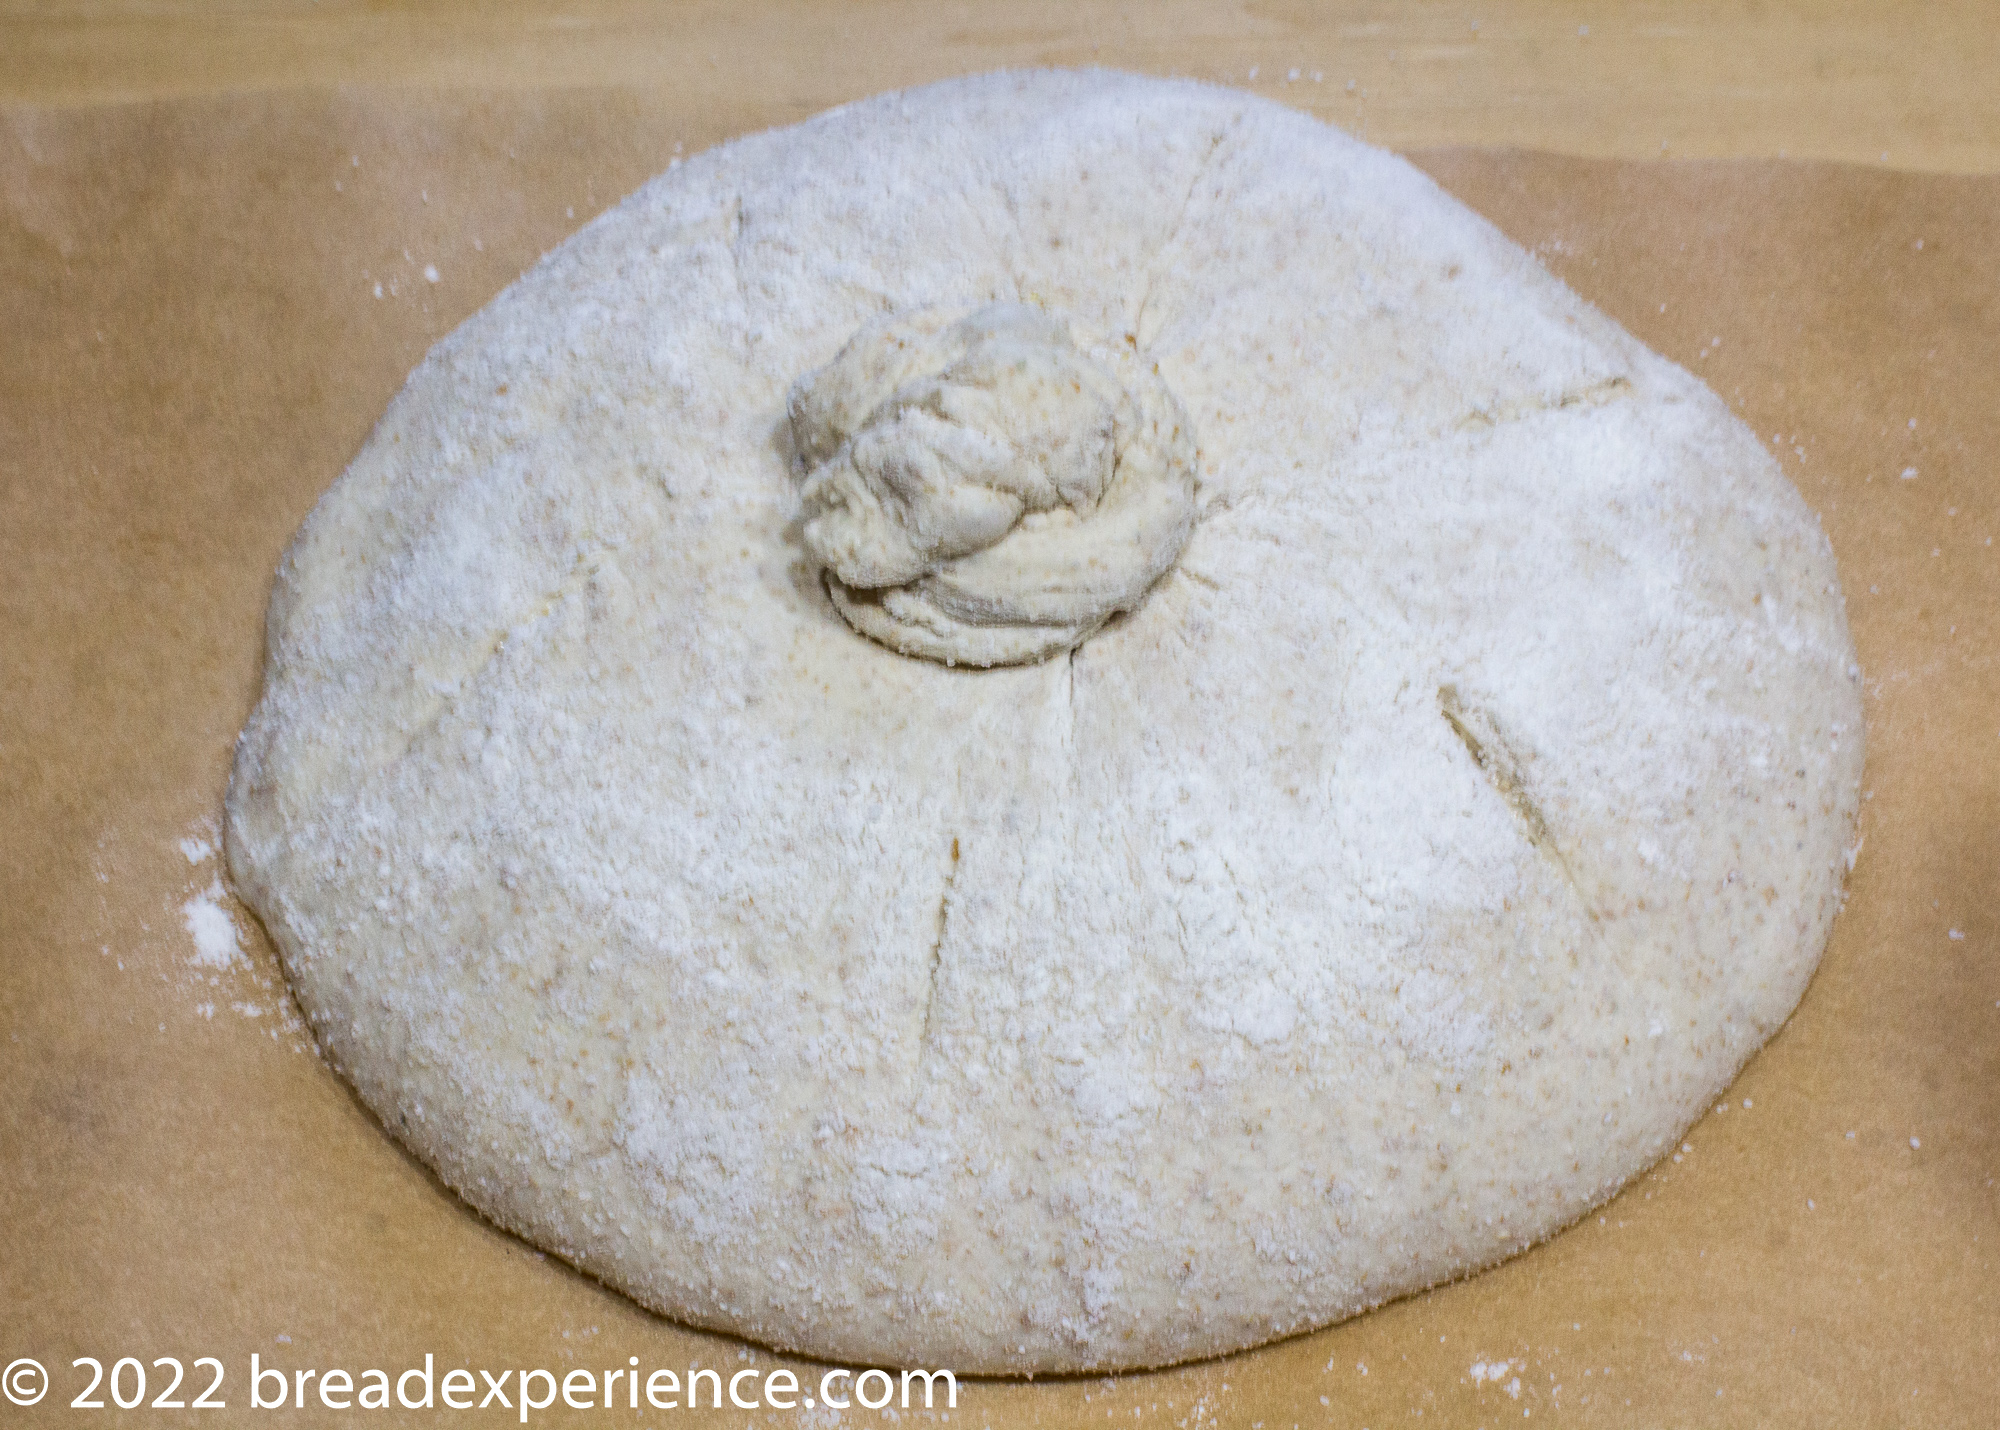
Pan Gallego, or Galician Bread, is a naturally leavened, high-hydration Spanish Bread made with a hint of rye and whole wheat flour. The distinctive characteristic of this bread is the unique knot tied on top of the loaf before baking.
I am the host kitchen for the Bread Baking Babes this month. I chose this unique bread as the monthly bake. Although it’s made with a higher hydration dough, it’s really easy to work with.
I first learned of this bread in Bryan Ford’s Book New World Sourdough. Artisan Bryan’s version includes a bit of rye, which I really like; however, some of the examples I’ve seen on the net only seem to use a portion of whole wheat but not rye.
According to the notes in the book, Bryan spoke with bakers in the area, and because he didn’t have access to the type of flour that is native to Galicia, Spain, they recommended using a strong white flour and rye.
You want enough rye flour to give the crumb distinct flecks, while at the same time, making sure the dough has enough strength to be able to knot the dough before baking.
He doesn’t specify whether to use white or whole grain rye. I used home-milled whole grain rye flour. It provides a lovely color and add to the rustic appeal of the loaf.
The formula makes two large loaves so I cut it in half and made one loaf for each bake. If you want more than one loaf, feel free to double the recipe.
The loaves featured in the book weren’t scored, but in some of the videos I watched, the baker scored the loaf and the knot. Refer to the video links in the notes below.
THIS POST MAY CONTAIN AFFILIATE LINKS. FOR MORE INFORMATION, PLEASE VISIT THE PRIVACY POLICY PAGE.
Two slightly different methods for proofing Pan Gallego
First method: Bulk cold ferment dough in bowl 8-10 hours, final proof on counter 3 hours in banneton before forming knot and baking
The first time I made this bread, I mostly followed the process as outlined in the book.
I made the full levain (200 grams) because I forgot that I had planned to cut the formula in half. I only used 100 grams in the final dough.
I used bread flour and rye in the final dough for this bake. I added a little bit of red fife flour in the levain to give it some color but it’s probably not enough to make a difference. Feel free to use your whole wheat of choice in the levain.
During the bulk proof, the dough proofs for 4 hours at room temperature, or until it is smooth and has a bubbly surface. Then the dough (in the bowl) goes in the refrigerator overnight to cold ferment for 8-10 hours.
Before the 4-hour bulk ferment on the counter, you complete two stretch and folds every 30 minutes. I utilized the coil method instead of stretching and folding the dough because the coil method worked so well for the high-hydration glass bread.

The next day, remove the dough from the refrigerator and immediately shape in to a boule, and then transfer it to a round proofing basket. The dough proofs in the basket for 3 hours before removing it and forming the knot.
I baked the loaf on a preheated baking steel at 475 F. with a steam pan underneath and placed ice cubes in the pan immediately after transferring the loaf to the baking steel. The book suggests an oven temperature of 500 degrees F., and then to reduce it after 10 minutes and bake for an additional 15 minutes at 475 F.
This is where you need to know your oven. At 500 degrees on a preheated baking steel, my loaves tend to burn on the bottom so I started at 475. I kept it at 475 pretty much the whole time but baked it longer than 25 minutes (about 30-35) and moved the loaf up a rack for the final 5 minutes or so of baking.
I had a couple of issues with this process:
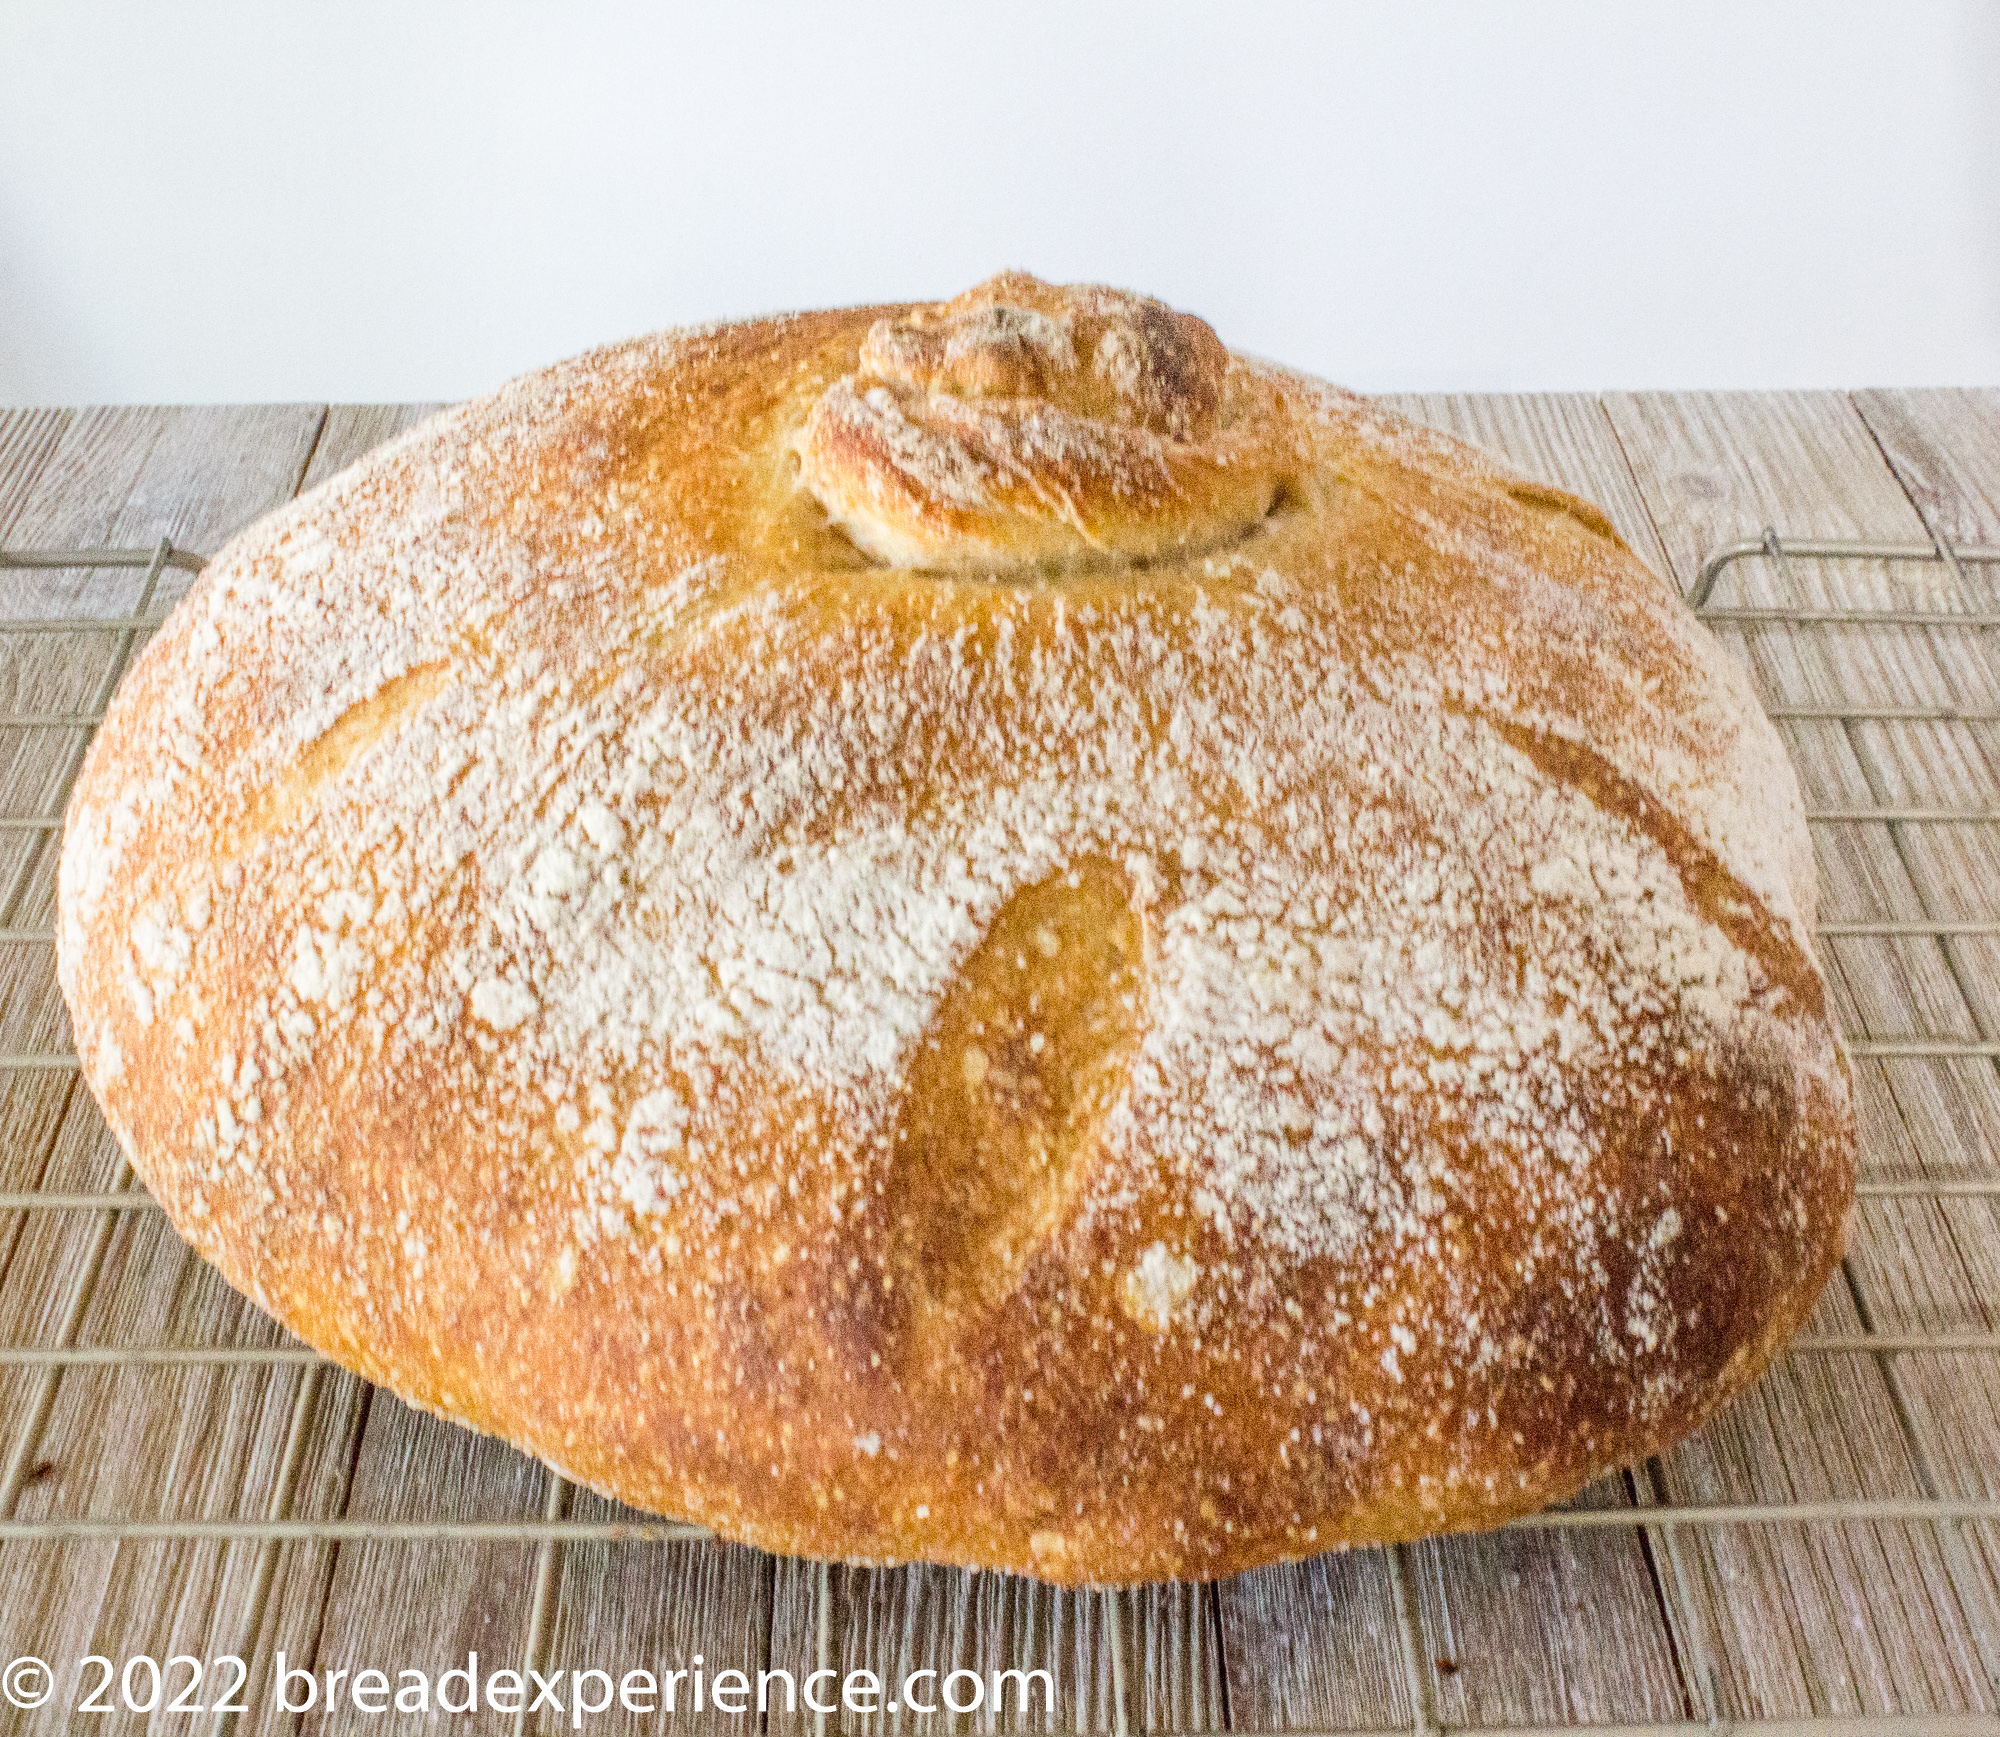
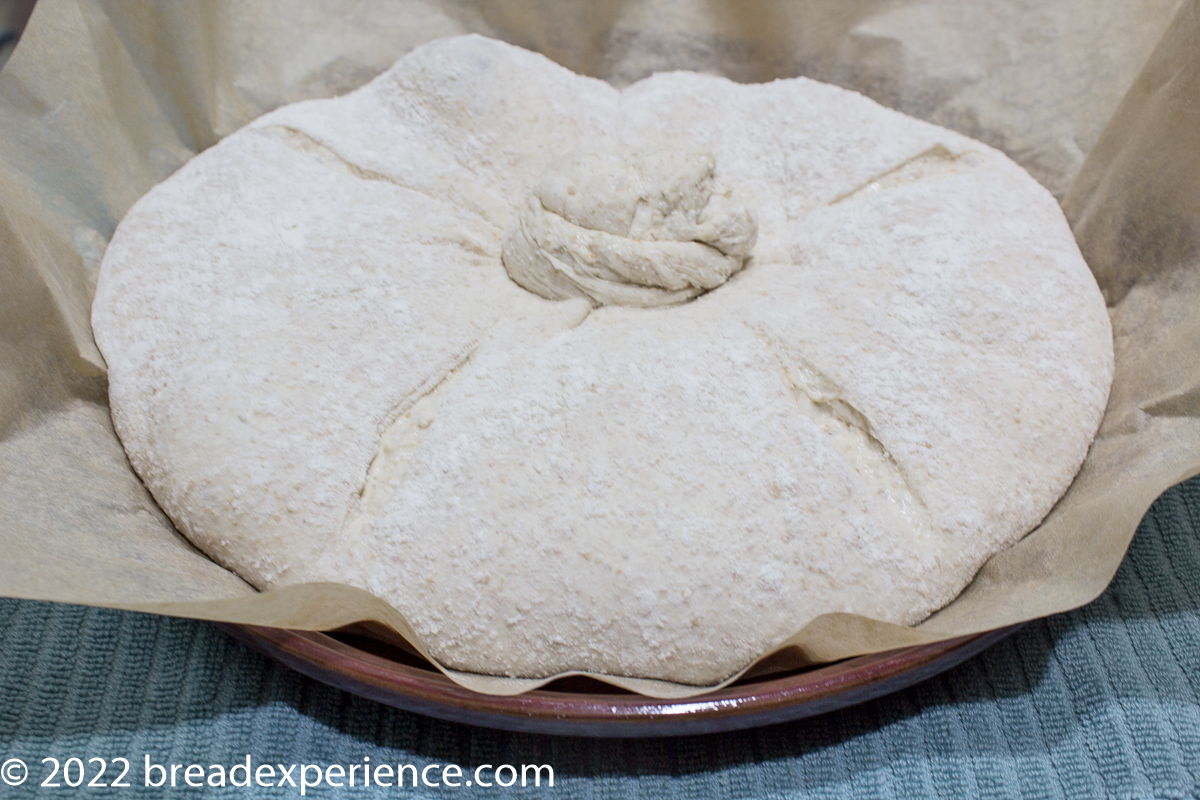
The dough was really slack after proofing in the banneton at warm room temperature for 3 hours. It was fairly easy to shape the knot, which is helpful, but the dough spread out, and I had a little trouble moving it to the parchment paper.
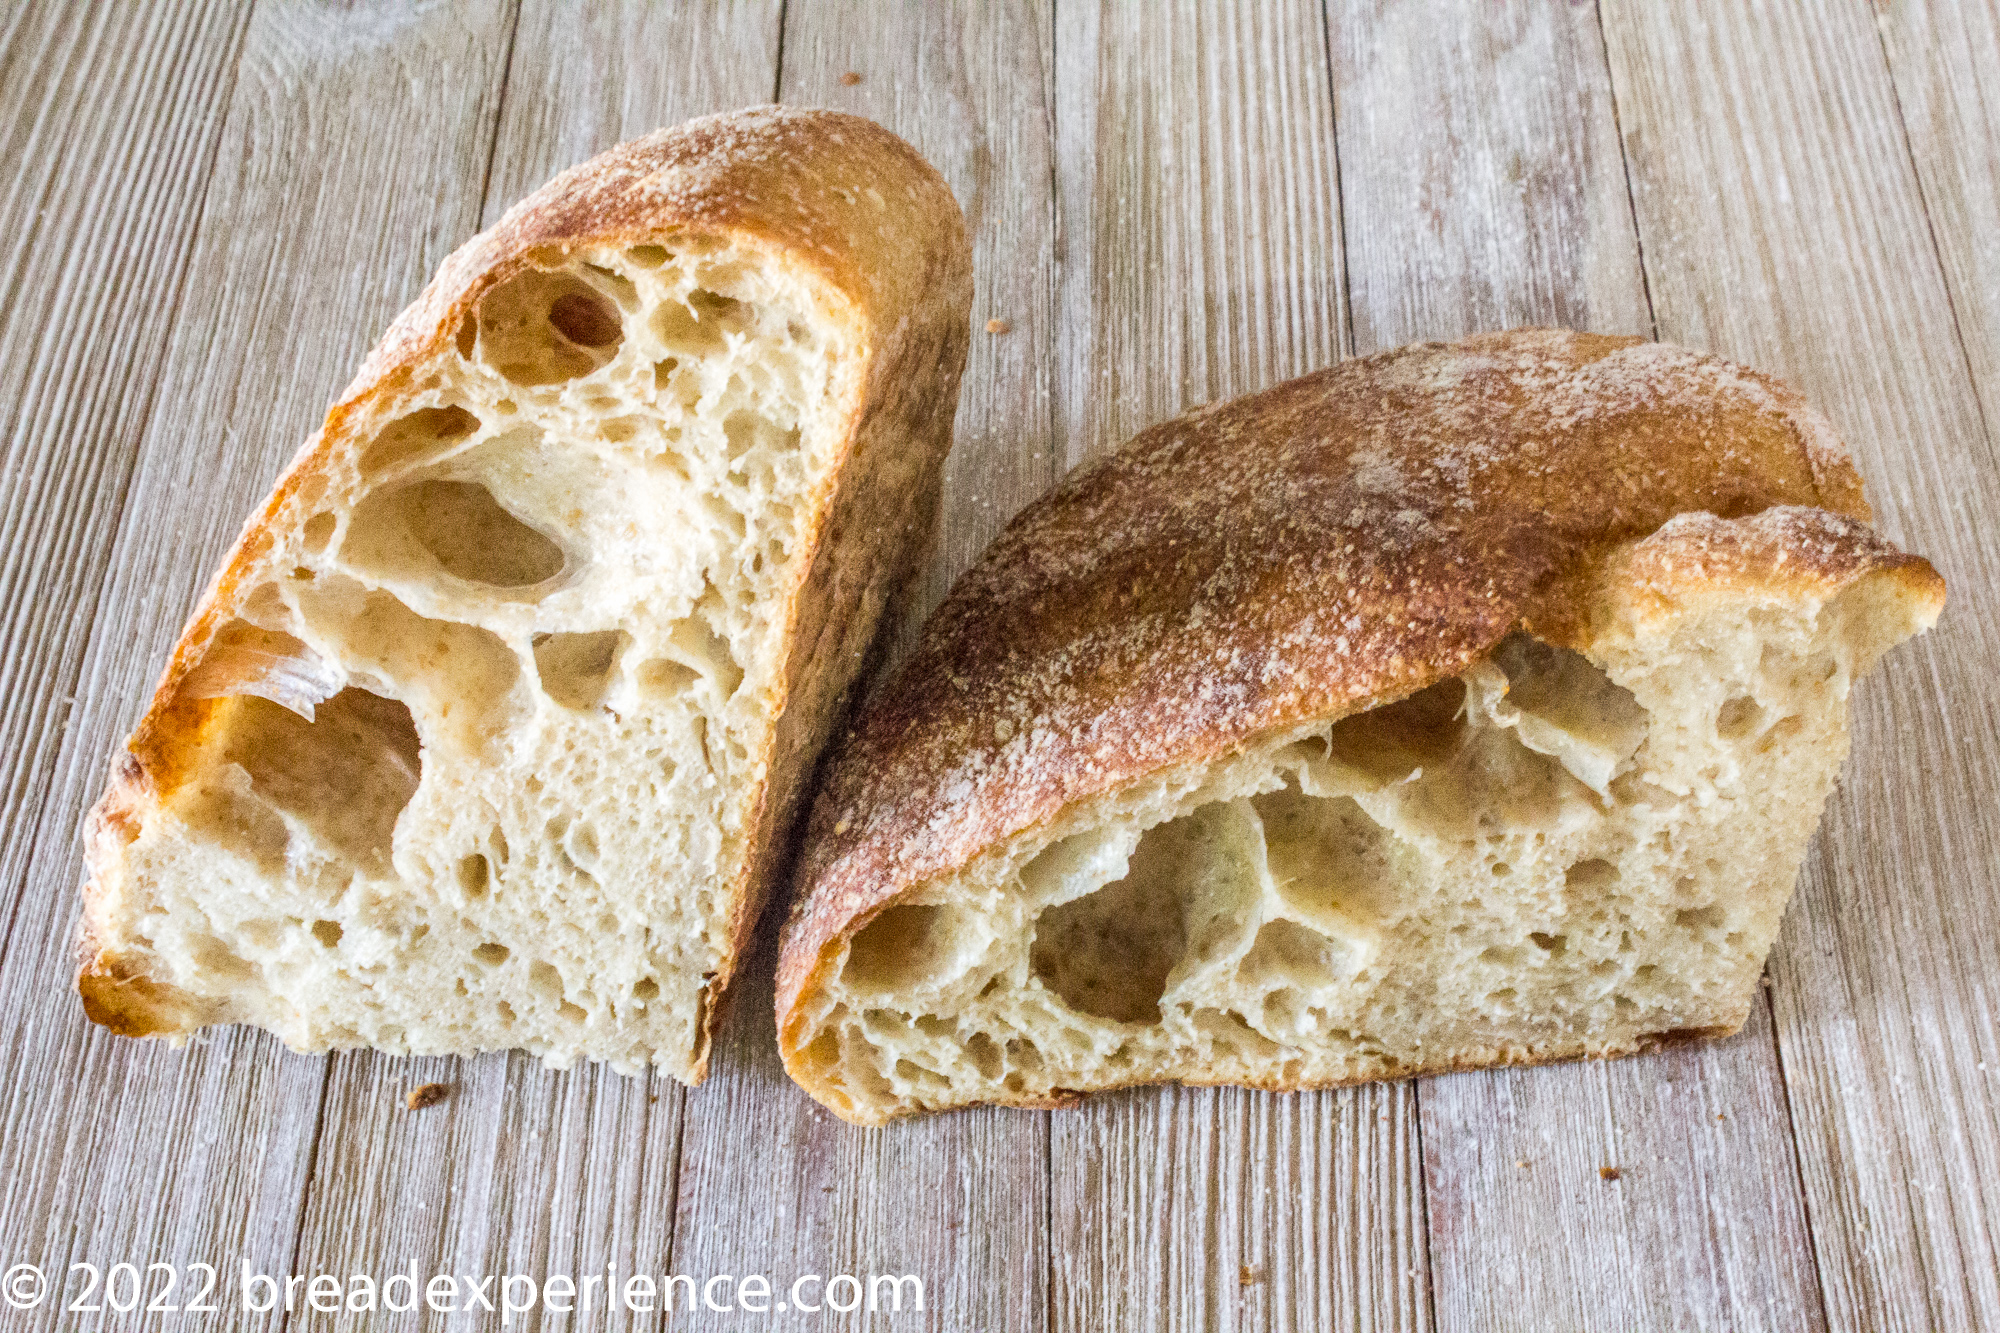
The loaf had great oven spring while baking and the crumb was beautiful. However, because it spread out, it ended up with an uneven shape.
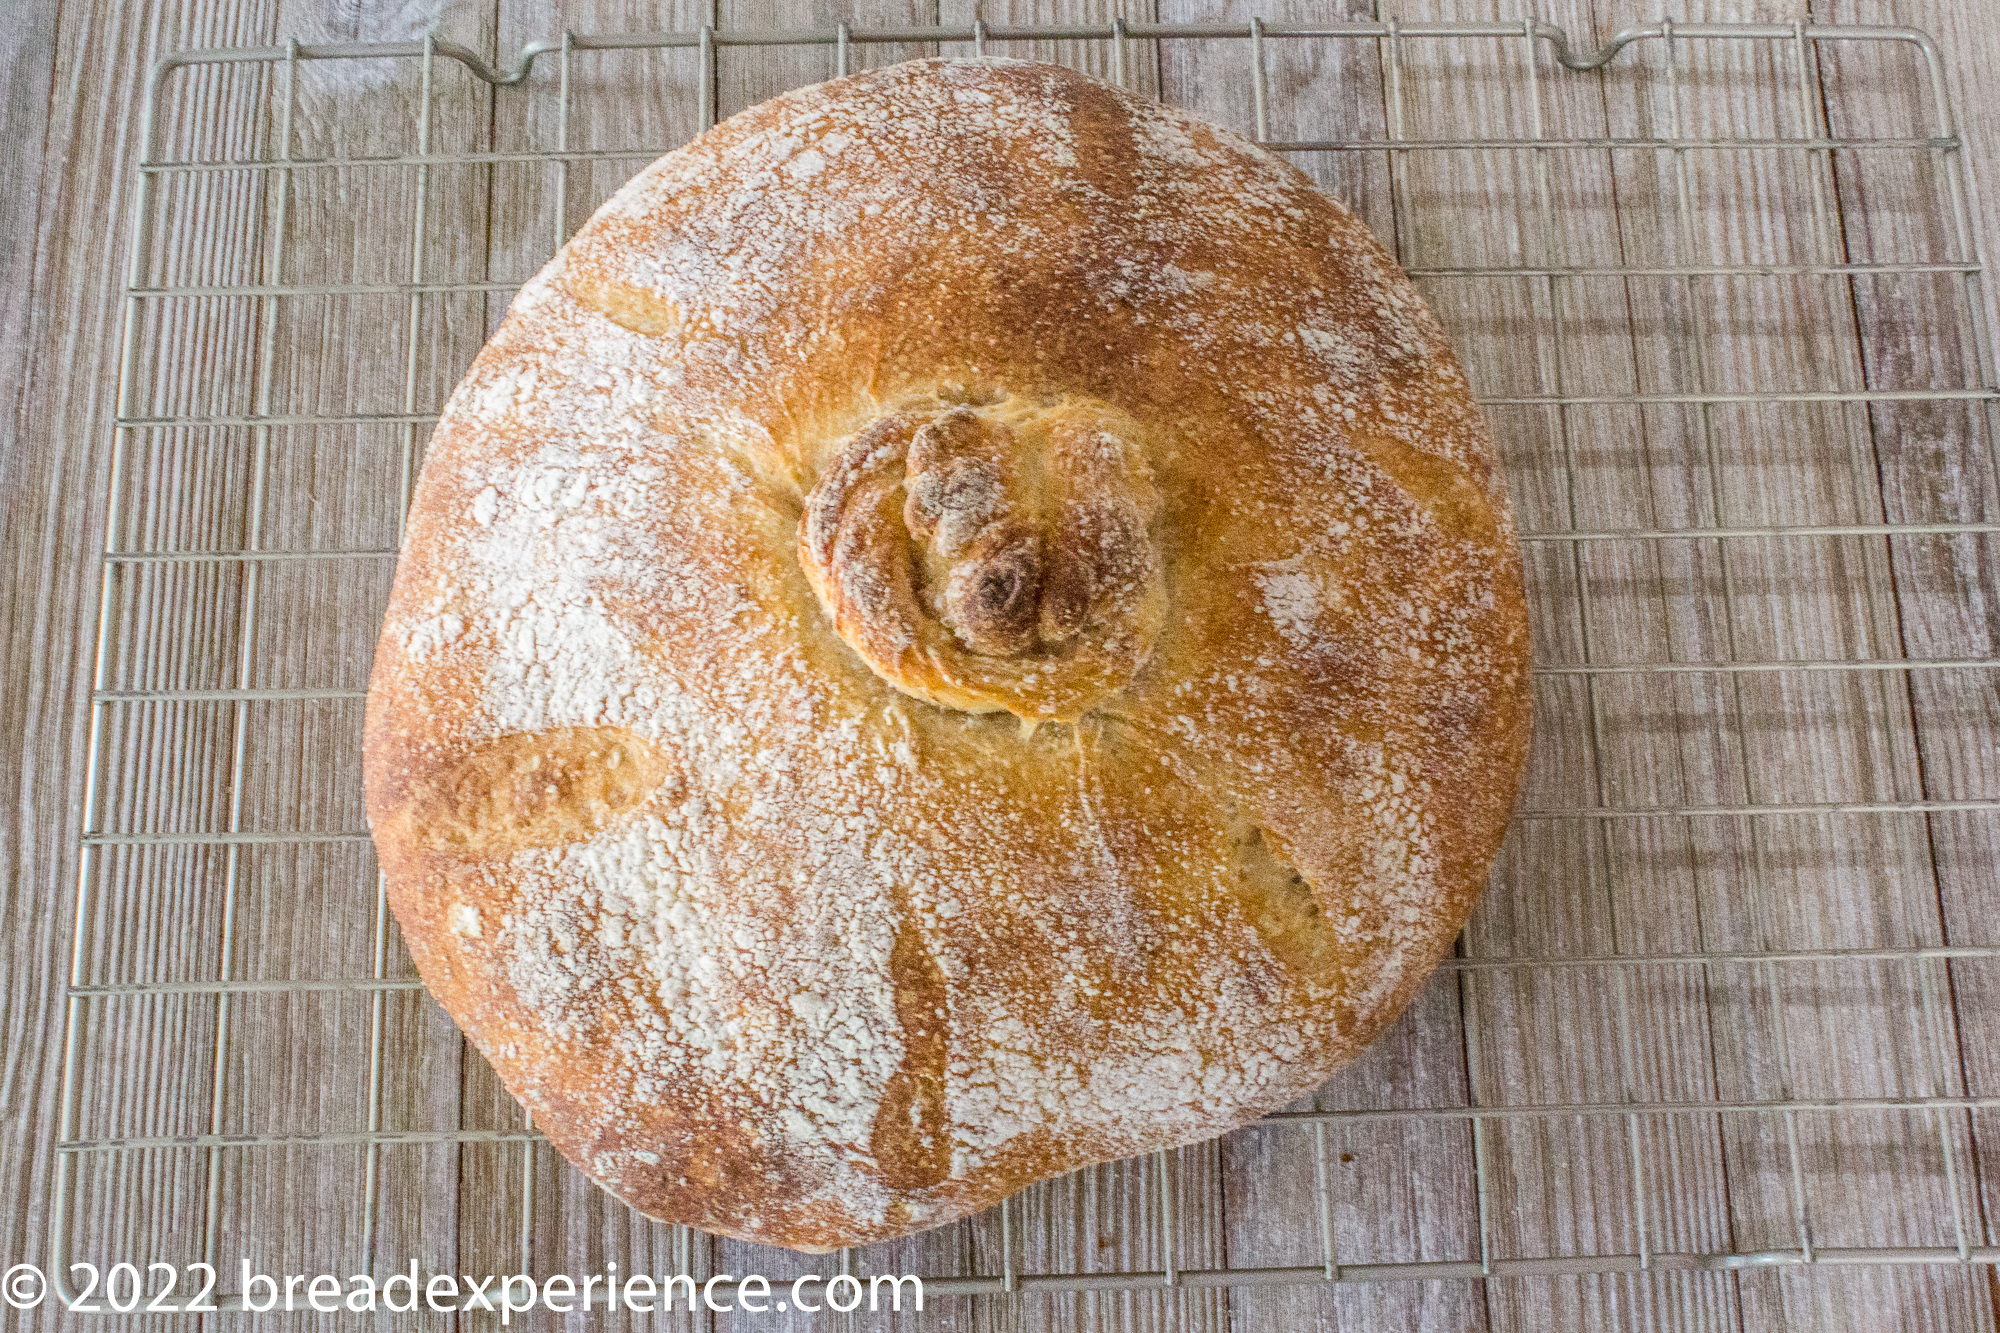
Although the holes look beautiful, and I love the soft texture, I prefer a slightly tighter crumb for these types of bread. Personal preference but I like to eat it with butter and it’s hard to do that with big holes.
2nd Method: Bulk ferment in bowl for 4 hours, shape & let proof 2-3 hours in banneton on counter; cold ferment overnight in banneton 8-10 hours; rest for 1-2 hours at room temperature (in basket) before forming knot and baking:
Taking the issues I had with the first bake in mind, I decided to make a few adjustments for the next bake.
I adjusted the ratios in the levain to equal 100 grams instead of 200 but also reduced the amount of starter used to 10 grams instead of 25. I ended up with a total weight of 98 grams after the levain rested overnight but that was close enough for my comfort.
I used 50/50 mix of KAF all-purpose flour to bread flour along with the rye because I was running out of bread flour. I couldn’t really tell much of a difference from the first bake.
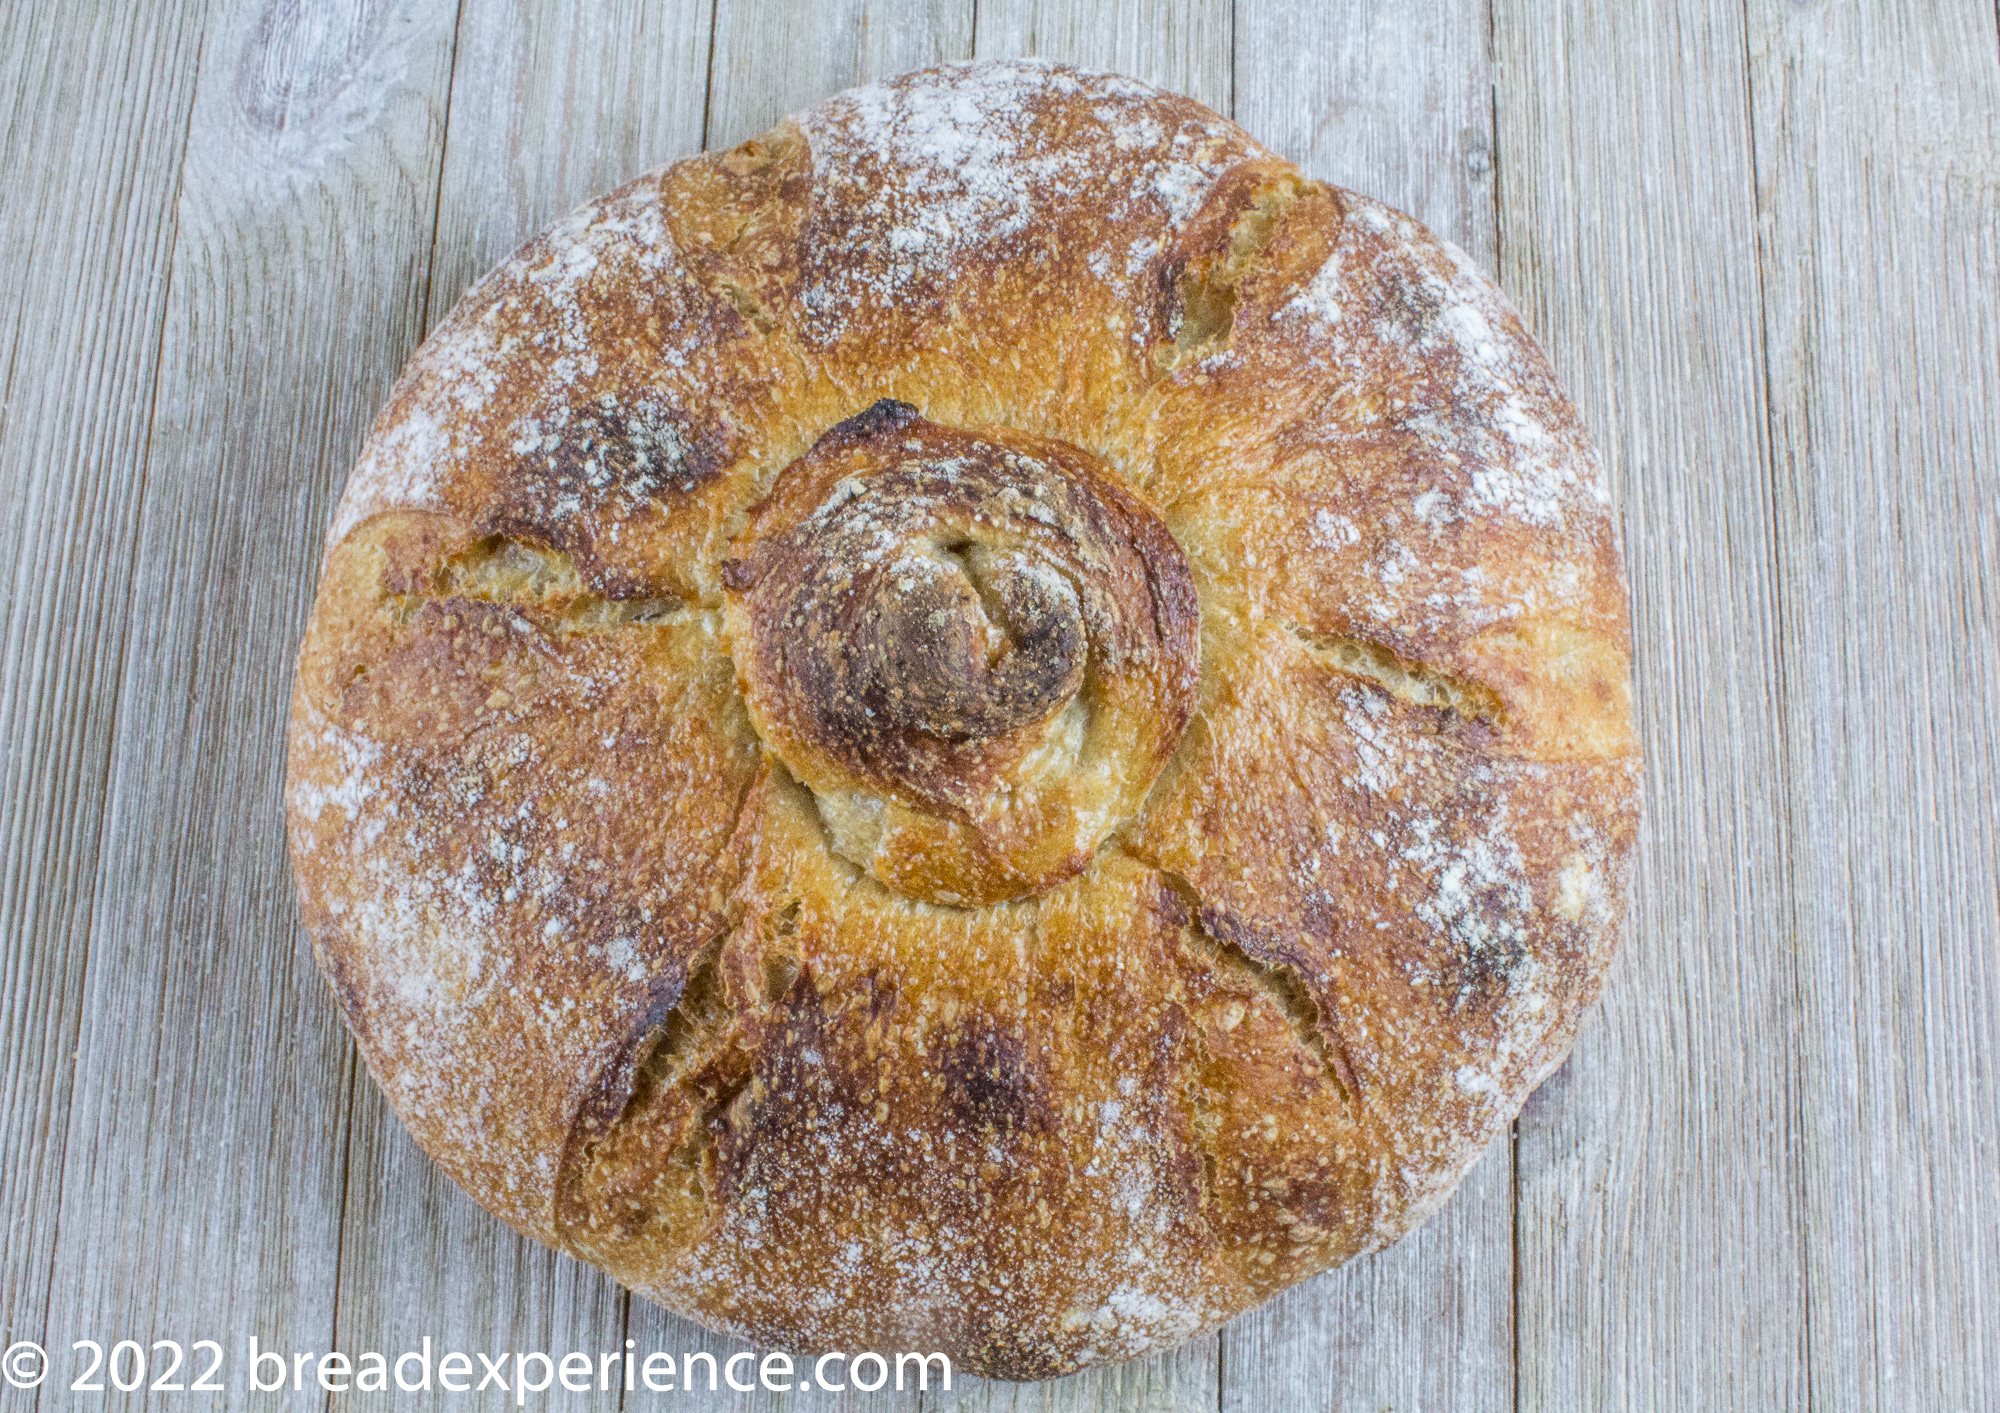
The main thing I was trying to accomplish with the second bake was to keep the round shape of the loaf.
I followed the same process for mixing, using the coil method instead of stretch and fold, etc.
What I changed was to shape the loaf into a boule and place it in the banneton before the cold ferment.
So, instead of allowing the dough to rest for 3 hours at room temperature the next day after the bulk cold ferment, I allowed it to ferment at room temperature (in the basket) a couple of hours before the cold ferment.
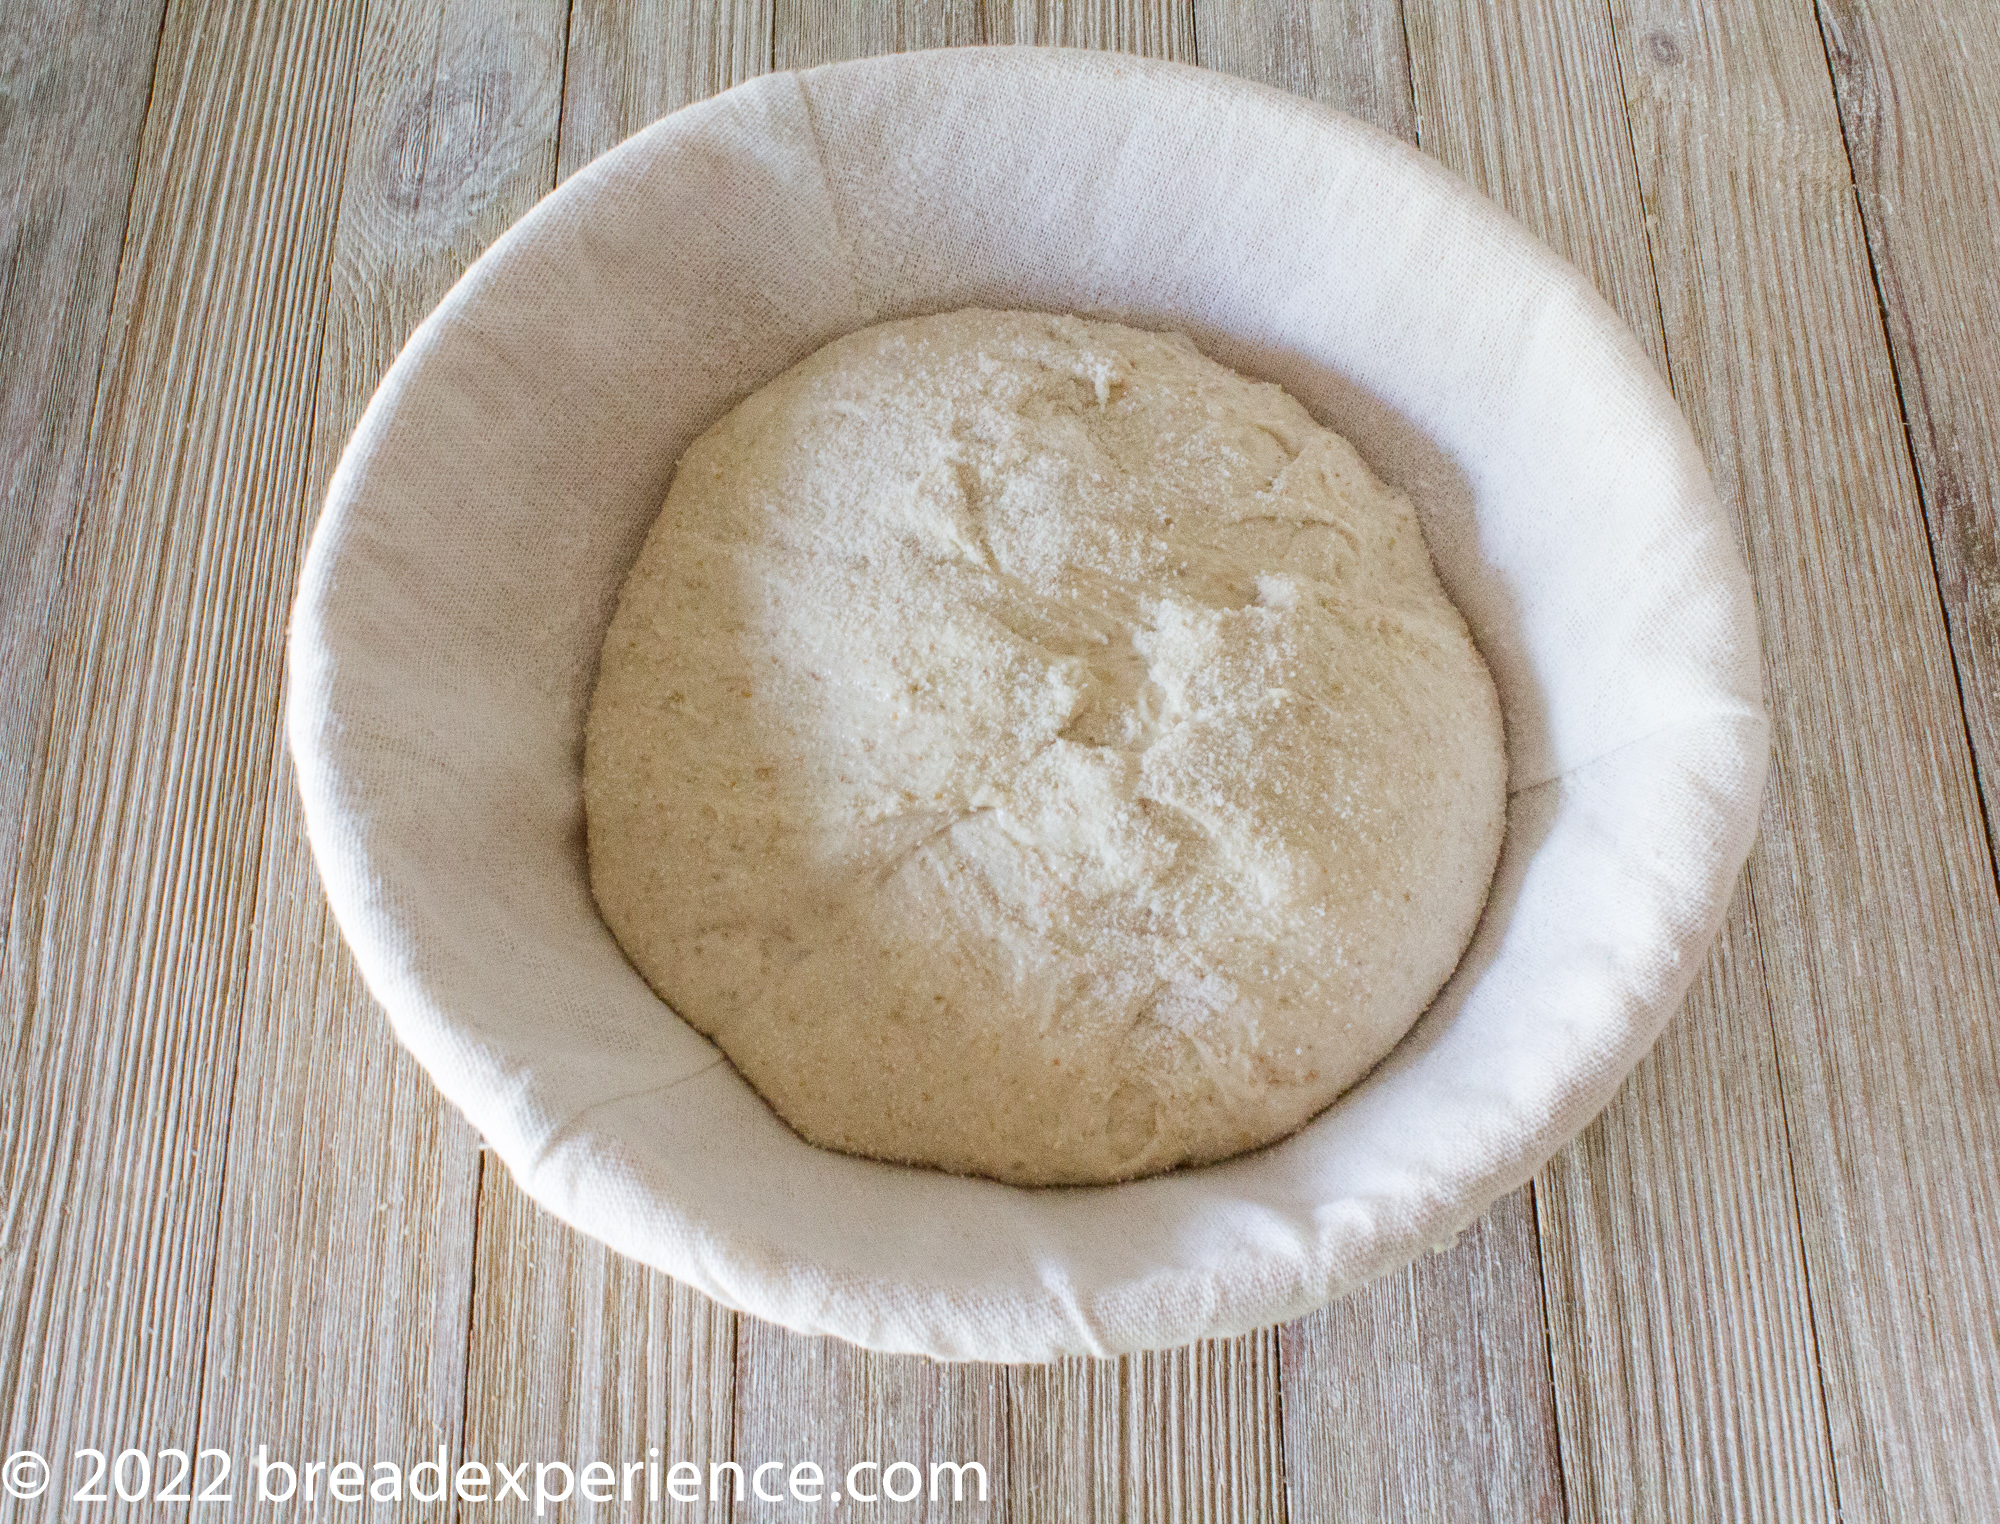
After the cold ferment, I allowed it to warm up while the oven was preheating.
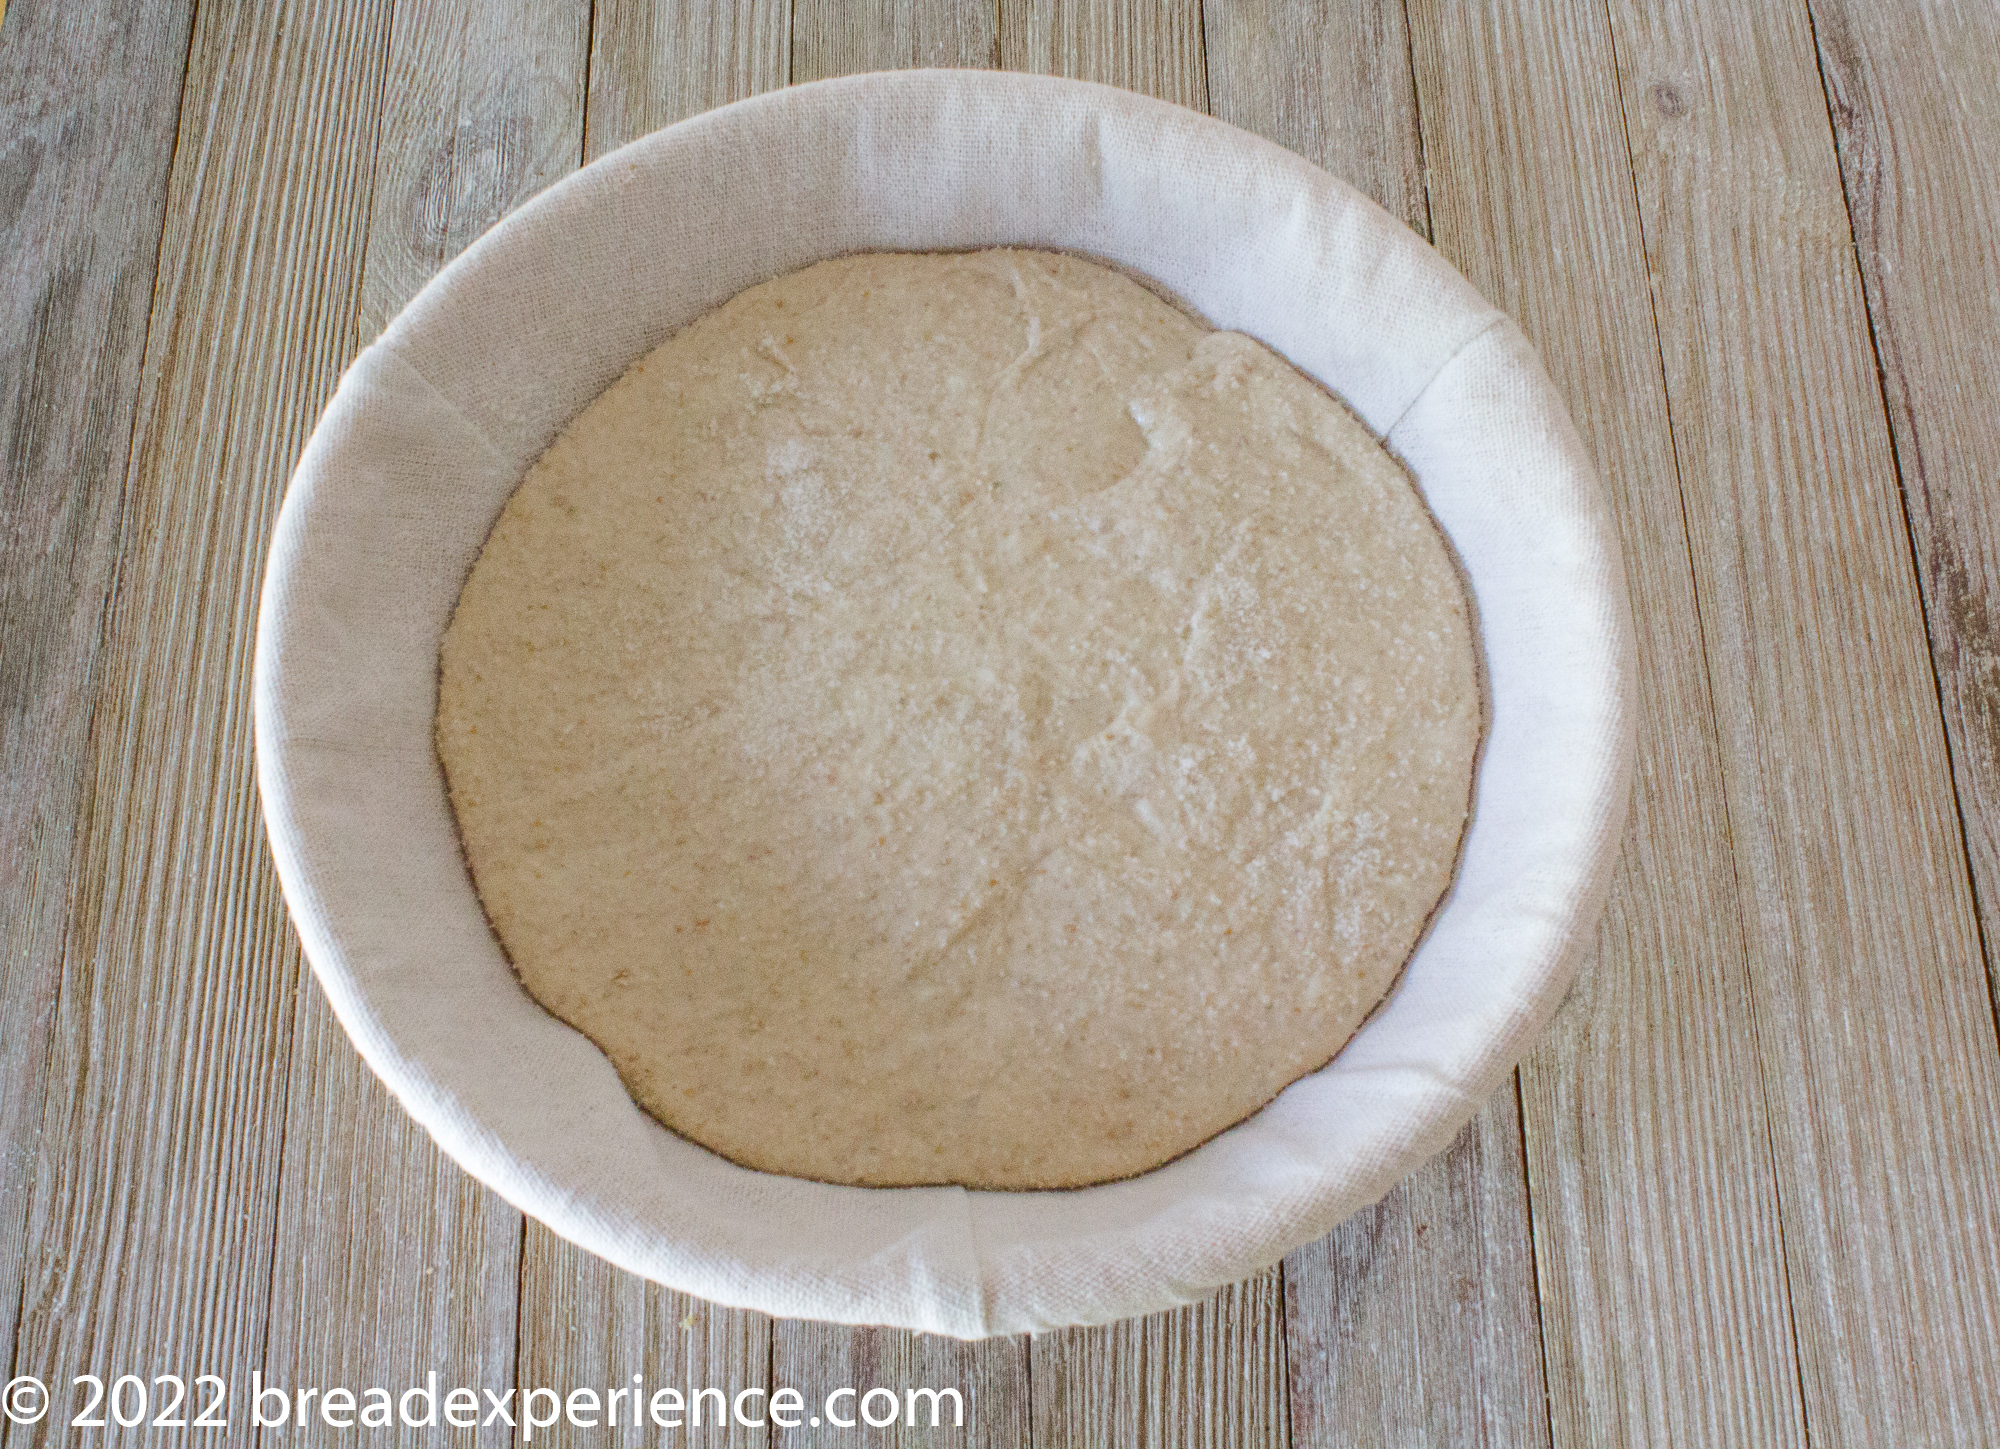
I baked the second loaf in my Emile Henry bread cloche instead of on the baking steel.
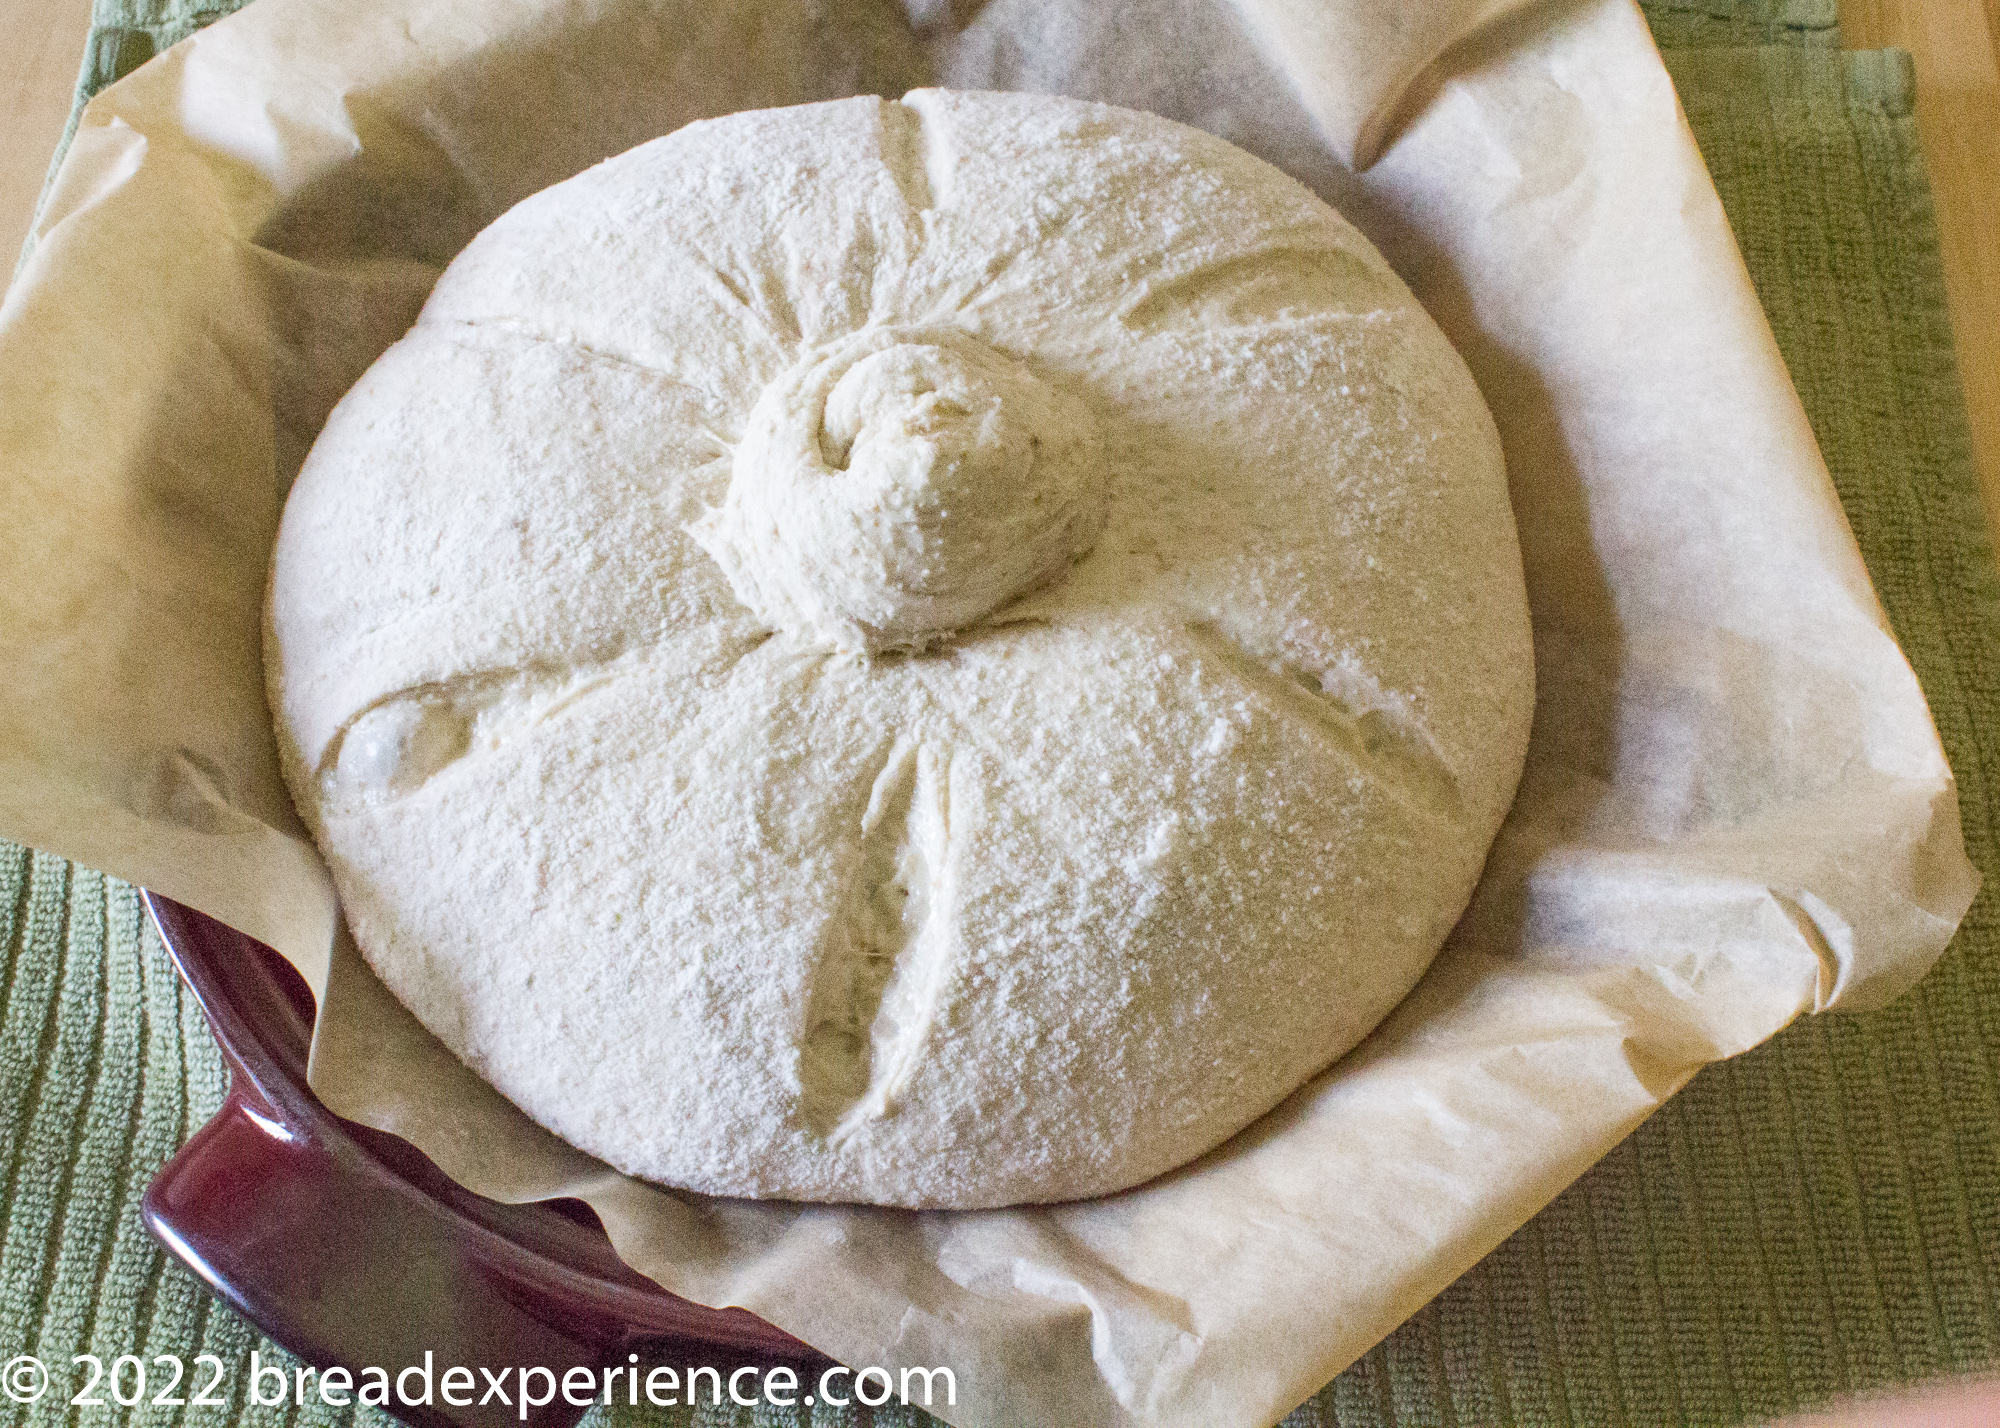
Same oven temperature – 475 degrees. Same process of moving it up one rack (after removing the lid).
I liked the shape and color of the second loaf. I didn’t adjust the hydration so the crumb on the second loaf is similar to the first one.
I wondered how shaping the knot would work since the dough wasn’t quite as slack. It did okay although I wasn’t able to stretch it up as high to tie the knot as with the first loaf.
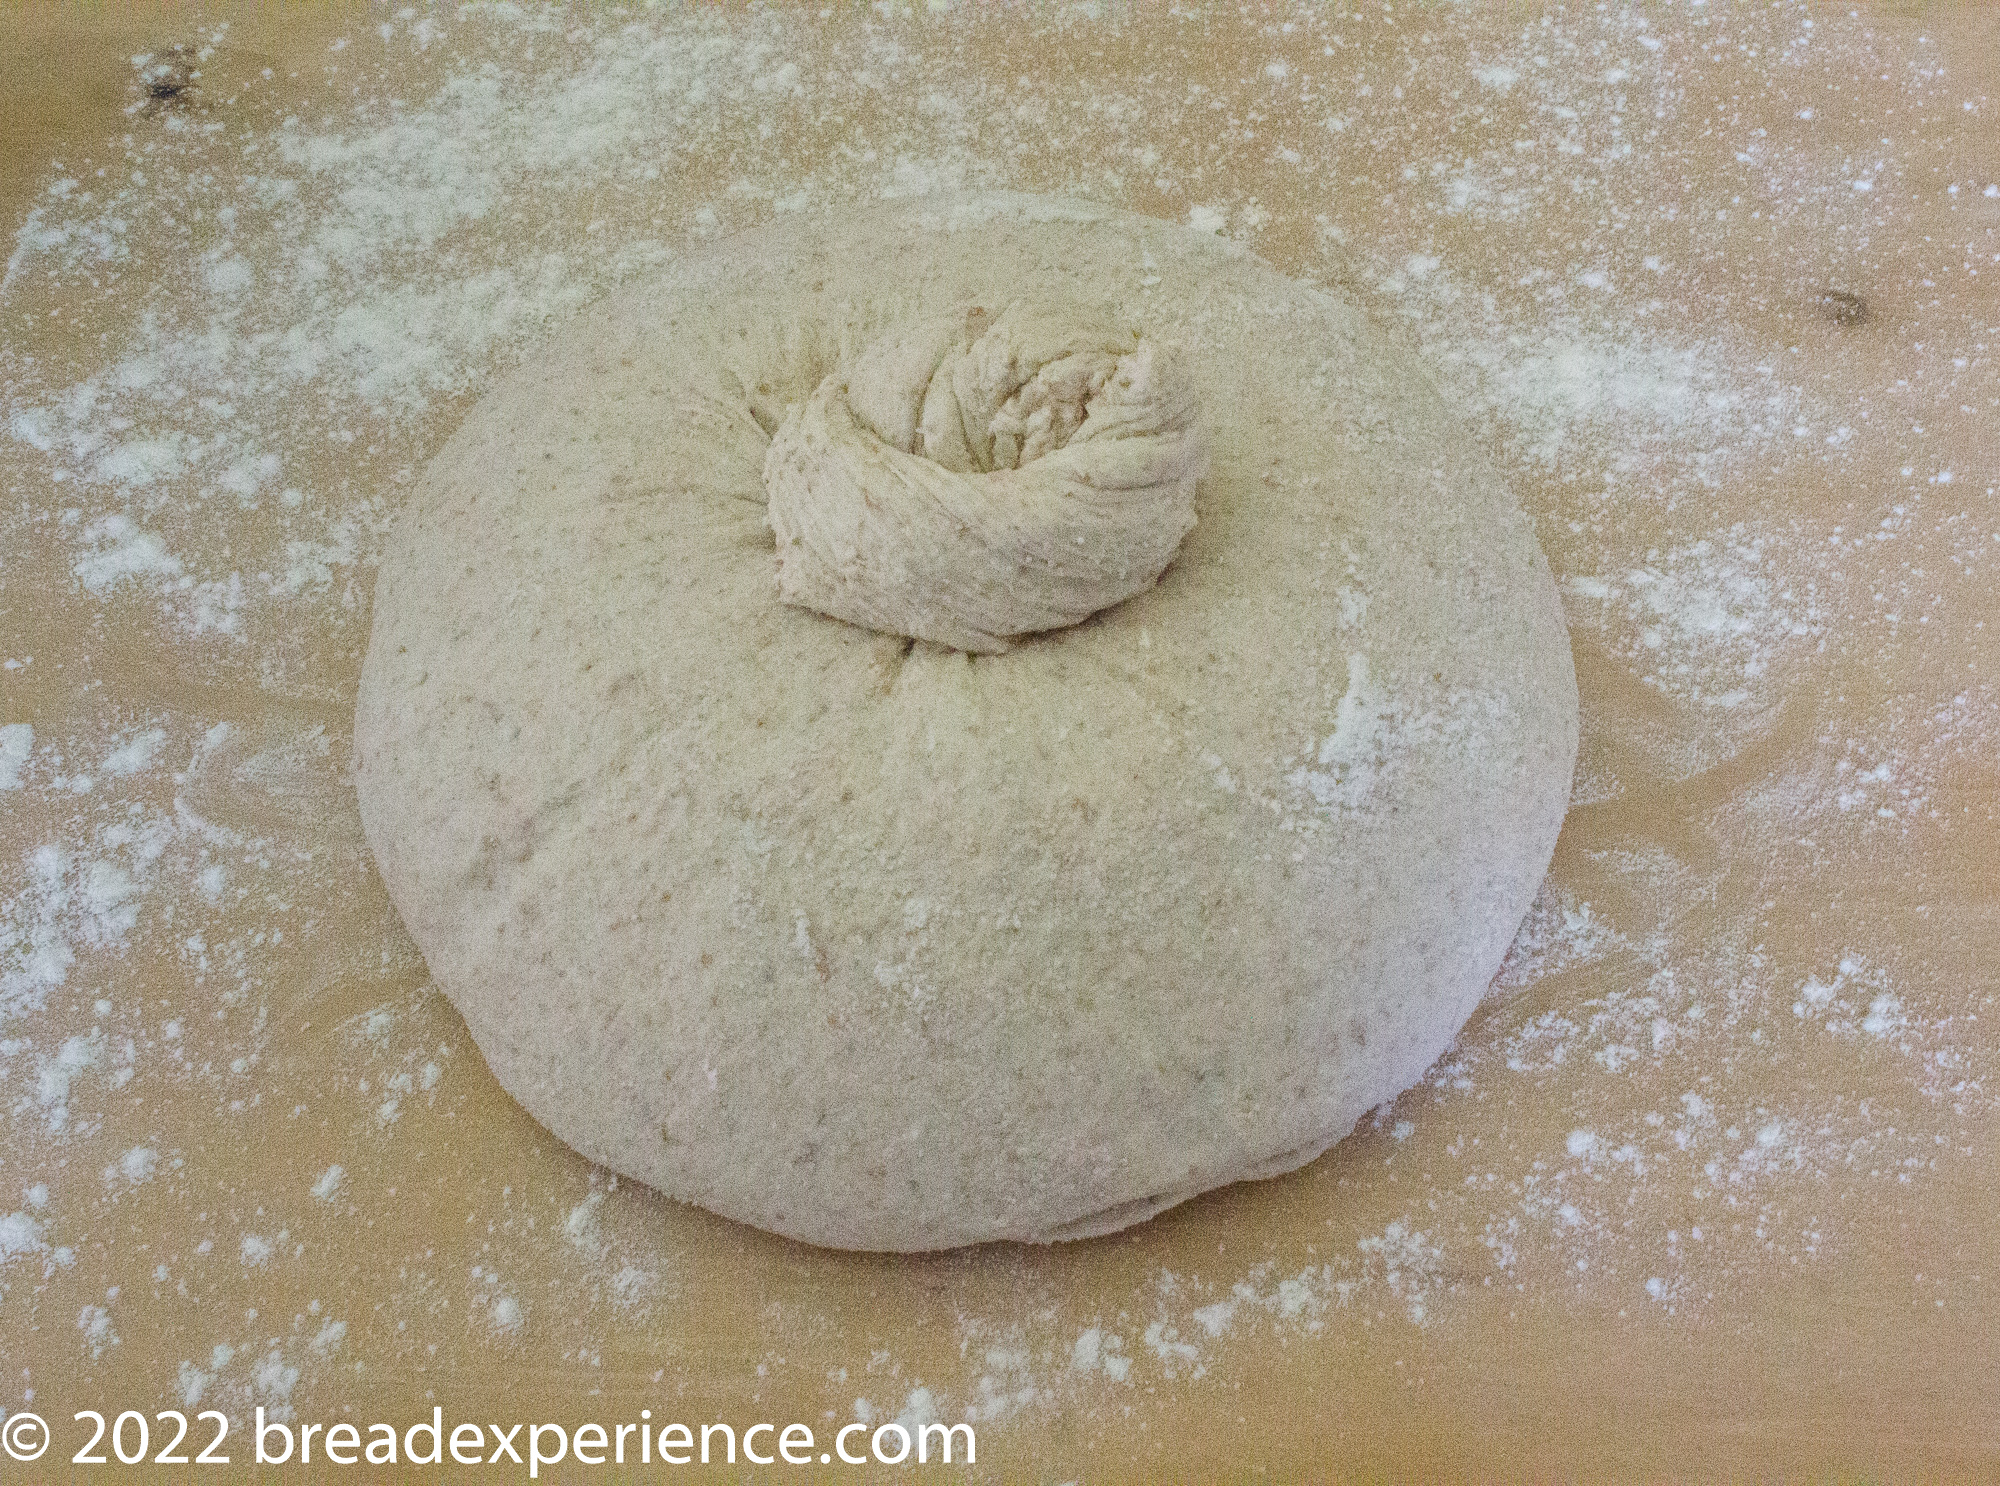
I tried pushing the knot into the dough this time because I had seen that done in some of the videos. I didn’t like that effect. Because I pushed it down, the knot on the second loaf was not as nice as the first loaf, but the second loaf had a more uniform round shape.
Additional bakes:
For subsequent bakes, I followed the same process as in the second bake but allowed the loaf (in the basket) to warm up longer (about 2 hours) before shaping and baking the loaves.
The one thing I did change was to preheat and bake the loaves at 500 degrees in the bread cloche. I kept it at that temperature the entire baking cycle. I baked the loaves 15 minutes with the lid on, 10 minutes with the lid off, then moved the loaf up one rack, and baked for 5-7 minutes more to allow for browning.
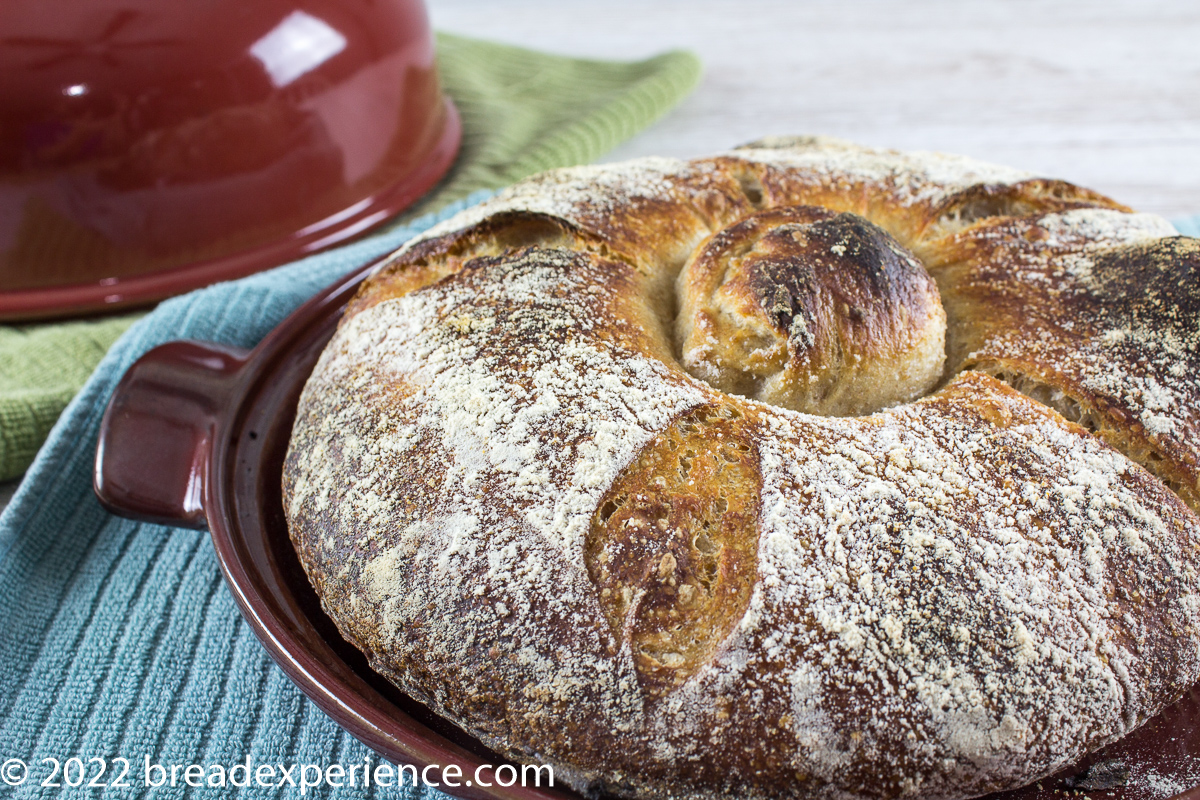
The knot worked the best on the final loaf (featured at the top of this post), but the shape wasn’t quite as round as the second loaf. Although you can’t tell in this photo, after I scored it, it spread a bit.
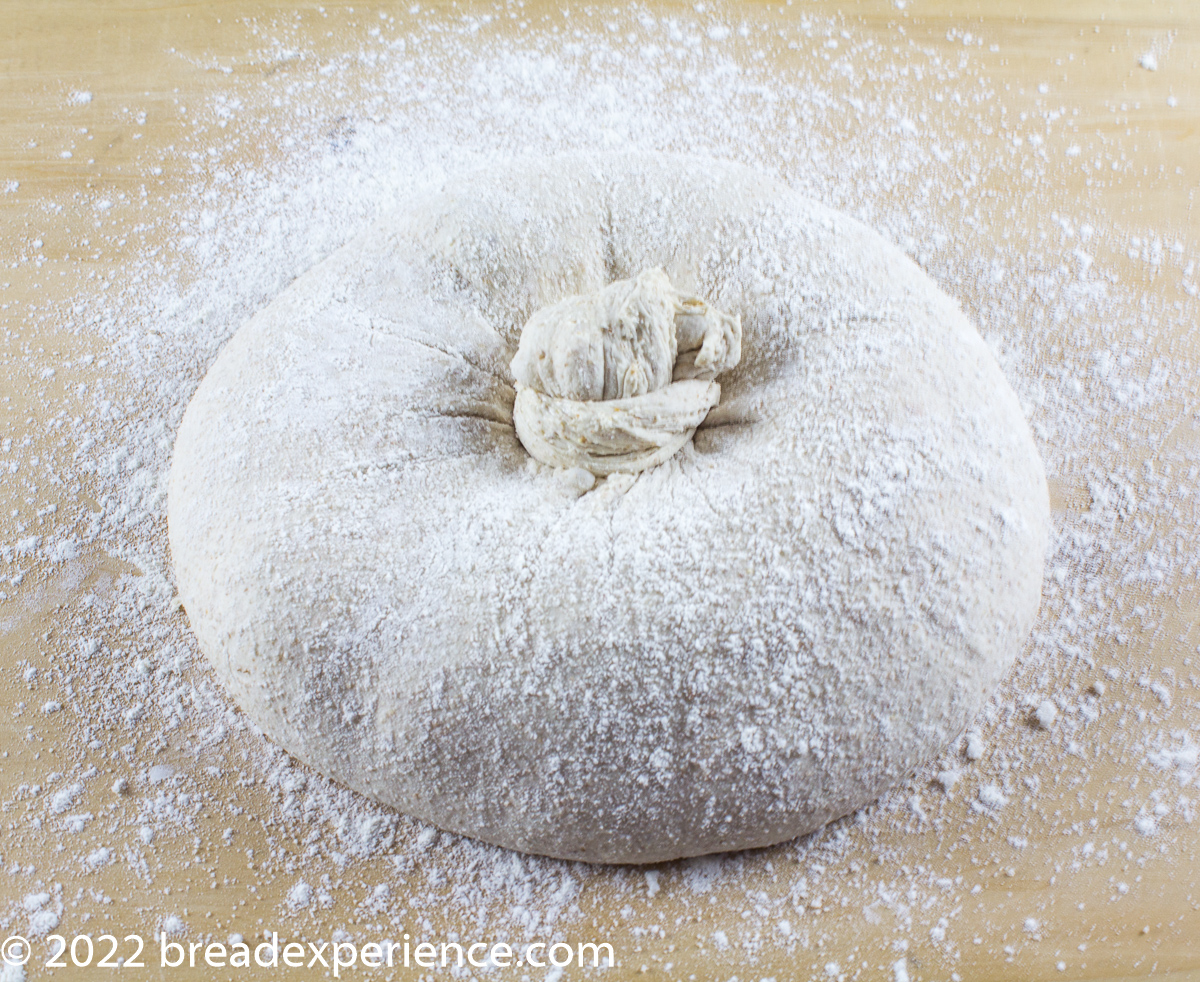
The loaf had fermented (in the proofing basket) in the refrigerator for about 36 hours. I had planned to bake it the next day, but it just didn’t work out that way. You know, best laid plans and all that.
Since I had allowed it to ferment longer, the knot was much easier to form for this loaf. I was able to stretch the dough higher this time, and the knot fell gently back into the dough.
Although stretching and tying the knot worked well, the dough spread out a bit more than I anticipated, and I had a bit of trouble getting it to fit in the base of the bread cloche.
Even so, I enjoyed the color of the crust and the knot on the last bake even if it is a bit misshapen.
Links of interest:
Video from Puratos – Canadahttps://www.youtube.com/watch?v=PNYCSwoPJX0
In this video, the baker doesn’t tie a knot, he just grabs the dough and twists it a bit. He doesn’t score his loaves.
Another video from Puratos
https://www.youtube.com/watch?v=tIV2AWWIaio
The baker in this video does the twist thing to make the knot as well, but he scores the top and the loaf using a curved lame. I guess if you don’t tie the knot, you can score it.
Tips for making this Pan Gallego
This bread takes a bit of planning, but it is worth it. It will take two to three days from start to finish depending on your schedule.
The cold ferment in the basket works well, but you need to allow the dough to warm up to room temperature (1-2 hours) on the counter after the cold ferment to help with shaping the knot. However, if you allow it to warm up too long, it spreads out.
Allow the loaf to cool completely before cutting into it.
The formula I provided is based on my second bake, along with the adjustments indicated above.
I’ve provided suggested schedules for two or three days depending on how leisurely you want to go.
Suggested schedule for making this Galician bread in 2 days:
With this schedule, my goal was to have the bread ready to serve on Sunday afternoon. Most of the prep work (mixing, fermenting, shaping, etc.) is done on Saturday, and then the dough cold ferments overnight and is ready to bake on Sunday afternoon.
Morning day one (ex. Saturday at 8:30am) feed the levain, let it rise 3-4 hours
Afternoon day one (Saturday Noon or so) mix the final dough, let it rise, shape loaf, place in the proofing basket, and allow to rise for 2-3 hours, then place in the refrigerator overnight
Afternoon day two (Sunday afternoon) – remove dough from the refrigerator, allow to come to room temperature (1-2 hours), form the knot, and bake the loaf
Suggested schedule for making this bread in 3 days:
This is a more leisurely schedule. If your goal is to serve the bread on Sunday, but you don’t feel like getting started early on a Saturday morning, this schedule may work better for you.
Afternoon or early evening day one (ex. Friday night) – feed the levain, let it rise, and then place it in the refrigerator overnight
Morning or early afternoon day two – mix the final dough, let it rise, shape the loaf, let it rise, and then place it in the refrigerator overnight
Afternoon day three – allow the dough to come to room temperature, shape the knot, and bake the loaf in a preheated Dutch oven, bread cloche, or on a baking stone.
This bread tastes great fresh with butter or toasted and drizzled with olive oil and spread with a tomato mixture like some of the Babes did for the glass bread. I also enjoyed it as a grilled cheese sandwich.
Print
Pan Gallego | Galician Bread
- Yield: 1 Large Loaf 1x
Description
Pan Gallego, or Galician Bread, is a naturally leavened, high hydration Spanish Bread made with a hint of rye and whole wheat flours. The distinctive characteristic of this bread is the unique knot tied on top of the loaf prior to baking.
Ingredients
Levain Build
- 10–15 grams mature sourdough starter
- 20 grams bread flour
- 10 grams whole grain rye flour
- 15 grams whole wheat flour
- 45 grams warm water
Final Dough
- 425 grams bread flour (or mix of bread flour & all-purpose flour)
- 75 grams rye flour
- 400–425 grams water, room temperature (more if needed)
- 100 grams levain
- 10 grams sea salt
Instructions
Build the Levain
- In a small bowl, mix the starter (it can be cold from the fridge), flours, and warm water until thorough incorporated. Cover with a kitchen towel or bees wrap, and let rest at warm room temperature for 3 to 4 hours, or until doubled in size. Use the levain immediately, or refrigerate it for 12 hours to use later. (Placing it in the refrigerator overnight worked better with my schedule.)
Day 1 – Mix the Final Dough
- The key to hand mixing high hydration dough is to add the water as slowly as possible.
- Place the flours in a large bowl. Pour in 325 grams of water and mix thoroughly.
- Add 25-50 grams more water, a little at a time, until you have a wet, sticky dough. Let rest 45 min.
- Add the levain and 25 grams water. Mix to dissolve the levain. Let rest for 1 hour.
- Add the salt and 15-25 grams water. Using your fingers, squeeze the salt and water into the dough until you have a smooth surface.
- Complete a total of 2 stretch and folds every 30 minutes. I performed the coil method in the bowl instead of stretching and folding the dough. To perform coil method, complete large folds in thirds, then rotate 90 degrees, and fold in thirds, let rest 30 min. Repeat.
- Let the dough bulk ferment for 4 hours. The dough should be smooth and have a bubbly surface.
- Transfer the dough to a floured surface and shape into a boule. Place in a lined and floured banneton basket. Cover, and allow dough to proof for 2-3 hours at warm room temperature.
- Cover tightly and place basket in the refrigerator to cold ferment 8-10 hours (or longer if it works better with your schedule)
Day 2 – Form the Knot and Bake
- Remove the dough from the refrigerator 1-2 hours before you plan to bake to allow it to warm up to room temperature.
- Preheat the oven to 500 degrees with a baking steel/stone, Dutch Oven, bread cloche, or cast-iron pot on the next to lowest rack. If using a baking stone or steel, place a steam pan on the lowest rack.
- Carefully release the proofed dough from the basket onto a floured surface, seam-side down. Grab the very top of the dough with your fingers. Stretch and pull the dough up as high as you can, twist it and tie into a knot. Allow the knot to gently settle back down.
- Using a couple of bench scrapers, a large spatula, or your hands, carefully transfer the loaf to a piece of parchment. Score the dough with a bread lame or serrated knife. Scoring the loaf is optional; however, making several slashes around the outside will ensure it opens up in those areas rather than tearing during baking.
- Transfer the loaf (on the parchment) to the preheated baking cloche (or stone) and bake for 10 minutes. If using a baking steel or stone, add a cup of ice cubes to the steam pan immediately after placing the loaf onto the steel.
- Reduce the temperature to 475 degrees, remove the lid of the baking vessel pot, and bake the loaf for 15 minutes (or longer) until you have a dark, blistery crust.
- When using a bread cloche, bake the loaf 15 minutes with the lid on and 10-15 minutes with the lid off. After 10 minutes, check the loaf for browning, and if needed, move it up a shelf and continue baking for additional 5-7 minutes to allow the crust to darken.
- Remove the loaf to a wire rack to cool completely before slicing.
Notes
Adapted from New World Sourdough by Bryan Ford
- Category: Sourdough Bread
- Cuisine: Spanish
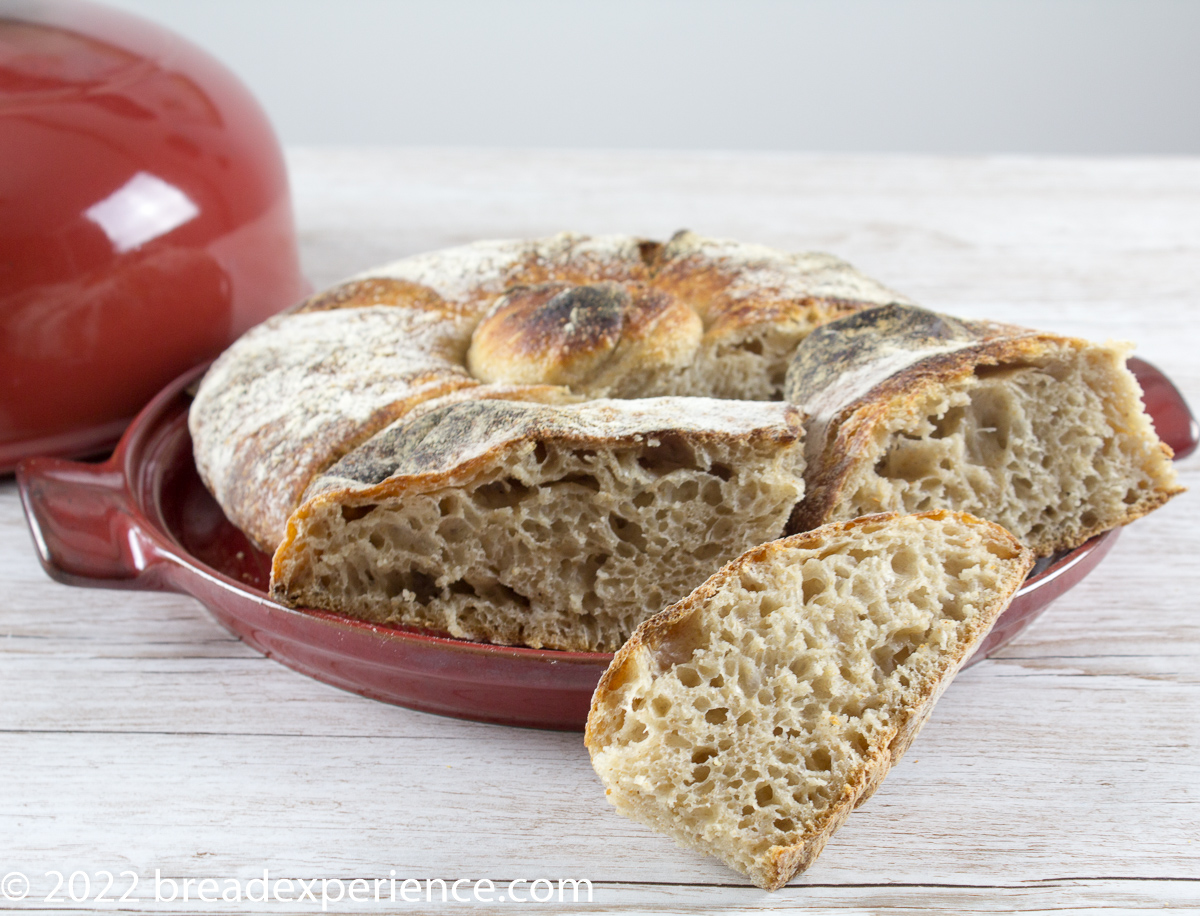
Crumb shot of the final bake
Who are the Bread Baking Babes?
We are a group of breadbakers who get together every month and bake bread! We have a Facebook group if you’d like to bake along. New recipes are posted every month on the 16th.
Bread Experience is the host kitchen this month. If you want to bake along with us, just bake the bread and post about it on your blog or in the BBB Facebook group by May 31st. To receive your buddy badge, send an email to breadexperience at gmail dotcom.
Check out the different variations for this month’s bake:
Bread Experience – Cathy (Host Kitchen)
Karen’s Kitchen Stories – Karen
A Messy Kitchen – Kelly
Judy’s Gross Eats – Judy
blog from OUR kitchen– Elizabeth
Thyme for Cooking – Katie (roundup)
Happy Baking!
Cathy
Karen says
I followed your second method but got impatient and only let it come to room temp for about an hour. Thanks for the great find!! Love all of your experimentations!
Cathy says
There seems to be a sweet spot between letting it warm up enough not but too much. The knot tends to work better with slacker dough, but the loaf spreads out a bit too much unless you get it in the baker really fast.
Glad you enjoyed this one. It is a great bread even if it spreads out a bit.
Kelly says
Doesn’t look misshapen at all, especially after baking. Pretty picture perfect with that knot and gorgeous color! I played pretty loose with the timing and let it rise quite a bit for the final shape. I think that’s why I got a lot of large bubbles toward the top in some sections, from forming the top knot.
Cathy says
Thank you Kelly! You may not see them in the photos, but I got a couple of large bubbles towards the top as well. Still very tasty.
Elizabeth says
Cathy, your bread looks perfect. Next time, I will definitely follow your lead and throw in a few slashes.
This bread was SO much easier than pan de cristal! (Especially with the unconvention mixing method I used….) Many thanks for a great choice.
Cathy says
Thanks Elizabeth! This one was definitely easier than the Pane de Cristal. I do think the scores help and add to the appeal.
Valentina says
hello, I have a question for you. I am quite new in bread baking but I am looking forward to experimenting new recipes. I want to ask you what kind of bread flour you used for this one (how strong). thank you for yor reply and for all the recipes!
Cathy says
Hello Valentina,
I experimented with King Arthur Baking’s all-purpose and bread flour in this bread. I don’t have the packages, but you can find the protein and other specs on their web site.
Happy Baking!
I hope you have fun with this bread.
Cathy
Valentina Rotaru says
Many thanks Cathy! i will look it up!
Happy baking!
valentina