October is Pizza Month! I adore pizza so whenever I get the chance to celebrate it, I’m there.
I made Pizza Napoletana during the BBA Challenge several years ago, and I liked it. I decided to revisit this dough to see if my pizza-making skills have improved.
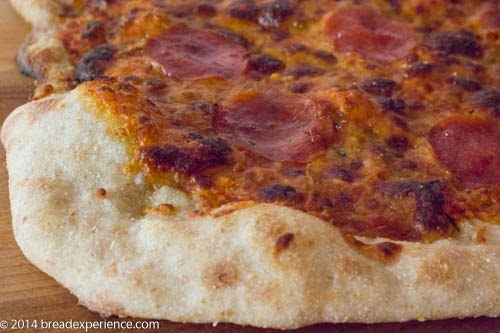
What inspired me to make this Pizza Napoletana-Style Pizza Dough?
Even though this pizza is adapted from one of Peter Reinhart’s formulas, it was Jeffrey Hammelman (Bread Baker extraordinaire at KAF) who inspired me to make it. I watched a video recently of his keynote address at the Grain Gathering Conference. Unfortunately, I missed the conference so I was delighted to be able to listen to a replay of his presentation.
During his speech, he mentioned that he participated in a session on making pizza. He said he knew he would have trouble shaping it. Jeffrey Hammelman is such an awesome baker I found that hard to believe, but I guess that goes to show that we all have our comfort zones.
He also mentioned that anyone who claims they are a self-taught baker is missing out on something. We all need mentors.
This made me think about all of the mentors I’ve had so far in my bread-baking journey. I would have to say that Peter Reinhart was my first artisan bread-baking mentor. I learned so much when I participated in the BBA Challenge and baked through his book “The Bread Baker’s Apprentice”. I’ve also attended sessions with him at the Asheville Bread Festival.
So with motivation from two of my bread-baking mentors – Jeffrey Hammelman and Peter Reinhart – I set out to make pizza Napoletana again and acquire more practice shaping this dough.
Retarding the dough in the refrigerator improves the flavor
I started with the basic formula and adjusted it to accommodate the amount of flour I wanted to use. I used a mixture of white bread flour and wholegrain Spelt flour.
According to Peter Reinhart, you can use up to 10% whole wheat flour in the dough so that’s what I did. He used high-gluten flour in his formula, but I used all-purpose and wholegrain Spelt. He added oil because it makes the high-gluten flour easier to work with. Since I used all-purpose flour, I omitted the oil. I did try his method of using cold flour and ice-cold water to mix the dough. It worked well.
The dough was good the last time I made this pizza, but this time it was even better. The addition of 10% Spelt flour and letting the dough retard in the refrigerator for 12 – 15 hours improves the flavor.
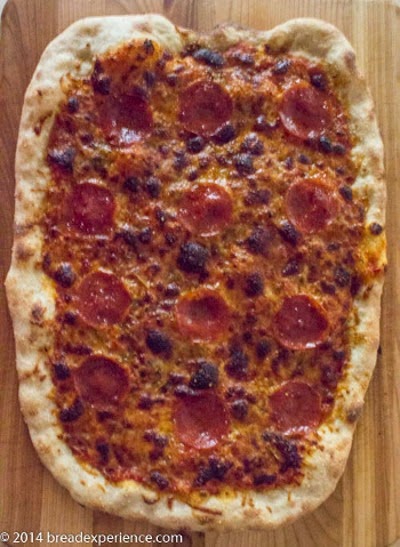
Pizza Napoletana-Style Dough
Adapted from: Bread Baker’s Apprentice by Peter Reinhart
Makes: Three 285 grams (9.65-oz.) pizza balls or 4 smaller balls
Formula:
- All-purpose flour 90%
- Whole grain Spelt flour 10%
- Salt 1.6%
- Yeast .002
- Water 70%
I started with 500 grams of flour and calculated the other ingredients as a percentage of the flour. I increased the hydration and decreased the amount of salt and yeast from the original formula.
- 450 grams all-purpose flour *
- 50 grams whole grain Spelt flour *
- 8 grams salt
- 1/4 teaspoon instant yeast
- 350 grams ice cold water *
* It is recommended that you use ice-cold water (chilled at 40 degrees F.) and place the flour in the refrigerator for at least one hour before you plan to make the pizza dough. I tried it this way and liked the results. It improves the dough.
Prepare the Pizza Dough:
In a large mixing bowl, stir together the flours, salt, and yeast. Using a Danish dough whisk, or a large metal spoon, mix in the cold water until all of the flour is absorbed.
Dip the dough whisk, spoon, or your hand into cold water and work the dough vigorously into a smooth mass. Rotate the bowl in a circular motion using your other hand. Then reverse the motion. This will help develop the gluten. Work the dough in this manner for 5 to 7 minutes, or until you create a smooth, sticky dough.
Transfer the dough to a counter sprinkled with flour.
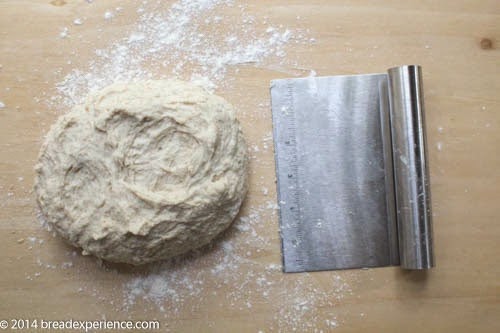
Line a baking sheet with oiled parchment paper. Divide the dough into 3 (or more) pieces using a metal dough scraper. If necessary, dip the scraper in cold water in between cuts to keep the dough from sticking to it.
Sprinkle flour over the dough pieces. Flour your hands if necessary. Lift each piece and gently shape them into balls. Transfer the dough balls to the greased parchment paper. Spray the balls with oil and cover them with plastic wrap or slip them into a food-grade plastic bag.
Place the pan of dough balls in the refrigerator overnight, or for up to 3 days.
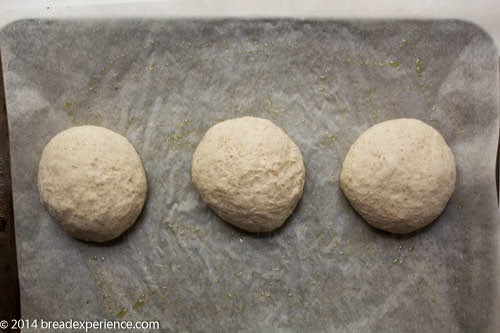
Next day or Bake Day:
On the day you want to make the pizza, remove the dough balls from the refrigerator. Dust the counter with flour. Place the dough balls on top of the floured counter and sprinkle them with flour; dust your hands with flour. Gently press the dough into flat disks about 1/2 inch thick and 5 inches in diameter.
Sprinkle the dough again with flour, cover the dough loosely with plastic wrap or a food-grade plastic bag, and let rest for 2 hours.
Prepare the oven for baking
45 minutes before you plan to bake the pizza, place a baking stone on the lowest rack of the oven. Preheat the oven as hot as possible (550 degrees, if possible). If you don’t have a baking stone, you can use the back of a sheet pan but don’t preheat the pan.
Shaping the Pizzas
If you are good at using a pizza peel (which I’m not yet), generously dust a peel or the back of a sheet pan with semolina flour or cornmeal. Or, sprinkle parchment paper with cornmeal.
Make the pizzas one at a time.
Dip your hands, including the backs of your hands and knuckles, in flour and lift 1 piece of dough by getting under it with a dough scraper.
Carefully lay the dough across your fists and stretch it by bouncing it in a circular motion on your hands. Gently give it a little stretch with each turn and bounce. If the dough sticks to your hands, lay it down and reflour your hands. Continue this shaping method until the dough has expanded outward. If the dough keeps springing back, let it rest for 5 to 20 minutes to relax the gluten, then try again.
Then you’re supposed to move to a full toss. I haven’t perfected the toss yet so I just spread it out on the parchment paper after stretching it with my fists. I’m still unable to make a complete fist (due to my recent surgery), but I was able to do the stretching with my fists so I was very pleased about that. Now I just have to work on my peel skills (that is, getting the dough not to stick to the peel) and learn how to toss the dough. I think smaller dough balls might be easier to work with so next time I might try that.
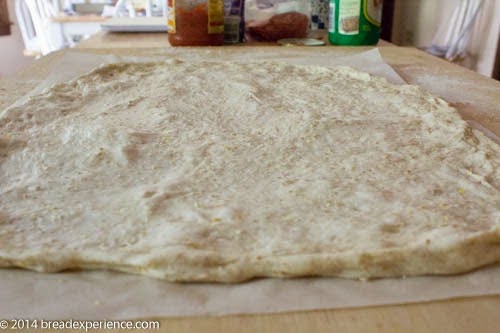
When you’ve stretched the dough enough (about 9 to 12 inches in diameter), lay it on the peel, or place it on parchment sprinkled with cornmeal then transfer the whole thing to a peel or the back of a baking sheet.
Lightly top the pizza with sauce and your favorite toppings. Remember, less is more so don’t overload it like I’ve been known to do.
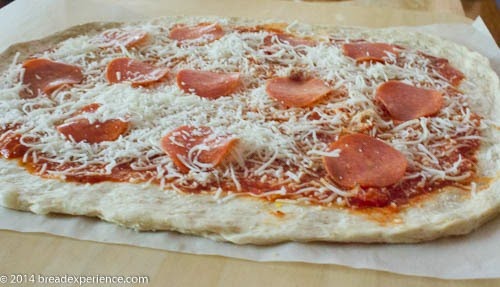
Slide the pizza (on the parchment paper) onto the preheated baking stone and close the door. Wait 2 minutes, then take a peak to make sure it is baking evenly. If necessary, you can rotate the pizza for even baking. The pizza should take about 5 to 8 minutes to bake.
Remove the parchment paper partway through the bake cycle to firm up the crust on the bottom of the pizza.
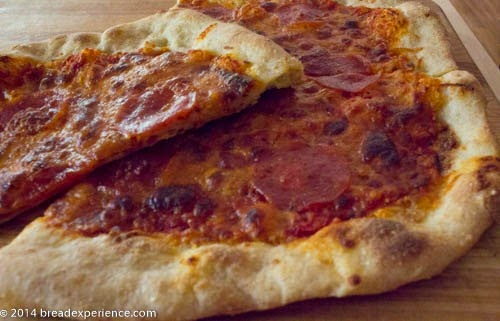
Remove the pizza from the oven and transfer to a cutting board. Wait about 3 to 5 minutes before you slice and serve this deliciousness. This allows the cheese to set a little bit.
Enjoy!
Happy Pizza Month!
Cathy
MyKitchenInHalfCups says
Oh good golly I need a pizza! That’s marvelous Cathy.
Cathy W. says
Hi Tanna, yes you do need a pizza and this is a good one.