The bread of the month for the Bread Baking Babes is Bakharkhani, a layered and very rich bread, similar to puff pastry. Aparna of My Diverse Kitchen is the host for November and she chose this bread because it was different, challenging, and fun to bake.
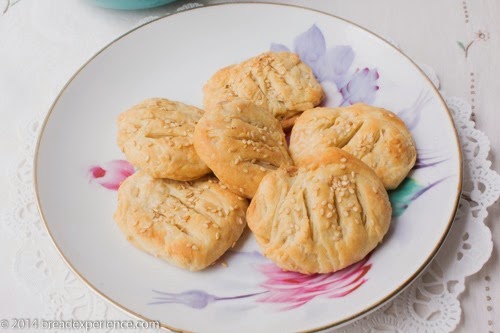
Bakarkhani (also called Baqeerkahni, Bakharkhoni, or Bakorkhani) are flatbreads that came into the Asian sub-continent with the tandoor and other breads of Turkish and Mughal traders and invaders sometime in the eighteenth century.
Bakharkhani is a layered and very rich bread similar to a puff pastry and is popular in Bangladesh, India, and Pakistan. In India, it is typically found in states where history, food, and culture are influenced by the Mughal rule like Lucknow, Hyderabad, and Kashmir.
Bakharkhani seems to be different in different parts of the world where it exists. It can be savory or slightly sweet, leavened or unleavened, soft or crisp, eaten for breakfast or served with tea, and even like a paratha (Sylheti Bakharkhani from Bangladesh). The softer versions of Bakharkhani are usually served with kebabs and meat curries.
Behind the origin of the name of this flatbread is a tragic love story – that of an army general named Aga Bakar and a beautiful dancer Khani Begum. Check out Aparna’s post to learn about this story.
The Bakharkhani in the recipe below is the Dhakai version (from Dhaka in Bangladesh) and is meant to be firm and somewhat crisp and is served with tea. Sprinkling sesame seeds on this flatbread is not traditional, and just an option.
Making this Bakharkhani involves rolling out the dough very thin, and then repeatedly spreading the surface with melted ghee and then a sprinkling of flour and then folding it, to create a layered dough. Yet, this layering doesn’t seem to be about having layers in the finished bread like in croissants or Danishes, but more about allowing the layering to produce lift (as there is no leavening agent in this dough), texture, and softness in the finished bread.
Dhakai Bakharkhani/ Baqeerkhani
Crisp Flatbreads from Dhaka, Bangladesh
Adapted from Honest Cooking
Ingredients:
For the mawa/ khoya:
- 1/2 gallon whole milk (2% works as well) – makes approximately 3/4 to 1 cup mava
For the Bakharkhani:
- 2 cups flour, (plus a little more for rolling it out the dough)
- 1/4 cup mawa
- 1/4 cup ghee (plus a little more for spreading on the dough while rolling it out)
- 1/4 tsp teaspoon salt *
- 2 tsp sugar
- 2/3 cups water (a little less or more if needed)
- Sesame seeds, to sprinkle (optional)
* I think it could benefit from a little more salt especially if you use unsalted butter for the ghee.
Making the Ghee:
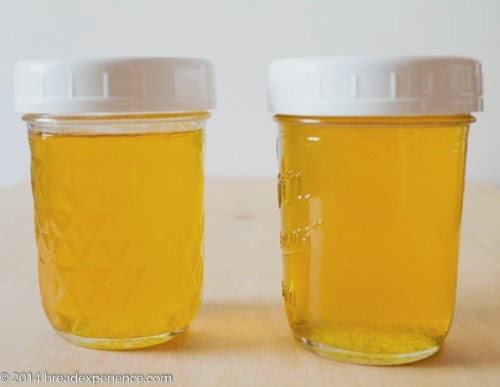
Ghee, also known as clarified butter, is quite easy to make. You can make a little extra and store the rest for later use. It can be stored at room temperature and will keep for a while.
Melt 500gm of unsalted butter and let it cook until the milk solids in the butter start turning golden brown (do not burn them) and the liquid fat is a golden color. You should get a rich aroma from it.
Let it cool to room temperature and then decant or strain the golden liquid into an airtight jar.
Making the mawa/ khoya:
Pour the milk into a heavy-bottomed saucepan, preferably a non-stick one. Bring the milk to a boil, stirring it on and off, making sure it doesn’t stick to the bottom.
Turn down the heat to medium and keep cooking the milk until it reduces to about a quarter of its original volume. This should take about an hour to an hour and a half. The important thing during this process is to watch the milk and stir it frequently to make sure it doesn’t stick to the sides or bottom of the pan and get burnt. The danger of this happening increases as the milk reduces and gets thicker.
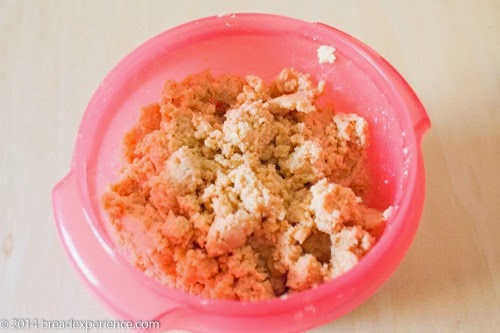
Once the milk has reduced to about 1/4 quantity, lower the heat to low and let cook for a little while longer. Keep stirring regularly, until the milk solids (mawa) take on a lumpy appearance. There should be no visible liquid left in the pan, but the mawa should be a bit moist and not stick to the sides of the pan.
Let it cool. Once it has cooled, it should still be a little moist but you should be able to crumble it.
Making the Bhakarkhani:
Place the flour, salt, and sugar into a large bowl. Crumble the mawa into it and mix it well. Add the ghee and use your fingers to rub it into the flour. Add the water, a little at a time, and knead well until you have a smooth and elastic dough that can be rolled out very thin.
Cover the bowl with plastic wrap or a damp kitchen towel to prevent it from drying. Let it rest for about 30 minutes to an hour.
Refer to this shaping video to get an idea of how the dough is rolled out, layered with ghee and flour, and folded. The language in the video is Bangla but the visual is quite descriptive. (http://www.youtube.com/watch?v=eyiOLuJywHQ )
Preheat oven to 350F.
Lightly coat the dough and then let it rest for another 10 to 15 minutes. Also lightly coat your rolling pin and board (or your working surface) with some ghee.
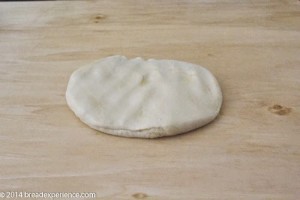
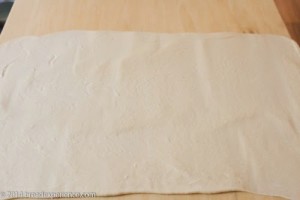
Now divide the dough into two portions, working with one portion at a time. Roll out one portion of the dough as thin as possible into a rectangle, without adding any flour. It should be thin enough for you to see your work surface through the rolled-out dough!
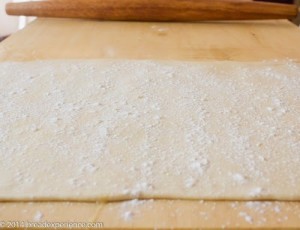
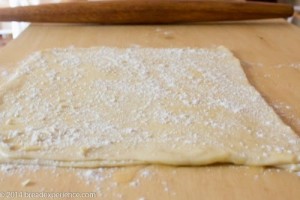
Brush some ghee (not too much) all over the surface of the rolled-out dough with your fingers. Sprinkle some flour evenly over this, enough so that the ghee is absorbed when spread out. The flour layer should be thin. Brush some more ghee, again, over this, and then sprinkle some flour over this like previously.
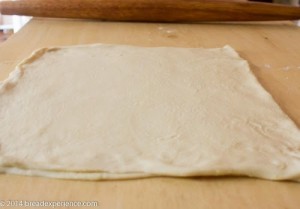
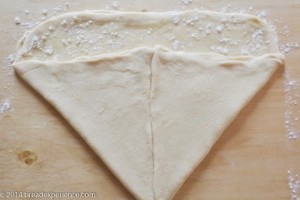
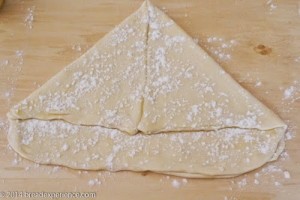
Fold the dough into half and once again repeat the process of brushing the ghee and sprinkling the flour over this twice, as before. Fold the dough for the second time (see the video) and repeat the brushing with ghee and flouring, twice.
 |
 |
 |
 |
 |
 |
 |
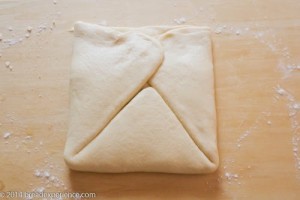 |
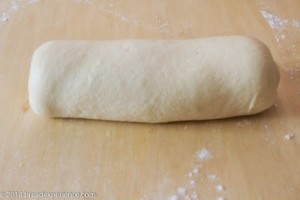
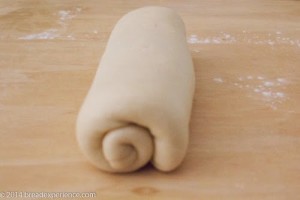
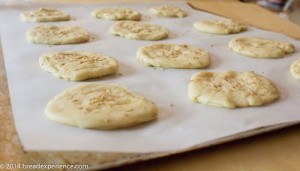
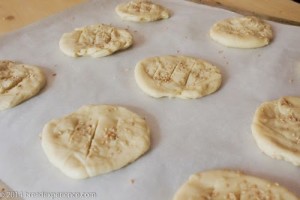
Finally, roll up the dough into a long cylinder and let it rest for about 10 minutes. Pinch off lemon-sized balls and roll each one into a small, round flatbread. Sprinkle sesame seeds (optional) and lightly press into the dough. Make three cuts on each flatbread using a knife. Place on parchment-lined baking sheets and bake for about 20 to 25 minutes or until they’re light brown on top. Do not overbake.
 |
 |
 |
 |
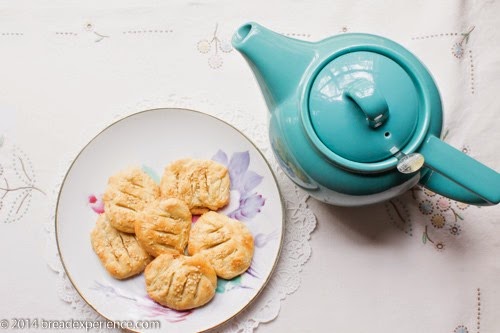
Let the Bakharkhani cool and serve with coffee or tea.
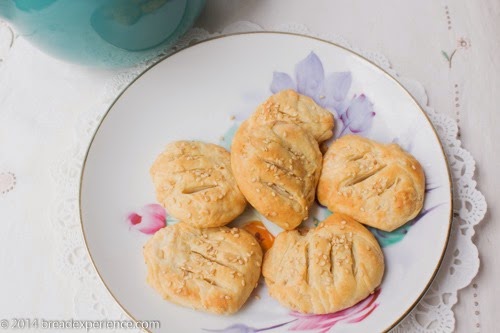
I didn’t roll my flatbreads out as thin as the recipe suggests so my little breads ended up being rich, flaky, and puffy instead of flat, but oh so good!
The Bread Baking Babes (current dozen) are:
- Bake My Day – Karen
- blog from OUR kitchen – Elizabeth
- Bread Experience – Cathy
- Feeding my Enthusiasms – Pat/Elle
- girlichef – Heather
- Life’s a Feast – Jamie
- My Diverse Kitchen – Aparna
- My Kitchen In Half Cups – Tanna
- Notitie Van Lien – Lien
- Thyme for Cooking – Katie (Bitchin’ Bread Baking Babe Bibliothécaire)
Would you like to be a Bread Baking Buddy?
Make the Bakharkhani according to the recipe above, then email your link to Aparna, the kitchen of the month. Refer to Aparna’s post for the details.
Once you’ve posted, you’ll receive a Buddy badge for baking along, then watch for a roundup of all of the BBBuddies posts a few days after the close of submissions.
I hope you’ll join us!
Happy Baking!
Cathy
Aparna says
Your Bakharkhani look pretty like cookies. It doesn’t matter if they aren’t too thin because it is the taste that matters. 🙂
And this flatbread is made a little thicker and puffy in some parts of the Asian subcontinent.
Love the pictures of the folding technique. My hands were so greasy, I didn’t bother touching my camera! 🙂
Cathy W. says
Thanks Aparna! This was a great choice! I enjoyed learning how to make mawa. These flatbreads taste divine!
Elizabeth says
Your bakharkhani look perfect! And I’m so impressed with your folding. Mercifully, my camera person got tired of standing around when I was doing the final folds – I didn’t manage to get nearly as tidy a package as you did.
Excellent job, Cathy!
Cathy W. says
Thank you Elizabeth! I guess I should confess that these photos are of the 2nd batch. I ran out of daylight so I put the 2nd portion in the fridge overnight. I think that helped with the shaping process.
Katie Zeller says
Wow – great technique photos! The the breads look wonderful
Cathy W. says
Thanks Katie! The 2nd batch was the charm. First batch tasted wonderful, but these look better.
Lien says
Yours are so neat and small, perfect for tea. Mine were more saucer like, we ate them with soup. Love your step-by-step-pictures.
Cathy W. says
Thanks Lien! I made the 2nd batch smaller because the first ones were too big.
MyKitchenInHalfCups says
Oh, way to go Cathy! Your folding is excellent and they are gorgeous. I’m so happy to hear you baked yours in two batches. Tomorrow I’m going to bake the other half of the dough. I always think it’s great to be able to mix one batch but get two fresh from the oven bakings.
Cathy W. says
Thanks Tanna! They worked great after the overnight rest in the refrigerator. I just let the dough warm up to room temperature before rolling it out.
Elle says
So the smaller ones were preferable. I love that they are a little puffy and the photos really show the technique for making them. We should send prospective Buddys to your site to check it out.
Cathy W. says
Thanks! The smaller ones turned out better, but they both tasted great!
Karen Kerr says
Those look so perfect (and I love your plate!). The smaller ones look like cookies!
Cathy W. says
Thanks Karen! They almost tasted like butter cookies. Yum!
Jamie says
Oh I like that yours and Aparna’s are thicker… well plumper. I find it makes them more tempting and probably more satisfying. Yours are just beautiful!
Cathy W. says
Thanks Jamie! Pumper, yes. They were definitely satisfying.