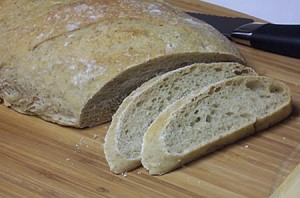
Rustic Bread is made with a preferment and includes a bit of whole grain or rye flour or a mixture of both to provide a rustic appeal and more depth of flavor.
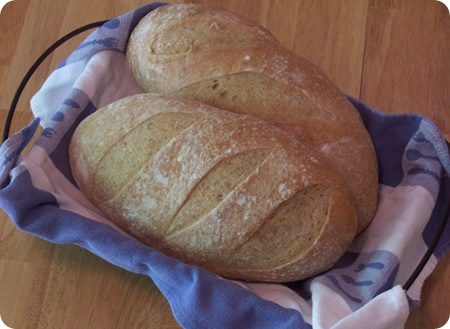
Rustic Bread is one of three breads the Mellow Bakers’ group made for April. I was so pleased when the group chose this one. I love rustic breads and this one is no exception.
The Mellow Bakers is my newest bread-baking group and it’s a good thing we’re moving at a mellow pace because that’s what I’ve been doing lately. I just got back from a mini vacation and all I’ve wanted to do for the past week is work on my garden. One of the places we visited had an organic garden and I got lot’s of neat ideas. I was so ready to get back to gardening when I got home.
With all the gardening going on, I got a little bit behind on my bread baking. Not to worry, my bread-baking hiatus didn’t last very long. It never does. As of this weekend, I’m back in the game.
Rustic Bread Recipe
Makes: 2 Large Loaves
Adapted from: Bread: A Baker’s Book of Techniques and Recipes by Jeffrey Hamelman
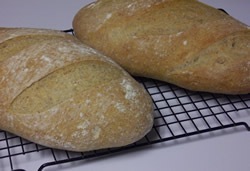
Note: To achieve a darker and crisper crust than what is shown in these photos, ensure the baking stone is preheated for at least 45 minutes (while you are preheating the oven) and let the crust bake darker than a golden brown.
Ingredients:
Preferment:
- 1 lb. bread flour (3 1/2 cups)
- 9.5 oz. water (1 1/4 cups)
- 1/2 tablespoon salt
- 1/8 teaspoon instant yeast
Final dough:
- 10 oz. bread flour (2 1/2 cups)
- 6 oz. whole wheat or rye flour or a mixture of them (around 1 1/2 cups)
- 12.5 oz. water (1 1/2 cups)
- 1/2 tablespoon salt
- 1/2 teaspoon instant yeast
- all of the preferment
Directions:
Making the Pre-Ferment
This bread is made with a pre-ferment of bread flour, water, salt and a little bit of dry yeast.
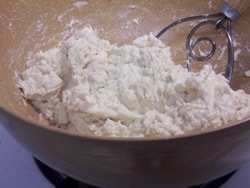
First, add the yeast to the water to dissolve it. Then, add the flour and salt and mix until just smooth.
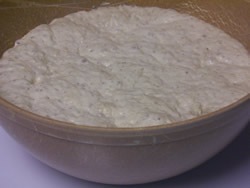
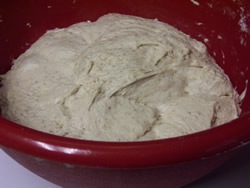
Cover the bowl with plastic wrap. Let it stand for 12 to 16 hours at about 70 degrees. Here is the preferment after 16 hours.
Making the Dough
The dough is made using the pre-ferment and a combination of bread flour, whole wheat flour and rye flour.
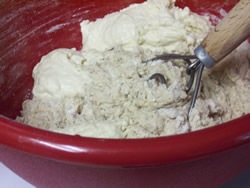
To make the pre-ferment, add all of the ingredients to the mixing bowl, except the pre-ferment. You can use a mixer to incorporate all of the ingredients, but I did this by hand (using my dough whisk) because my mixer can’t handle this much dough.
Add the pre-ferment in chunks. My pre-ferment wasn’t really chunky so I added it in blobs. I finished incorporating the dough with my hands because there was so much dough.
The dough should be supple and moderately loose.
Fermenting the Dough
Cover the dough with plastic wrap and let it ferment for 2 1/2 hours. During the bulk fermentation, you fold the dough twice, once after 50 minutes and again 50 minutes later. I actually did this part at about 1 hour and 10 minutes and then 60 minutes later.
I let it rest on the counter for about 3 1/2 hours (since I was working in my garden), then decided I wasn’t ready to bake the bread so I put it in the refrigerator to retard overnight. I took it out the next day and let it warm up to room temperature before mixing the dough.
Shaping the Dough
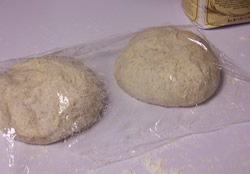
Divide the dough into two equal pieces (1.5-pound pieces). Preshape the dough lightly into rounds and place on a lightly floured work surface, seam side up. Cover the mounds with plastic wrap.
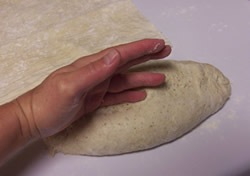
Let the dough relax for 10 to 20 minutes, then shape into round or oval loaves. I decided to shape the rounds into batards using the method from the Bread Baker’s Apprentice.
For more information on shaping a batard, check out this post on Tuscan Bread.
Proofing the Dough
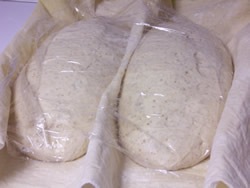
Place the batards into a couche. To make a couche, I sprayed baker’s linen with cooking spray, then heavily dusted it with flour and placed the batards between the folds.
Then I covered the dough with plastic wrap and let it ferment for about 1 1/2 hours. As you can see I used my sugar bowl and the book to keep the dough from spreading.
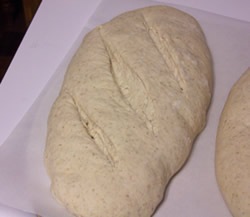
Invert the loaves onto a baking peel covered with parchment paper. Slash the loaves with a serrated knife.
Baking the Loaves
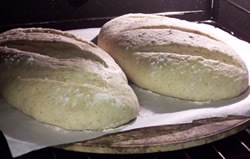
Bake the bread for about 35 to 38 minutes in a 450 degrees preheated oven. I preheated the oven with the baking stone in it and placed a steam pan underneath to create steam.
After I slid the loaves onto the baking stone, I placed 1 cup of hot water into the steam pan, then closed the door.
After about 30 seconds, I sprayed the oven walls with a spray bottle filled with water to create more steam. I did this 3 times, then let the bread bake for about 10 minutes, then rotated the loaves for even baking.
Bake the loaves until they are golden brown and sound hollow when tapped on the bottom.
Remove the loaves to a cooling rack to cool completely before slicing and serving.
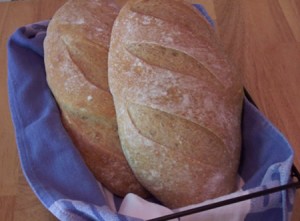
This bread tastes great warm with butter. Delicious!
This bread has been YeastSpotted. Please visit Wild Yeast to view all of the lovely breads in the roundup.
 Mellow Bakers was hosted by Paul at Yumarama. We baked breads from Bread: A Baker’s Book of Techniques and Recipes by Jeffrey Hamelman.
Thanks for joining me in the bread-baking blog. I hope you’ll join me again soon.
Happy Baking!
Cathy
görel says
It looks really great, and I love your procedure pics!
I have to get going, silly me is actually planning to follow both Mellow bakers and The Modern baker …
elra says
Cathy, your bread look perfect. I have that book, and made plenty of bread from his recipe.
Cheers,
elara
Abby says
Your loaves look lovely! We loved this one, too! Great step-by-step photos.
Nat says
The loaves are beautiful. Nice scoring and oven spring! : )
hobby baker says
They look simply delightful!
GlutenForPunishment says
Beautiful loaves! I have that book, but haven’t made that recipe yet. I must give it a try.
Simo Häkli, Turku, Finland says
The bread was good, the recipe good, the mood also good!
Smells much like the Lahey No-Knead Bread. Also the texture is alike. I had a hard time baking it without the right equipment. I turned my baking tray upside down and put the very loose loaves on it. They were so sticky that also stuck on my linen though it was VERY well floured! So the loaves spread over the edges of the tray in the oven..
But still beautiful and tasty bread, the gluten strength lifted them up back in their loaf-form while in the oven. Thanks!
Cathy (breadexperience) says
Hi Simo! Thanks for visiting my blog. Sounds like you improvised very well. Good for you. That’s the whole fun of it!
Rod Ferris says
Seems I e been making this bread for awhile! I use Red Fife for the whole wheat element. And diastatic Malt. Guess I do theItalian version! I add salt at the end and analyze the dog that once it is together. I also use semolina flour in the main dough. ½ and ½ Seems I get the same dough and the same loaf!
Isn’t it fun to bake?
Cathy says
Hi Rod, thanks for sharing your experience making this type of bread. Red Fife sounds like a good choice for the whole wheat and I love semolina. Yes it is fun to bake.