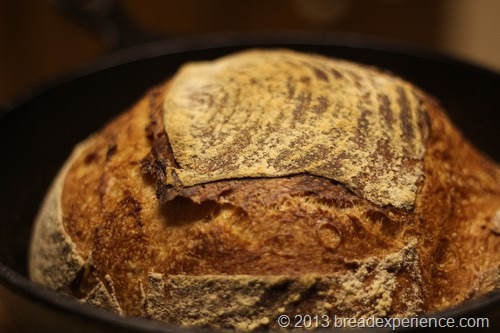
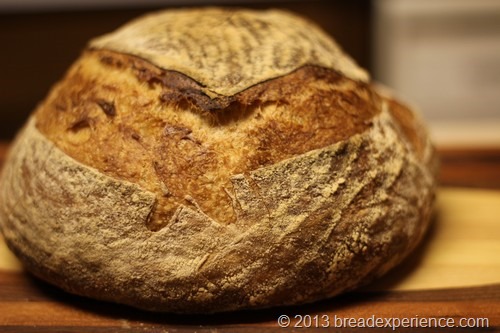
This white bread with poolish is based on the Forkish method from Flour, Water, Salt & Yeast and is baked in a Dutch Oven Combo Baker. When I removed the loaf from the oven, it crackled in my ear. It was such a lovely sound!
Now and then you run across a gem. You know you’re onto something because it just resonates with you. It’s not something you can explain, but you just know it when it happens.
Well, it happened to me this past weekend. I ended up not going to the Asheville Bread Festival as I had planned, and I was bummed.
I had been pushing myself too hard recently, and I just had to rest. So, instead of fighting it like I normally do, I took a break from everything and spent time catching up with myself. It rained most of the weekend so it was a good time to just hibernate.
While I was sitting there trying to relax (which if anyone knows me, is a feat in and of itself), I picked up a bread book that I had gotten recently. The book is called Flour Water Salt Yeast: The Fundamentals of Artisan Bread and Pizza by Ken Forkish.
Note: I did not receive a free copy of the book in exchange for a review. I bought the book myself, and I love it.
Mr. Forkish’s method is inspired by the processes of Jim Lahey (My Bread) and Chad Robertson (Tartine Bread). I think that’s one of the reasons I like this book so much. All of his formulas are based on 1000 grams of flour which makes it so easy to follow and adapt. He also provides tips on how to adapt his recipes. Nothing is left to chance.
I was so inspired by the book that of course I had to bake some bread. I chose a bread that utilized an overnight poolish so it didn’t require much hands-on time the first day. I finished it Sunday afternoon and it lifted my spirits.
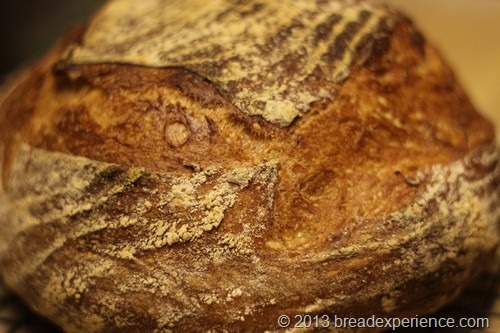
I fell in love with this bread the minute I took it out of the oven. I placed it on the wire rack to cool and as I was taking photos, it started to sing. It was a delightful melody. It crackled ever so lightly like a lover whispering in my ear.
I don’t know if I was just so spacey from exhaustion or what, but all I could think at the time was “I’m in love.”
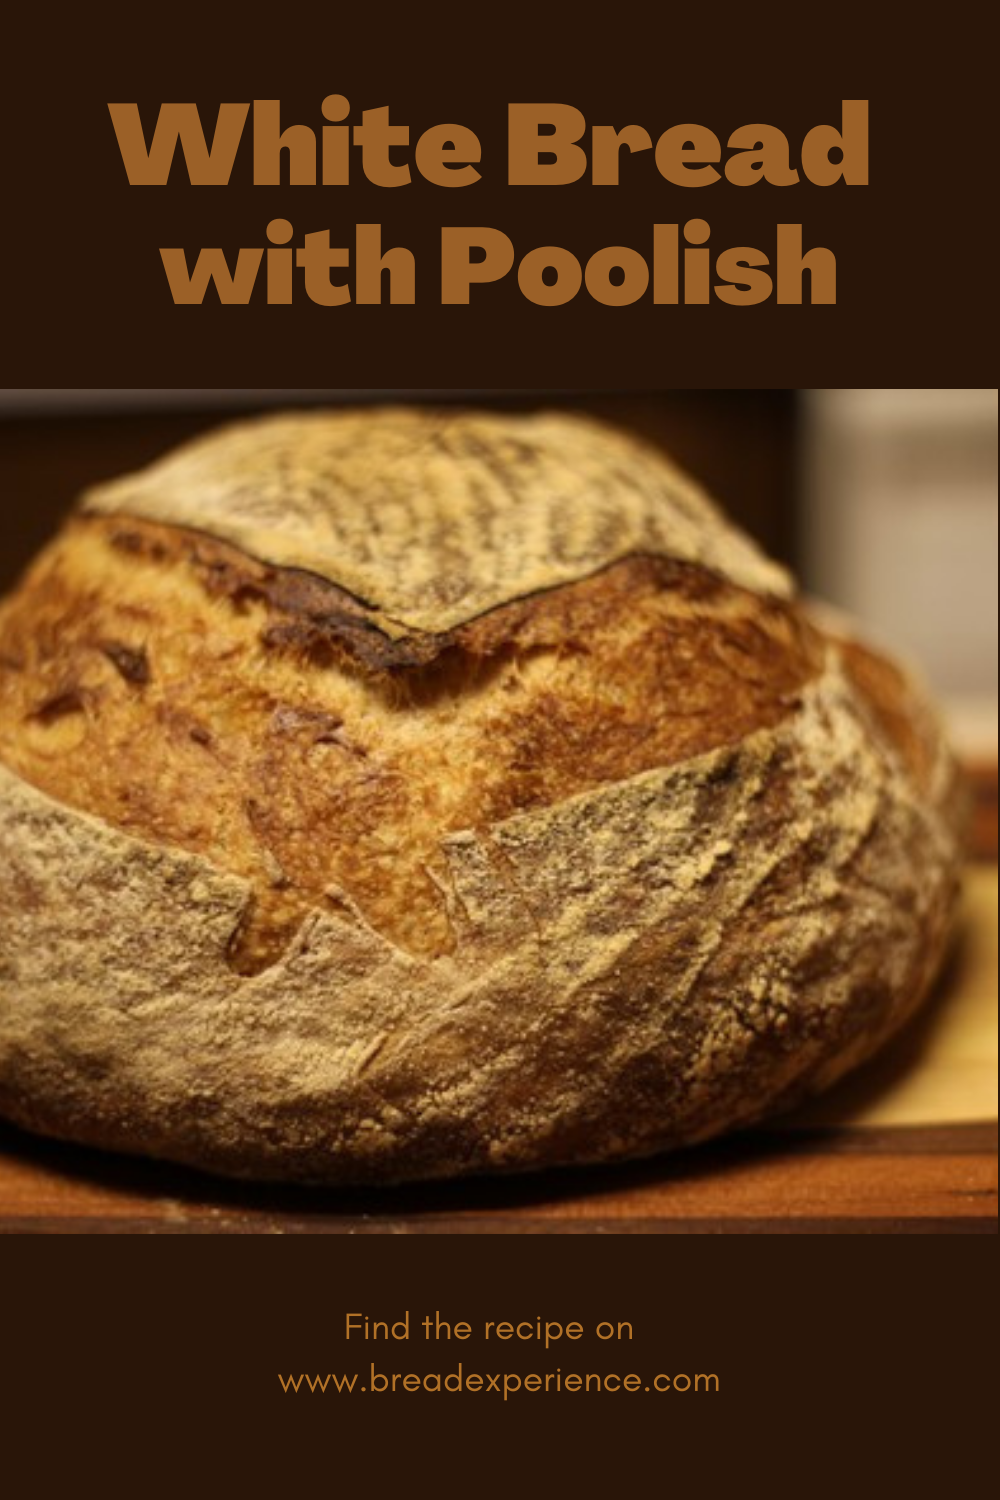
White Bread with Poolish
Adapted from: Flour Water Salt Yeast: The Fundamentals of Artisan Bread and Pizza by Ken Forkish
Makes: One Loaf
Poolish:
| Ingredient | Quantity | |
| White bread flour | 250 g | 1 7/8 cups +1 tbsp. |
| Water | 250 g 80 degrees F. | 1 1/8 cups |
| Instant dried yeast | 0.4 g | scant 1/8 tsp. |
Final Dough:
| Ingredient | Final Dough Mix Quantity | |
| White bread flour | 250 g | 1 7/8 cups + 1 tbsp. |
| Water | 125 g 105 degrees F. | 1/2 cup |
| Fine sea salt | 10 g | ~1 3/4 tsp. |
| Instant dried yeast | 1.6 g | 1/2 tsp. |
| Poolish | 500 g | all of the above |
Baker’s Formula:
| Ingredient | Quantity in Poolish | Total Recipe Quantity | Baker’s Percentage |
| Bread flour | 250 g | 500 g | 100% |
| Water | 250 g | 375 g | 75% |
| Sea salt | 0 | 10 g | 2.0 % |
| Yeast | 0.4 g | 2 g | 0.40 % |
| Poolish | 50%* |
*Note: The baker’s percentage for the poolish is calculated by taking the amount of flour in the poolish and dividing it by the total flour in the recipe (250 grams / 500 grams = 50%).
Process:
1) Make the Poolish
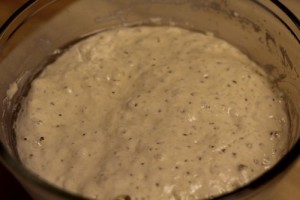
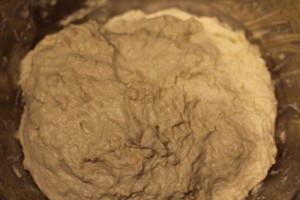
The night before you plan to bake the bread, whisk the flour and yeast together in a large bowl and add the water. Mix by hand or with a wooden spoon until it is thoroughly blended. Cover the bowl with plastic wrap and let it sit at room temperature (65 to 70 degrees F.) for 12 to 14 hours. When the poolish is ready, it should be bubbly and almost tripled in volume.
2) Mix the Final Dough
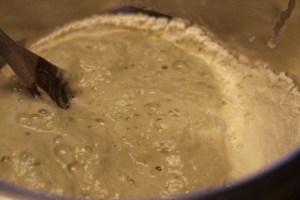
The next day, after the poolish is fully mature, whisk together the flour, salt, and instant yeast in a large bowl. Pour the water around the edges of the poolish to loosen it from the bowl. Pour the water/poolish mixture into the flour mixture.
For the next part, you’ll need to get your hands wet. Using wet hands, mix the dough by folding it to thoroughly incorporate all of the ingredients (refer to my post on making Tartine Country Bread) The dough should be around 74 – 75 degrees F.
3) Bulk Fermentation
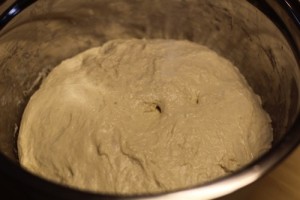
Let the dough rest for 2 to 3 hours after mixing. During this time, do two or three folds during the first hour after mixing the dough. I forgot to use 105 degrees F. water when I mixed the dough so I extended the bulk fermentation another hour to compensate for the overall temperature of the dough being lower. I did several folds and turns during the first hour, then I let the dough rest for the remainder of the proof.
4) Shaping the loaf
Mr. Forkish has a slightly different process because he bakes his loaf in a Dutch oven and shapes his loaves into a fendue shape. I shaped my loaf differently and baked it in my combo baker so this is the process I used. If you choose to use a different type of bread baker, you might need to adjust the shaping/scoring part so you don’t burn yourself when inverting the dough into the pot.
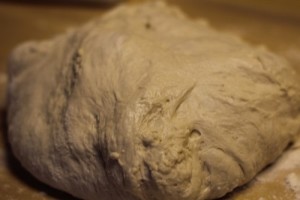
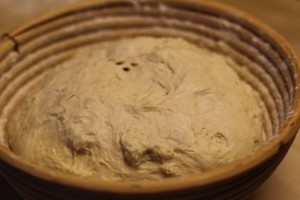
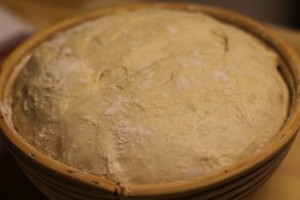
I only made one loaf so I didn’t need to divide the dough. I just carefully scraped the dough onto a lightly floured surface and shaped it into a medium-tight ball. Then I placed it seam-side up in a floured banneton basket. I used an 8-inch round proofing basket but you could use a larger one if desired.
5) Proof the loaf
I lightly floured the top of the loaf and covered it with a kitchen towel. Then I let the loaf proof in the basket for an hour.
Use the finger-dent test to know when the dough is fully-proofed and ready to bake. This just means you press your index finger lightly into the dough and if the indention remains, the dough is ready.
6) Prepare the oven for Hearth baking
While the loaf is proofing, at least 45 minutes before it’s time to bake, preheat the oven to 475 degrees F. with the combo baker or Dutch oven or other bread baker on the bottom rack. There’s no need to place a steam pan underneath because the covered pot will provide the steam.
7) Scoring the loaf
For this part, be very careful that you don’t burn yourself because you’ll be working with a very hot pan. Keep your fingers, forearms, and anything else away from the hot pot. A large heat-resistant oven mitt works wonders.
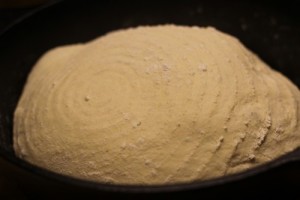
Carefully remove the preheated combo baker (using gloves) and invert the proofed loaf onto the bottom of the baker. My loaf didn’t plop exactly centered in the pan so I shook the pot a little bit to even it out but it was still a bit uneven.
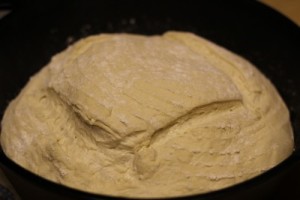
Then I carefully scored the loaf using a lame. Even though the rings of flour were a bit off in the pan, I thought the scoring turned out pretty well.
8) Bake the loaf
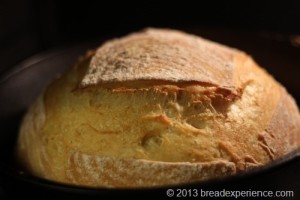
Cover the combo baker with the lid and place it on the bottom rack to bake. Bake the loaf for 30 minutes, then uncover the baker and bake the loaf for an additional 20 to 30 minutes. This is what the loaf looked like when I removed the lid.
The finished loaf should be at least medium dark brown all around the loaf. This has always been the hard part for me because I don’t like to burn my bread, but I was a good girl and left the loaf in for the suggested amount of time. However, if your oven is hot like mine, you might want to check the loaf sooner.
9) Cool the Loaf
Carefully remove the combo baker from the oven and gently tilt it to remove the loaf. I just reached in using my oven mitt and lifted it out. Place the loaf on a wire rack and let the loaf rest for at least 20 minutes before slicing.
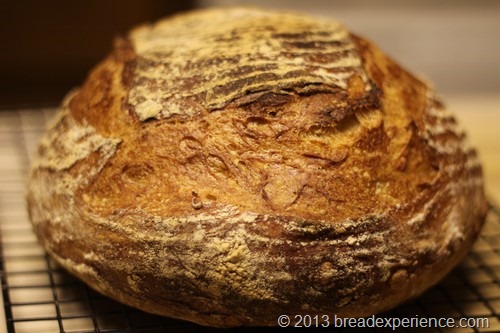
After I let the loaf cool, I just couldn’t bring myself to slice it just yet. I wanted to look at it a bit longer. So I placed the cooled loaf in a paper grocery bag and let it sit overnight.
10) Slice and Enjoy!
The next day, I sliced the loaf and sampled it. I was not disappointed. It’s great with butter or dipped in oil and tastes particularly good toasted with sharp cheddar cheese. It also makes a great sandwich bread. I’ve been enjoying it all week.
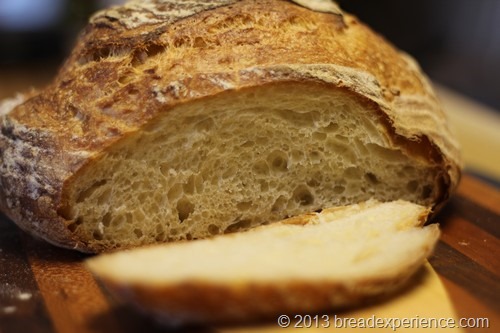
And so, my love affair with bread begins anew with this White Bread with Poolish.
I hope you enjoy this bread as much as I did.
This bread has been YeastSpotted in the weekly bread roundup hosted by Susan of Wild Yeast.
Happy Baking!
Cathy
Karen Kerr says
That looks wonderful Cathy. I love it when my bread sings. The first time that happened to me I freaked a little, and then it hit me… oh… .yeaaaahhh.
=)
TeaLady says
Food that sings! wonderful. I am anxious to try this one.
Cathy Warner says
Thanks Karen! It is a lovely sound.
Hi Margaret, you definitely need to try this one. It’s delightful!
Mostyn Park says
Hi
Congratulations – a great loaf/recipe/explanation/pics – but please, what is a ‘combo baker’? What does it look like etc. I’m in the UK and haven’t a clue what this might be or whether, in fact, I own one! Before asking, I did check on Google but was none the wiser. Thanks in advance!
Mostyn
Cathy W. says
Hi Mostyn, thanks for visiting.
A combo baker is like a cast iron Dutch oven, but the smaller part is on the bottom and the deeper part is on top. At least that’s the way it’s used for this bread. It has two handles. It works like a La Cloche. It makes beautiful loaves. You can see exactly what it looks like in this post http://breadmakingblog.breadexperience.com/2011/02/tartine-country-bread.html
TONY says
WHY ARE YOU USING INSTANT YEAST INSTEAD OF SOURDOUGH STARTER? — THE BREAD LOOKS GREAT AND I WILL TRY IT AND USE STARTER INSTEAD OF YEAST —
TONYK
Cathy W. says
Hi Tony, this particular post is about the bread/method from Ken Forkish’s book. Not everyone is comfortable using a sourdough starter; however, feel free to utilize sourdough instead of the yeast if that is your preference. And next time you want to comment, please don’t use all caps as that is considered yelling and there is no need to yell about good bread. Thank you!
Robert Hill says
I used sourdough instead of yeast. Worked brilliantly.
Cathy says
Fabulous! So glad it worked well for you.
老公,回家吃飯吧! says
Hi from a Hong Kong housewife who loves bread,
I just bought Ken Forkish’s bread book and did my first try on poolish white bread. I have been baking bread for about 1 year. I tried to follow his instruction and the only thing I could not control is the weather temperature here is 90F~95F and quite humid. The 12-14 hr poolish develeopment turned out well as I put the tub in the air-conditioned room whole night. However the problem happened when I tried to make the dough the next morning in the kitchen where temperature was about 95F. I did everything said in the book but the dough just could not be formed. It was like a flat batter all the time. I tried to do the Fold, but I could not. Once I fold, it immediately spread out like a batter, so I could not turn it over. I kept on and still just a mass of sticky batter. At the end, I tried to add more flour or put it into the machine mixer, it did not work. I don’t know where it went wrong except the hot and humit weather. But would these factors make such big impact on the dough? I used Gold Medal unbleached all purpose flour. I just just bought several kilos of such flour and determined to work it through. Reading your blog, I hope you can give me some advice. Many thanks.
Donald A says
Use a higher protein AP flour….King Arthur….Heckers Etc….I believe they are about 11.5%.
Cathy W. says
Hello, I think your problem is the heat. What temperature was your poolish resting at all night? It really needs to be about 75 – 80 degrees. If you’re not able to do that, I think letting it rest on the counter for a couple of hours at room temperature and then placing it in the refrigerator overnight might be a better option for you. You could let it warm up to room temperature for a little while the next day.
Also, when you’re baking in the heat like that, you’ll probably need to reduce the proofing time. I’ve heard that for every 2 degrees above 80 degrees, you should reduce the fermentation time by 15 minutes.
It’s hot and humid where I am as well, and I’ve had to reduce the proofing time.
You might also want to use colder water so the dough temperature is not so hot.
Hope this helps. You’ll probably just have to play around with it a bit to get it to work, but don’t get discouraged. This bread is worth it.
psychopecan says
This looks beautiful, Cathy.
I just recently began experimenting with baking bread, and I don’t have a dutch oven or combo baker yet. Do you think this recipe would be possible without?
Thank you
Selena
Cathy W. says
Thanks Selena! You can make this bread without a Dutch oven, but it won’t have the same characteristics. The Dutch oven/combo bakers simulate a brick oven to provide the necessary steam/heat to create the crackly crust and help the bread expand. If you have a baking stone, you could bake it freeform on the baking stone with a steam pan underneath, but it will still be different because the heat is not always even when using a baking stone.
Chris Losinger says
I did everything said in the book but the dough just could not be formed. It was like a flat batter all the time.
yes.
i tried Forkish’s recipe last week and had the exact same results. the dough was way too wet (i think). it would not rise, was way too sticky, would not form a loaf. and when it baked it, hoping something magical would happen in the oven, the loaves came out short and the crust was rock-hard. total failure.
i set my poolish out in a 71-deg house all night. i’m in NC, but it hasn’t been above 80 here in weeks. so the heat was definitely not an issue with me.
(i actually found this page Googling to see if anyone else had the same problem)
Cathy W. says
Hello Chris,
Things to consider: Did you let the poolish rest overnight for 12-14 hours? How long did you let the dough bulk ferment? Did the folds help to strengthen the dough? You might need to extend the bulk fermentation (first rise) to make sure the dough is developed sufficiently. I extended the time by an additional hour, but you could extend it longer, if necessary.
You could even try putting the dough in the refrigerator overnight to help develop the gluten. I do that quite often with these types of breads. I didn’t do that with this one, but if you need to, you can.
Chris Losinger says
overnight, yes. 14 hours, probably. folding didn’t seem to do much. i added more flour later, to try to sop up some of the water, but that probably just made things worse.
i’m starting to think it was the flour i used. Forkish said ‘all purpose’ flour. and that’s what the label on the flour said.
i had good luck with Forkish’s first few recipes, using King Arthur bread flour. but since he says to use AP, i tried that. but i used White Lily AP flour, since we had it in the house. but that has a very low protein content: it’s nearly cake flour. next time i try it, i’ll use something with a bit higher protein level.
Cathy W. says
You’re right! The type of flour used will definitely effect the gluten development. White Lily is good for biscuits; not so much for artisan breads. I recommend going back to using the KAF bread flour or try a different AP flour with more protein content. Glad you figured out the problem. I do hope you’ll try this bread again. It’s definitely worth it.! Happy Baking!
David Cass says
I’ve been baking Ken Forkish’s White Bread with Poolish, and consider it the best bread I’ve ever had. I’ve baked several of them, but lately I’ve been having trouble with the proofed dough sticking to the proofing basket (I use the same ones he does in the book). The effect is the dough streches out and must be pulled away from the basket, reducing the gas content markedly, I’d guess. I recently cleaned the baxkets, but I prepped them once they dried by painting them with a corn starch/water thin coating, then applied flour all over the baskets until each was pretty well covered. I always apply fresh flour before each use. Is the problem simply too little flour in the basket, or should I apply a liberal coating to the dough once it’s divided? Is it something else, perhaps?
Cathy says
Hi David, Although I love the rings, it’s frustrating when the dough sticks to the basket. I’ve found that after using the baskets for awhile, I need to use liners with my baskets especially with this type of wet dough. An alternative would be to use a lot of extra flour and then brush it off before baking the loaves. That might be a bit tricky with the preheated pot, but if you could do it quickly before you score the loaves, that is, if you are scoring them. Are you using rice flour? That works really well.
Therese says
Oh my gosh, it turned out perfect! I’m so excited, I’ve tried for more than twenty years to bake bread this good. I even cheated a little, I used a $20, crockpot brand, 5qt enamel roaster and didn’t preheat it. Did my last rise right in the roaster. Turned out super crackly and beautiful. Thank you so much for posting this recipe!! I may never buy bread again 🙂 ❤️
Cathy says
Therese, that’s awesome! That’s not cheating, that’s improvising. Way to go! I’d love to see a photo of the bread if you have one.
Therese says
I do! I have no idea how to attach it 🙂 Thanks again! Would it be possible to convert this to a rye recipe?
Cathy says
Hi Terese, you can add or substitute rye flour in this bread, but if you use mostly rye, it will be really dense. If you want to share a photo, feel free to post it on the Bread Experience FB page. That’s probably the easiest way to do it.
Pushpa says
The bakers percentage formula part where the polish is 50 % . I would like to know how did u calculate that part ? I’m abit loss there . Tq
Cathy says
Hello, the baker’s percentage for the poolish is calculated by taking the amount of flour in the poolish and dividing it by the total flour in the recipe (250 grams / 500 grams = 50%). I added a note to the formula to explain this. Happy Baking!
Pushpa says
Yes I got it . Tq so much . I was scratching my head for that part . Ha ha ha ha
Ellen@BakeItWithBooze says
Can you please tell me what size proofing basket you use? I am quite confused on which size to buy. I’ve read a few recipes and can’t find any information. This dough is about the same size as the Tartine country bread which was divided between two baskets. Please help! 🙂 Lovely bread…And I have a combo cooker just for this bread! Thank you!!
Cathy says
Hi Ellen, I believe I used an 8″ round banneton basket for this bread; however, you could use a larger size if you prefer. The loaf expands when you place it in the hot combo cooker. I will add the size basket I used to the post for clarification. Thanks for bringing this to my attention. This is a great bread! Let me know how it goes when you make it.
Alma Rands says
Thank you for posting this recipe. I have the Ken Forkish book, and really am learning a lot. However, I have not tried the recipes as they all make two loaves, which is too much for me. He does suggest using half the dough for pizza, or focaccia, but I am not interested in making those.
I see where you have successfully halved the recipe in the Forkish book, and had success. I was concerned that cutting the recipe in half would change the taste and texture. However your did it with great success. Thank you so much, as now I will feel comfortable about halving the recipes.
Also, I want to thank you for all your wonderful recipes. Each and every one of them has been a great success.
Cathy says
Alma, that’s the beauty of using baker’s percentages. You can easily scale formulas up or down. Since the formulas in the Forkish book are based on 1000 grams, they can be halved very easily.
Thank you for your feedback! I’m so glad you enjoy the recipes and have had good success with them.
Ray D says
Could someone please advise me at what point is the best time to freeze this dough – immediately after shaping or 30 minutes after shaping? I made half recipe & used cast iron pot and it turned out great! Would like to make a larger batch. I have Ken’s book any other recipe that you love? Ray
Cathy says
Glad your bread turned out. This is a great method! I haven’t frozen this dough, but I have frozen the bread after it completely cooled. I do know that pizza dough (with oil in it) freezes fairly well for several months. It is frozen after shaping into dough balls.
Alla says
This Bread looks so beautiful and delicious!! I’m making it right now! I so hope everything goes the right way! I’m at the last rise step now….getting nervous! I always scored my bread before the last rise. That way i never ruined the beautiful shape of the risen bread. But this time I’m following all of the instructions carefully. Worried about scoring the bread once its inside the baker….
Cathy says
Hi Alla, It is a little tricky scoring the loaf inside the baker. Do let me know how it turns out.
Alex Hanna says
Hi
A fantastic loaf and something of a revelation. I normally use sourdough but I wanted to get similar results with dried yeast for a change. The bread came out with a great structure and was a little easier to handle than a high hydration sourdough. It was every bit as good as a sourdough and what a tasty crust!
Best
Alex
Cathy says
Hi Alex, thanks for sharing! So glad you enjoyed making this loaf.
Carol says
I have been experimenting with the dutch oven baked breads and this one is my favourite so far. The only change I made was adding 1 teaspoon of honey to the mix. When I did the final proof I thought the dough was too wet and did not really keep that nice design from the banneton, but it did bake up beautifully and was delicious.I find that 475F a bit high for my oven so baked mine at 450F and then 15 mins at the end uncovered and at just over 200F internal temp it was was perfect. I will make it again for sure.
Cathy says
Hi Carol, Thank you for sharing about your experience making this bread. I’m glad you found a temperature that works for your oven and that the bread baked up nicely.
This is definitely a wet dough. Sometimes I use a lined banneton basket when working with wet dough.
william says
I have made this dough several dozen times, and each time I make it I try something a little bit different. For example I have used all AP dough, all bread dough, AP for the polish and bread for bulk etc… I don’t think the results of different flours has mattered I always use KA flour). Here are a couple of tweaks that have beedn successful for me:
1. I use parchment paper. When removing the loaf from the banneton, plop it on a piece of parchment paper about the size of the dutch oven. Related to the next point, hand brush the excess flour off the parchment paper before lifting and putting into the pan. Using the parchment paper really makes getting the loaf into the pan a very easy process.
2. I use a pair of scissors to score the bread. I create a table top by making four cuts to create a square. Et voila. Fast and easy.
3. I flour the heck out of the banneton. There is no reason not to. This flour is not changing the percentages and it keeps the wet dough from sticking (most of the time).
4. Hold on to your hat for the next one: I use both instant yeast and a starter !! To the polish I add 1/2 tsp of instant yeast; and to the bulk mix I add 1 tsp of instant yeast and 100g of starter. I add another 25 grams of flour to the final mix to compensate for 100% starter.
5. Related to the point above, I start the instant yeast in 100 degree water for about 5 mins before adding to the flour.
6. Last one: I mix the salt into the flour during the bulk mix stage before adding it to the polish and before adding the final water. My general understanding is that neither the instant yeast nor the starter play well with the salt, so this is my way of trying to minimize confrontation. Might not make a hoot of difference, but I do it anyhow.
7. Real last one. I mist spray the loaf just before i cover them, and sometimes sprinkle a little course kosher salt on top.
This bread is loved by all who taste it, which is why I keep making it. And unlike those who want to cut the recipe in half, I double it and make four loafs. With a double oven that accommodates to dutch ovens, the added time to make 4 vs. 1 is minimal and all that work for one loaf that will disappear faster than a frightened rabbit is crazy. Plus, the bread freezes really well.
That’s all folks. Cheers.
Cathy says
William,
Thank you for sharing your tips and in such great detail! I like using parchment paper myself and you’re right, adding lots of flour to this loaf shouldn’t affect the hydration since it’s such a wet dough. Having a double oven that holds two Dutch ovens, how fabulous! I would love to see a photo of your breads sometime.
Happy Baking!
Cathy