I grew up eating grits and cornbread, but I haven’t had much exposure to polenta.
So when Elizabeth of blog from OUR kitchen chose Polenta Bread as the bread of the month for the Bread Baking Babes (BBBs), I set out to learn more about polenta and what differentiates it from grits and cornmeal.
I ran across an interesting article and discussion about Polenta versus Grits here.
Some folks contend that grits (the Southern version) are made from white corn, and polenta (the Italian version) is made from yellow corn.
Others, such as Glen Roberts of Anson Mills, say the type of corn is what makes the distinction – i.e. grits are made from dent corn and polenta is made from flint corn. Dan Barber substantiates this claim further in his book, The Third Plate, when he talks about tasting the best polenta he had in his life. It was made from New England Eight Row Flint.
The third explanation is that it’s the grind of the corn that makes the difference. One commenter, whose family ran a mill for a long time, put it this way, “One pass of the millstone = Grits; Two passes of the millstone = Corn Meal; Three passes of the millstone =Polenta (Corn Flour).” There you go. Take your pick.
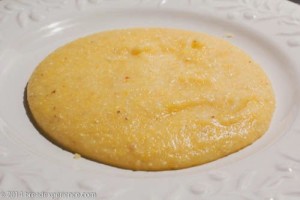
As for me, I used coarsely ground cornmeal and cooked it with hot water to make the polenta. When I tasted it, I was smitten. I forgot all about the confusion with the grinds and colors and types of corn. The cooked polenta tasted really good, even without salt.
I made my Polenta Bread with sourdough. Some of the other Babes scoffed at using sourdough so Elizabeth provided an alternative. If you prefer to use dried yeast instead of a sourdough starter, please refer to the instructions in Elizabeth’s post.
I also used a slightly different method for the bulk ferment and final proof because I still had stitches in my finger from my surgery, but don’t worry, I used a food-grade glove to protect my finger and the dough.
Sourdough Polenta Bread
inspiration
: Della Fattoria’s Polenta Bread from Artisan Baking Across America: the Breads, the Bakers, the Best Recipes by Maggie Glezer
The evening before (1st day):
Starter
- 60g (60ml) water at 95F
- 20 g (4 tsp.) (active) fed sourdough starter
- 100g (2/3 cup) unbleached all-purpose flour
The morning of (2nd day):Polenta
- 35g (3 Tbsp.) cornmeal, coarsely ground
- 175g (175 ml) cold water
The morning of (2nd day): Dough
- 390g (390 ml) water at 80F
- 535g (3.85 cups) unbleached all-purpose flour or a mixture of all-purpose and bread flour *
- 60g (0.5 cups) whole wheat flour
- 5g (1.5 tsp.) ground flax seed meal
- all of the starter
- 18g (1 Tbsp. + 0.75 tsp.) salt
- all of the cooled polenta
- cornmeal, for garnish and sprinkling
* I used all-purpose flour to make this bread. It worked pretty well, but the dough will be stronger if you use a mixture of all-purpose and bread flour as suggested in the original recipe. Or, you can add some vital wheat gluten to the all-purpose flour to give it more structure. Starter:
The evening of the day before you plan to bake the bread, add 20g of starter to a small bowl. Pour in the water and add the flour. Using a wooden spoon, Danish dough whisk or your hands, mix until you have a smooth lump of dough. This will only take a few minutes.
Polenta: In the morning of the day you are baking the bread, pour cold water into a small pot on the stove at medium high heat. Add the polenta and using a wooden spoon, cook, stirring constantly until the mixture is thick – about 5 minutes. Remove it from the pot to a plate or shallow container and put it into the fridge to cool.
Mixing the dough: In a large mixing bowl, add the starter (which should have doubled and be quite bubbly).
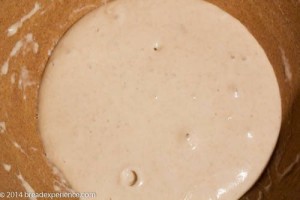
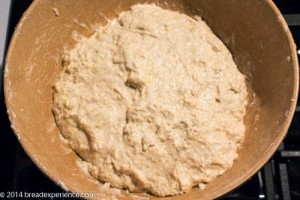
Using a wooden spoon or Danish dough whisk, stir in the flours, ground flaxseed and salt. Elizabeth said it might be pretty sloppy. Mine was gloppy.
Kneading: Lay the cooled polenta on top of the dough. Plunge in with your hands to turn and fold the dough in the bowl, kneading until it’s smooth (5 to 10 minutes).
The dough was really wet so I did the fold-and-turn method in the bowl. I couldn’t really knead it. The dough stayed pretty wet so I covered it with a towel and let it bulk ferment (in the bowl) at room temperature for a couple of hours.
I did the fold and turn method after about 15 minutes and then every 30 minutes for the first hour and a half. The dough got stronger but it was still pretty gloppy.
Shaping: When you are ready to shape the bread, turn it out onto a lightly floured board and divide it into 2 pieces. Trying not to disturb the bubbles too much, shape into two rounds. Liberally spray the tops of the shaped loaves with water. Cover them with cornmeal. (Glezer suggests rolling the sprayed shaped loaves in the cornmeal placed on a plate.) Put each loaves seam-side up in a brotform, tightly woven basket or colander. Cover each one with a mixing bowl and allow them to rise on the counter (or in the oven with only the light turned on) until almost double.
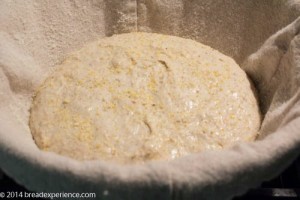
I shaped the dough into rounds and placed them into lined proofing baskets dusted with corn flour. Then I put them in the refrigerator to retard overnight.
The next (3rd) day:
You can bake this bread on a baking stone, in a Dutch oven or cloche or even in a loaf pan.
Preheat: If you are using a baking stone, preheat the oven to 375 degrees F. If you are using a Dutch oven or bread cloche, preheat the oven to 450 degrees F. You can preheat the Dutch oven or cloche when you preheat the oven but I opted to use a room temperature cloche because I was pretty much doing things one handed, and I didn’t want to burn myself.
While the oven was preheating, I took one of the baskets out of the refrigerator.
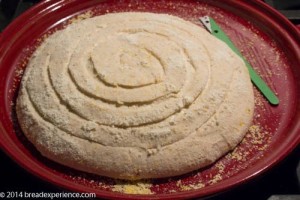
I dusted the bottom of the cloche liberally with corn meal and gently flipped the loaf seam side up onto the bottom of the cloche.
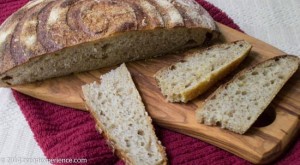
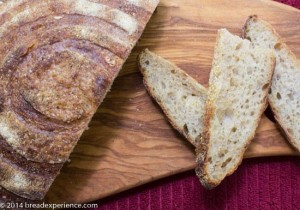
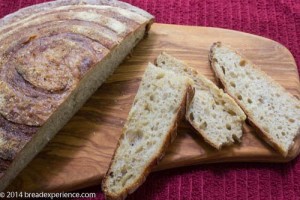
Slashing: Using a lame or very sharp knife, starting at the center of the loaf and holding the blade almost horizontally, carve a spiral into each loaf. I used a straight lame for this and it worked really well. I think a sharp knife would also work. It also helped to work with cold dough.
Baking: Carefully place the bottom of the cloche in the preheated oven and cover it with the domed lid. Bake for about 25 minutes, then remove the lid and continue baking until the crust is dark and the internal temperature is somewhere between 200F and 210F.
Allow the baked bread to cool completely before cutting into it. It’s still baking inside!
I really enjoyed this loaf. It’s definitely not cornbread. It’s a tasty, full-bodied artisan loaf with a rustic and chewy texture.
Because I retarded the dough in the refrigerator overnight, I didn’t get a huge rise in the oven. However, I got pretty rings by scoring the cold dough and great flavor from the overnight fermentation.
I had a friend over for dinner and he took a bite and said, “oh, I like bread like this!” He’s a sourdough lover and he likes breads made with different types of grains. Bingo!
Check out how the other creative Babes handled this bread:
The Bread Baking Babes (current dozen) are:
- Bake My Day – Karen
- blog from OUR kitchen – Elizabeth
- Bread Experience – Cathy
- Feeding my Enthusiasms – Pat/Elle
- girlichef – Heather
- Life’s a Feast – Jamie
- Living in the Kitchen with Puppies – Natashya
- Lucullian Delights – Ilva
- My Diverse Kitchen – Aparna
- My Kitchen In Half Cups – Tanna
- Notitie Van Lien – Lien
- Thyme for Cooking – Katie (Bitchin’ Bread Baking Babe Bibliothécaire)
Would you like to be a Bread Baking Buddy? Here’s how:
Just make the Polenta Bread, then email your link to Elizabeth, the kitchen of the month (or email your photo and a bit about your experience if you don’t have a blog). Refer to Elizabeth’s post for the details. Submissions are due by August 29th. Once you’ve posted, you’ll receive a Buddy badge for baking along, then watch for a roundup of all of the BBBuddies posts a few days after the close of submissions.
I hope you’ll join us this month!
Happy Baking!
Cathy
Elizabeth says
Many thanks for the information about the difference between cornmeal and polenta.
I must say that I’m extremely envious of your scoring, Cathy! And, of course, I bow down to you that you made the bread with sourdough AND with one stitched hand tied behind your back.
I’m so glad to hear that you and your friend liked the bread!
Cathy W. says
Thanks for this bread, Elizabeth. I really enjoyed it. The overnight rest in the fridge (for the dough, that is) did wonders for my finger and the scoring.
Jamie says
Okay, I have to link to your post for the polenta vs grits discussion. That’s really interesting. And because you kept yours in the fridge overnight and baked cold. Your loaves are beautiful!!!
Cathy W. says
Thanks Jamie! The discussion is a bit confusing but it was interesting.
Lien says
Wonderful loaves, lovely holes and airy inside. great scoring! We don’t know grits here, but I’ve seen polenta in diverent grades of coarseness.
Cathy W. says
Thanks Lien!
Karen Kerr says
Beautiful slashing and great crumb! I’m going to try this with sourdough too.
Cathy W. says
Thanks Karen! Yes, make the sourdough version for sure.
Katie Zeller says
Interesting about the difference between grits and polenta. Here (Europe) corn flour is what Americans call cornstarch. I can’at imagine baking with it…..
Lovely breads.
Cathy W. says
Thanks Katie! I thought that was rather odd about the cornflour myself. Cornstarch is way different here. Go figure!
MyKitchenInHalfCups says
Great run down of grits vs polenta … I’m with you, it tastes great; still now I think I must seek out the flint.
Love that swirl!
Cathy W. says
Thanks Karen! I’m with you, the flint corn sounds really good.