This Sourdough Romanian Easter Braid is filled with a delicious paste of finely ground almonds, cinnamon, and lemon zest. It is a wonderful Spring bread. Inspired by traditional Romanian Easter bread, this sourdough braid weaves together sweet, spiced layers and a soft, airy crumb. The rich, golden crust and intricate shape make it a festive centerpiece, echoing the customs of Easter celebrations where bread symbolizes renewal and togetherness.
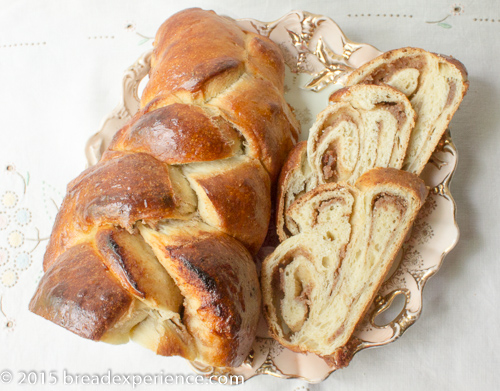
This braided bread is the bread of the month for the Bread Baking Babes. Traditionally, it is served on Easter, but you can enjoy this festive bread anytime.
This swirled bread, chosen by Elle, features a beautiful three-strand braid, but what makes it extra special is that each braid is filled with a paste of finely crushed almonds, cinnamon, and lemon zest. It would make a delightful treat for any special occasion or just because.
I made my version with sourdough to fit with my schedule. Using sourdough allowed for a longer fermentation time which not only developed the flavor but made it possible to braid and bake the loaf after work.
Notes:
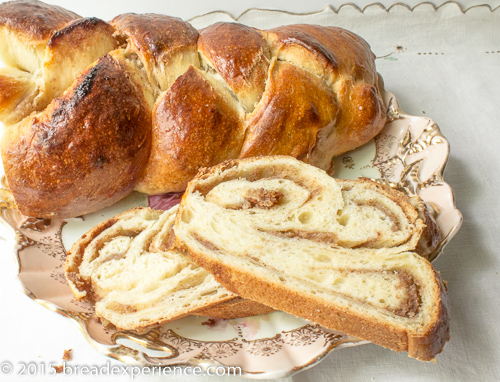
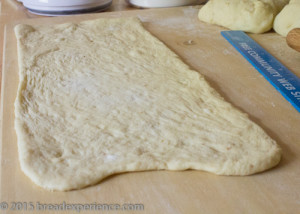
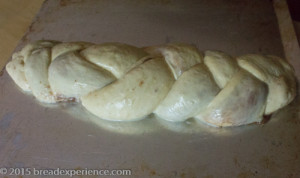
I had a couple of mishaps while I was shaping the loaf. The first mishap was rolling out one of the braids too thin which allowed the filling to ooze out during the final proof. You can see the thin braid in the photo above. I attempted to push the filling back in but this made the dough tear slightly. I ended up eating the filling that oozed out instead. So if you’re wondering where the rest of the filling is, it sure was good. My recommendation is not to roll out the dough too thin if you want the filling to stay inside.
My second mistake or oversight was to roll out and spread the filling on the first braid before working on the other braids. I did this mainly due to my workspace. However, this meant that the first braid started proofing before I had finished rolling out the other braids. So I rolled out the remaining braids simultaneously, spread the filling on them, and then rolled them up one after another. This made the second and third braid more uniform.
Even with these mishaps, the bread didn’t look any worse for the wear even though the braids weren’t as uniform as they could have been. Once I tasted it, all was forgotten. The sourdough gave it a complex flavor, but it wasn’t sour at all. And, the filling was wonderful. I had ground the almonds in my coffee grinder and it left some larger pieces. This gave the filling a slightly crunchy texture. I enjoyed the texture and flavor of this bread.
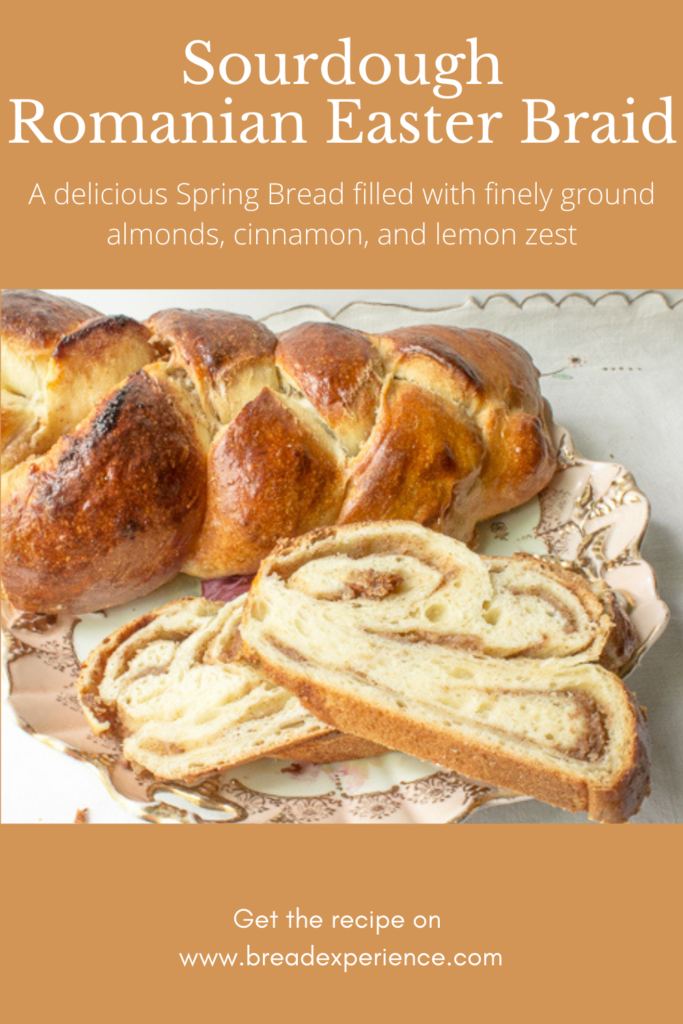
Sourdough Romanian Easter Braid
- Yield: 1 Braided Loaf 1x
Description
Inspired by traditional Romanian Easter bread, this sourdough braid weaves together sweet, spiced layers and a soft, airy crumb. The rich, golden crust and intricate shape make it a festive centerpiece, echoing the customs of Easter celebrations where bread symbolizes renewal and togetherness.
Ingredients
Dough:
190 grams (1 cup) sourdough starter, recently fed
420 grams (3 cups) all-purpose flour
1 gram (1/2 tsp.) grated lemon zest (or orange zest)
80 grams (1/3 cup) milk
57 grams (4 Tbsp.) unsalted butter
50 grams (1/4 cup) sugar
3 grams (1/2 tsp.) salt
2 large eggs, beaten
Filling:
80 grams (1/3 cup) water
67 grams (1/3 cup) sugar
100 grams (1 cup) finely ground almonds (or walnuts, poppy seeds, etc)
1 gram (1/2 tsp.) grated lemon zest (or orange zest)
1.3 grams (1/2 tsp.) cinnamon
Glaze:
1 egg beaten with 30 grams (2 Tbsp.) milk
Instructions
Directions:
Transfer the sourdough starter to a large mixing bowl. Pour the milk into a separate bowl. Melt the butter and add it to the milk to warm it. Add the salt and sugar to the milk mixture and stir until dissolved. Stir in the eggs and lemon (or orange rind); then add the milk/egg mixture to the sourdough and blend well using a wooden spoon or Danish dough whisk.
Gradually add the flour one cup (140 grams) at a time until the dough is too stiff to mix with the wooden spoon or Danish dough whisk. The dough will be soft. Transfer the dough to a lightly floured surface and knead in the remaining flour until the dough is smooth. This should take about 10 minutes.
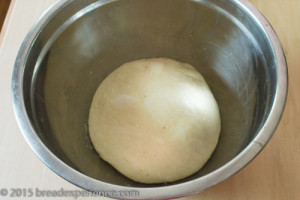
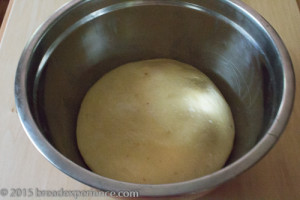
Place the dough in a clean, greased bowl, turning to coat the top. Cover the bowl and let the dough proof overnight (8 to 12 hours) at room temperature, about 70 degrees F. The dough should double in size during this time.
Gently transfer the dough to a floured work surface using a spatula or dough scraper.
Divide dough into 3 equal pieces. Roll each into a 7 x 16-inch rectangle.
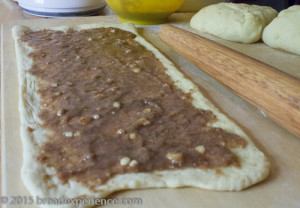
Use 1/3 of the filling for each rectangle. Spread the filling, leaving a margin around the edges, and roll up jelly-roll style. Seal seam and ends. You will have three filled and sealed ropes. Braid ropes; place onto a greased baking sheet.
Cover; let rise in a warm place until double – about 30 minutes.
Make the glaze and brush on the loaf.
Bake in a preheated 350-degree F. oven for 40 minutes or until done. Cool on a wire rack.
Notes
adapted from The Festive Bread Book, by Kathy Cutler
- Category: Sweet Bread
- Method: Sourdough
- Cuisine: Romanian
Pat of Feeding My Enthusiasms is the host kitchen this month. If you would like to bake along with us and earn your Bread Baking Buddy badge, just make your version of this Romanian Easter Braid (more info in her post) by the 29th of the month.
See what the other Bread Baking Babes did with this month’s bread:
Cozonac (Romanian Easter Bread) – blog from OUR kitchen
Romanian Easter Braid – Notitie van Lien
Romanian Easter Braid w/ Walnut-Coconut-Rum Swirl – girlichef
Romanian Easter Bread – My Kitchen in Half Cups
Romanian Spring Braid – Feeding My Enthusiasms
Sourdough Romanian Easter Braid – breadexperience
Roundup: Bread Baking Babes Celebrate Spring with a Twist – Thyme for Cooking
Happy Baking!
Cathy

Louise says
your bread is so inviting! I loved reading your experiences and will use your tips when I try the recipe. I hope mine is as pretty and tasty. Thank you!
Cathy says
Thank you Louise! I do hope you try this braided bread. It’s a keeper.
Karen @ Karen's Kitchen Stories says
Looks fabulous, and I love the new blog design!
Cathy says
Thanks Karen! This bread is so very tasty!
Elizabeth says
It looks fabulous. And the extra fermentation time has to have made a difference to the flavour. And I wonder if having a slightly non-uniform braid with a bit of filling oozing out might have actually been a plus. It really does look wonderful.
So does your new design for your blog.
Cathy says
Thanks Elizabeth! The oozing filling was really good so perhaps you are right!
Linda Mitchell says
Does the filling need to be cooked? Sounds watery
Cathy says
Hi Linda, the filling does not need to be cooked. However, be careful not to roll the dough out too thin or it could tear and then the filling will ooze out. Ask me how I know? I enjoyed the part that oozed out though.
Ruth says
I just made this exactly as written and it is perfect! Thanks for an easy and tasty recipe.
Cathy says
Ruth, that is wonderful! Thank you so much for sharing your experience. I do hope you enjoy the bread.
Darrel says
was looking for something new for bread/rolls for family Easter Dinner, so I gave this a try. It was great! Easy to make and tasted really good. Based on the tip above I rolled out the whole batch into 16×21 rectangle and then used a pizza cutter to cut it into three 7×16 strips to fill and then braid. I found it a bit soft to handle when braiding so may try a little more flour next time but it turned out really good and will be trying it again. Thanks for a new bread recipe
Cathy says
Hi Darrel,
Thanks for sharing your experience with the Sourdough Romanian Easter Braid. I’m so glad you liked it. Let me know if the extra flour helps next time. It’s always helpful to learn new tips.
Happy Baking!
Cathy
Nicolas says
Hi! One question please, does the oven need to be in fan mode? Or without?
Thanks 🙂
Cathy says
The oven does not need to be in fan mode.
Gia Natoli says
Can this be frozen and baked off at a later date?
Cathy says
I haven’t tried freezing the dough. So, I’m not sure how freezing the dough would work. Baking the bread ahead of time and freezing it would probably be okay. It wouldn’t be as fresh as just baked, but you could warm it up a bit in the oven after letting it thaw completely.
Melissa says
I made two of these today and gave one to my friend’s family. Our’s was delicious! Might become a family favorite!!
Cathy says
Wonderful! I’m so glad you enjoyed this bread.