This Sourdough Sweet Potato Onion Loaf is made with roasted purple sweet potato and loaded with caramelized onions. It’s a high-hydration dough, meaning it’s very wet to work with, but the result is a moist and onion-flavored loaf.
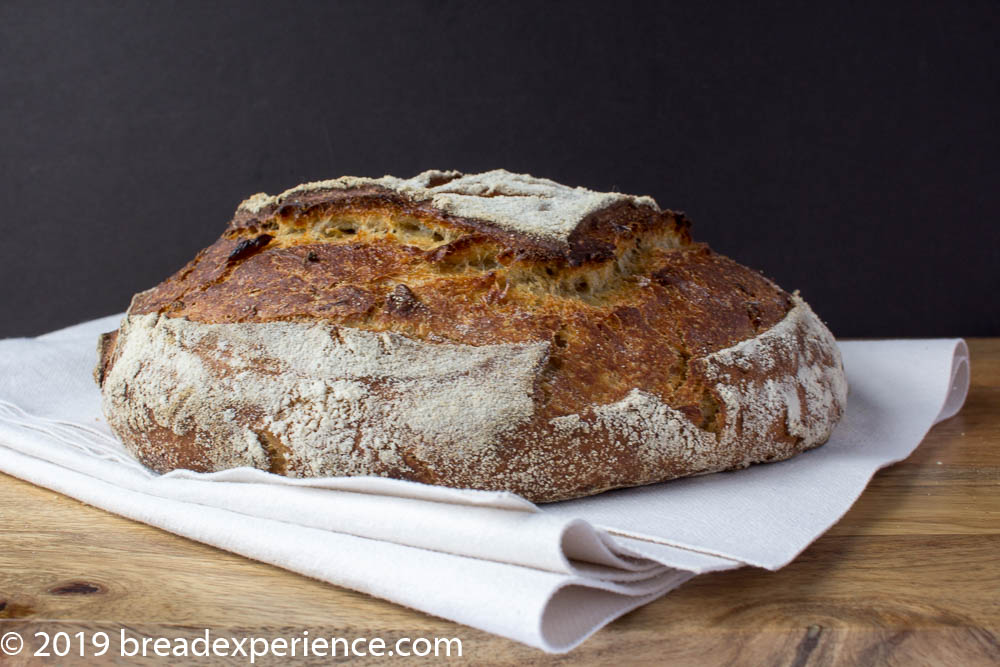
Elizabeth, from Blog from OUR Kitchen, chose the Sweet Potato Onion Bread, also known as Elbow-Lick Bread, from Vivian Howard’s book, Deep Run Roots, as the bread of the month.
If you are wondering what in the world Elbow-Lick Bread is, here is what the author has to say about it:
“This stuff is special-chewy with deep flavor and a dark crust. If you want a sandwich that will make you cry tears of joy, make the Elbow-Lick Tomato Sandwich”
– Vivian Howard, Deep Run Roots | Chapter 14: Sweet Potatoes, Sweet Potato Onion Bread, p321
~~~~
“I knew this was it, the bread, the mayo, even the halfhearted tomatoes. I scarfed that sandwich down like a wild animal. Tomato juice mingled with smoked mayo and vinegary onions dripped down my arm all the way to my elbow. I licked my arms and did my best to lick my elbow. Licked the palm of my hand and imagined how unimaginable it would be with juicy, ripe Cherokee Purples.”
– Vivian Howard, Deep Run Roots | Chapter 12: Tomatoes, Elbow-Lick Tomato Sandwich, p260
I’ll be honest, although I grew up in the South (and still live here), I’ve never been a fan of tomato sandwiches or mayonnaise so the idea of having tomato juice mixed with mayo dripping down my chin isn’t an image that appeals to me (although Vivian wears the look very well, I must say).
So forget the tomato and mayo sandwich, give me sweet potatoes and caramelized onions, and tomato soup and grilled cheese sandwiches. Or just bread with soup and I’m good to go.
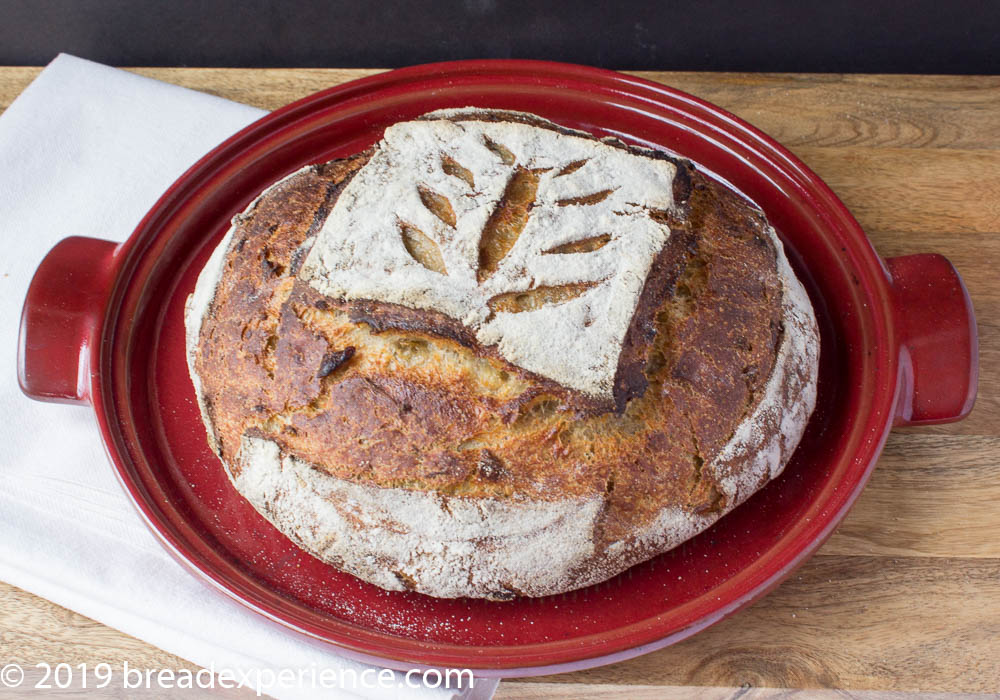
I like to think my loaf has the ingredients, mostly, of the elbow-lick bread, but the charm and appeal of an artisan loaf.
As usual, I made changes to the adapted recipe:
I used purple sweet potatoes instead of orange sweet potatoes because a reader commented on one of my breads last month and asked me what type of sweet potato was the best to use. I had only used orange ones up until that point, but I thought using a purple one sounded like a great idea and one I needed to try. So when I saw a bag of purple potatoes at Trader Joe’s, I grabbed it.
I love the chestnut flavor of the purple sweet potatoes, and when you roast them using Vivian’s method, they are over-the-top delicious. These may be my new favorite sweet potatoes. They made the dough nice and fluffy.
I also used a rye levain rather than whole wheat (as Elizabeth’s adapted recipe below suggests), mainly because I could. Not sure why, but the idea hit me, and I went with it. I also added a little bit of emmer to the final dough for good measure.
As I mentioned earlier, the hydration was high so I chose to add additional flour to the dough. After letting it proof on the counter for about 4 hours (with a stretch and fold every hour), it still wasn’t developed so I gave it an overnight cold ferment in the refrigerator.
The next morning, I shaped the dough into a boule and placed it in a proofing basket, and let if proof on the counter for two hours, then placed it back in the refrigerator for 5 hours.
When it was time to bake the loaf, I used the finger poke method to test if it was sufficiently proofed, and the indention came back very slowly which told me it was proofed sufficiently.
I baked it as I normally bake artisan loaves in my Bread Cloche, by preheating the cloche to 450 for at least 45 minutes, then baking the loaf 25-30 minutes with the lid on and 15-20 minutes with the lid off.
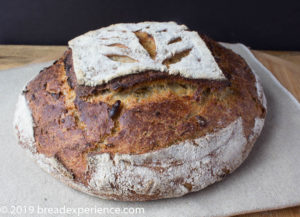
The loaf looked great when I removed it from the oven, but to my dismay, it had a gummy line at the bottom when I sliced it.
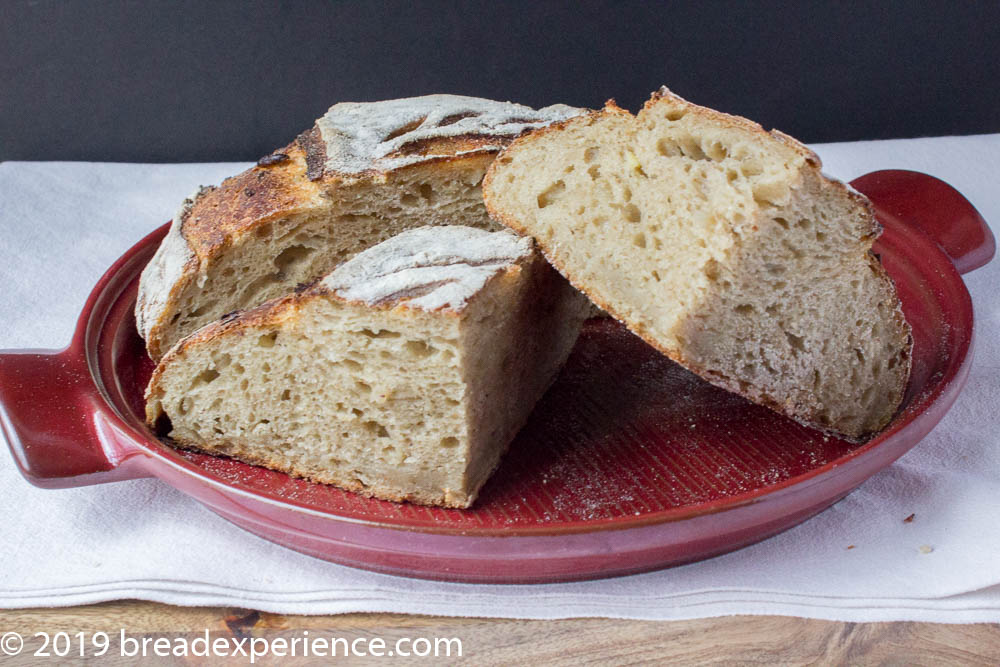
After doing some digging, I found a few things that might cause a gummy line in a loaf:
- Under proofed dough – mine wasn’t under proofed so I marked that off the list
- Not adequately shaped – I shaped it the way I normally do so I don’t think this was the problem; however, you never know
- Uneven heat – I believe this was my issue because the rest of the loaf baked well. The rest of the loaf was moist but not gummy. I have since determined there was a slight gap in the bread cloche when I placed it on the base so this could be what kept it from heating evenly although I haven’t had this issue with other loaves. I will need to test some more to know for sure.
- Baking time – I also think it needed to bake about 5-10 minutes longer with the lid on so that may be the issue – again, this will require additional testing.
- Slicing loaf too soon – I will also admit that I cut this bread before it was cooled completely – so that I could get the crumb shot. Oops!
It will require more testing to know for sure whether it’s the cloche, the baking time, slicing it too soon, and/or too many onions that gave it the gummy line at the bottom. However, I do know that when I make it again, I plan to reduce the amount of onions or let them caramelize longer so they don’t contribute too much moisture.
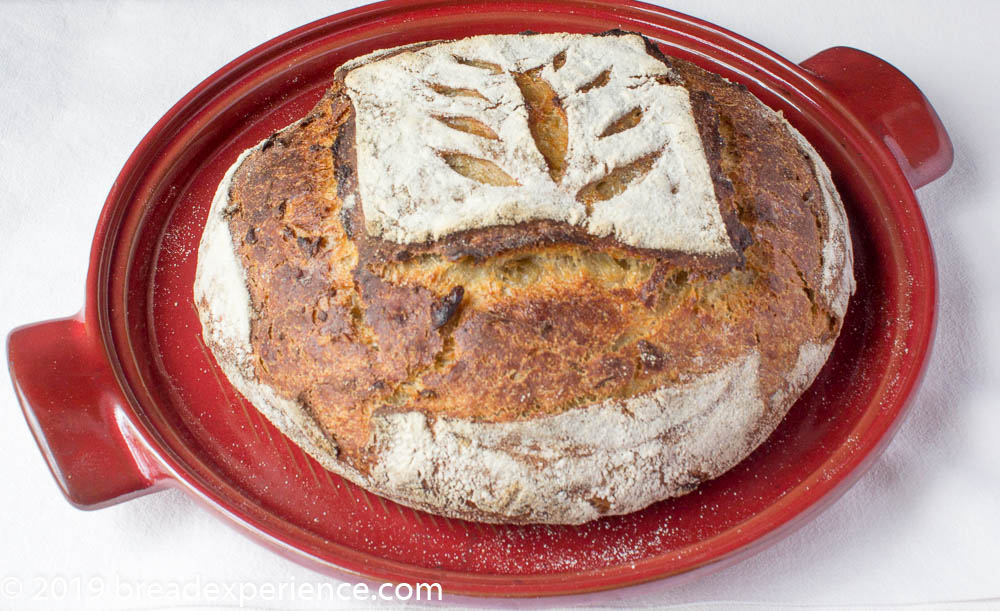
Even though it had a gummy line at the bottom, I still enjoyed this bread with – you guessed it – tomato soup.
Sourdough Sweet Potato and Caramelized Onion Loaf
based on the recipe for Sweet Potato Onion Bread in “Deep Run Roots” by Vivian Howard
Makes: 1 loaf
Leavener
- spoonful (10ml or so) active natural wheat starter at 100% hydration (OR 0.5gm (1/8 tsp) active dry yeast)
- 60 grams (60ml) water, body temperature
- 60 grams (118ml) 100% whole wheat or rye flour
Sweet Potato
- Approx. 1 five-inch-long orange sweet potato (I used a purple sweet potato)
Caramelized Onions
- 375 grams (2.5 large) onions, diced
- 7 grams (1.5 tsp) olive oil
- 3 grams Kosher salt (0.5 tsp table salt)
Dough
- 300 grams all-purpose flour + 50-100 grams additional for sprinkling
- 40 grams whole wheat emmer flour
- 200 grams (200ml) water at body temperature
- All of the Starter from above
- 7 grams (5 ml) honey
- 9 grams Kosher salt (1.5 tsp table salt)
- 128 grams (120ml) roasted sweet potato puree
- All of the caramelized onions from above
- Bran, for sprinkling on the loaf while proofing in the basket
Directions:
- leavener – IN THE EVENING OF THE DAY BEFORE MAKING THE BREAD: Put the starter (or active dry yeast, if you’re using that) and water into a smallish bowl. Mix with a wooden spoon. Use the wooden spoon to stir the flour in well. Cover the bowl with a plate and set aside overnight in the oven with only the light turned on.
- sweet potato – IN THE EVENING OF THE DAY BEFORE MAKING THE BREAD: Preheat oven to 400 F. Cut the ends off of the sweet potato and place it whole on a baking sheet lined with parchment paper. Bake until tender. This should take about 45 minutes. Vivian Howard wrote the following:
Once you start to smell them, probably after about 45 minutes, give the potatoes a look. My mom always looked for a little of their juice to have leached out and caramelized, but that is more romantic than necessary. When the potatoes are done, their skins should have separated slightly from their flesh and they should pierce easily with a knife or fork.
Slice the baked sweet potato in half lengthwise and scoop the flesh out into a bowl. Mash well. Cover the bowl with a plate and set aside in a cool place until the next morning. - onions – IN THE EVENING OF THE DAY BEFORE MAKING THE BREAD: Heat oil for onions in a cast iron pan. Add the onions and salt and caramelize the onions over medium heat until they are golden brown. Vivian Howard says this will take 30-40 minutes. Set aside in a cool place until the next morning.
- mix the dough – IN THE MORNING OF THE DAY YOU WILL BE MAKING THE BREAD: When a small forkful of the leavener floats in a small bowl of room temperature water, you can go ahead and mix the dough. If the leavener does not float, stir in a little more whole wheat (or rye) flour and water – even amounts by weight – cover with a plate and leave for about 30 minutes more. Chances are that it will now float. (If you have used active dry yeast, you can safely skip the floating test.) Put flour, wheat germ, all but 18ml water, leavener, honey, sweet potato puree into a large mixing bowl. Use a wooden spoon or dough whisk to mix these ingredients to make a rough dough. Cover the bowl with a plate and leave on the counter for about 40 minutes.
- adding the salt – Pour the salt over the dough.
- kneading – Use one of your hands to incorporate the salt into the dough; use the other hand to steady the bowl – this way you always have a clean hand. At first the dough might be a bit messy and seem like it’s coming apart. Persevere. Suddenly, it will seem more like dough than a horrible separated glop. Keep folding it over onto itself until it is relatively smooth. Cover with a plate and leave to rest for about 20 minutes.
- stretching and folding the dough and adding the onions – Put a quarter of onions on top of the dough and turn it by folding the dough into the center. Let sit 20 minutes. Repeat at 20 minute intervals until all the onions are in the dough. You’ll notice that after each time, the dough will feel significantly smoother. Cover with a plate and leave on the counter (or if the kitchen is cool, into the oven with only the light turned on). Once all the onions are added, leave the covered bowl in the oven – with only the light turned on – for a couple of hours to allow the dough to double. (A good way to tell if the dough is ready to shape is to run your index finger under water, then poke a hole in the center of the dough. If the hole disappears immediately, the dough still need to rise. If there is a slight whooshing sound and the hole remains in place, the dough has probably over-risen. If the hole very gradually begins to close, the dough is ready to shape.
- prepare the brot-form – Put rice flour or a 50/50 mix of rice flour/all-purpose flour into a brotform (proofing basket) and distribute it as evenly as possible. (If you don’t have a brot-form, you can line a bowl, basket or sieve with parchment paper. You can also use a liberally rice-floured tea towel. If you do not have rice flour, you can use any other kind of flour.
- pre-shaping – Scatter a dusting of flour on your work surface and gently place the dough on the flour. Using wet hands, stretch the dough into a longish rectangle, then fold it like a letter, gently patting off any extra flour that might be there. Continue folding until the dough is shaped in a ball. Cover with a clean tea towel and let the ball rest for about 20 minutes.
- shaping – Without breaking the skin, tighten the ball further. Place it seam side UP in the well floured brotform. Sprinkle some bran evenly over the top of the bread. Loosely wrap the shaped loaf with a clean tea towel and enclose the whole thing inside a plastic bag and leave it in the oven with only the light turned on for 3 or 4 hours (until it has about doubled and there are bubbles). Please note that Vivian Howard shapes her bread into rounds with holes in the center:
Shape [the dough] into a round. Let [it] rest for 10 minutes. […]Line [a baking sheet] with parchment and dust with flour. Stick your finger through the center of [the dough ball]. […] Stretch it slightly to form a little hole. Transfer that dough round to the baking sheet and continue to carefully stretch the center into a 3-inch hole. Your bread round at this point will look like a giant flat doughnut.” – Vivian Howard, Deep Run Roots, Chapter 14: Sweet Potato | Sweet Potato Onion Bread - baking – To know when it’s time to bake, run your index finger under water and gently but firmly press it on the side of the bread. If the dough springs back immediately, recover the bread with the plastic bag and leave it in the oven with only the light turned on. If the dough gradually returns back after being pressed, for the round loaf, put a Dutch Oven or Bread Cloche into the oven and preheat to 450F.
- When the oven is preheated about 45 minutes later, put a piece of parchment paper on the counter. Overturn the shaped bread onto the parchment paper (the bran covered part will now be on the bottom). Using a lame (or scissors, or serrated knife), score the bread.
- Take the cloche or Dutch Oven out of the oven (wear oven mitts!!) and place it on a heavy towel or pot holder (to prevent burning your countertop or damaging the cloche due to extreme temperature changes…). Transfer the bread to the base of the cloche or Dutch Oven and immediately put the lid on. Place everything into the oven on the middle rack. Bake for 40-50 minutes, removing the lid after 25-30 minutes. The bread is done when the crust is a deep golden brown and the bread sounds hollow when tapped on the bottom.
- cooling – When the bread has finished baking, remove it from the pot and allow it to cool on a footed rack before slicing and eating; the bread is still cooking internally when first removed from the oven! If you wish to serve warm bread (of course you do), reheat it after it has cooled completely: To reheat any uncut bread, turn the oven to 400F for 5 minutes or so. Turn the oven OFF. Put the bread into the hot oven for about ten minutes. This will rejuvenate the crust and warm the crumb perfectly.
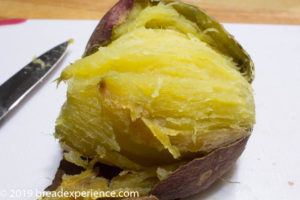
- Roasted Sweet Potato with a little juice oozing out
- The peel just comes right off
- Love the flavor of purple sweet potatoes
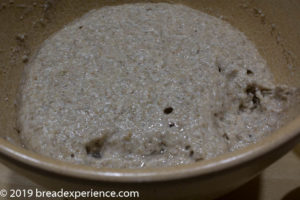
- Leavener risen with a spoonful removed for the float test
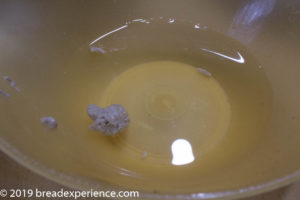
- Leavener passing the float test
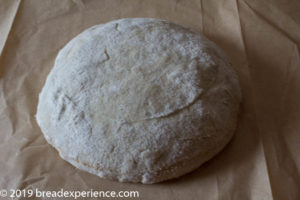
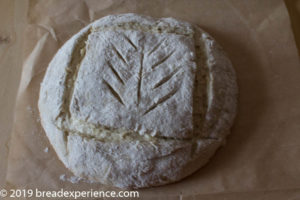
- Risen loaf on parchment paper
- I had fun scoring this loaf
- Baked Loaf
Elizabeth’s Notes:
:: leavener: Vivian Howard’s recipe for Sweet Potato Onion Bread calls for active dry yeast. At the opening of the recipe, she wrote, “Kim Adams, our pastry chef, who’s been with us since day one, had no experience making bread and neither did I. We set out to master at least one style of loaf, and we did.” But I really wanted to use our starter that has been creating such magnificent bread for us since July 2017. It is 100% hydration and takes about 5 days to create. (Please see our take on Jane Mason’s Natural Starter made with Wheat Flour.)
:: why hand mixing? These instructions, as usual, do not mention using an electric mixer: I don’t have one; I don’t know how to use one. But of course, if you want to use your electric mixer for mixing and kneading, you should do so.
:: brotform: If you do not have a brotform, or banneton, also known as a proofing basket, you can use Jim Lahey’s method for proofing the shaped loaf: he coats a parchment covered cookie sheet with bran, than shapes his loaf into a ball and places it seam side down onto the bran. He scatters a little more bran on top before covering the shaped loaf loosely with a clean tea towel. He lets it sit at room temperature that way until it has almost doubled in size. Or, you can use Vivian Howard’s idea to place the bread on a flour covered parchment papered cookie sheet.
:: cooking container: If you have a ceramic or Cast Iron Dutch Oven or a cast-iron combo cooker, use that. But if you don’t, you can use your cast-iron pan and cover the bread with an overturned stainless steel mixing bowl for the first half of baking. The dome creates a steam chamber that encourages oven spring.
:: oven temperature and baking times: Howard suggests preheating the oven to 450F and baking for a total of about minutes at 450F. Because of the presence of honey and sweet potato, and fear of scorching, I lowered the oven temperature. Cathy’s notes – I kept the temperature at 450F. the whole time.
Information and Tools
» Tasting Table: Flour Guide – Everything you need to know about types of flour
» Gourmet Sleuth: Cooking Conversions Calculator
» Splendid Table, Vivian Howard: Vivian’s Sweet Potato Wisdom
» Google Books: Deep Run Roots, Chapter 14: Sweet Potato | Roasted Sweet Potatoes in Their Jackets by Vivian Howard
» Cathy, Bread Experience: Dutch Oven Sourdough Sweet Potato Crunch Bread
^^^^^^^^^^^^^^^^^^^^^^^^^^^^^^^^^^^^^^^^^^^^^
Would you like to make Elbow Licking-good bread with us this month and get your very own Buddy Badge?
Check out Elizabeth’s post for information on how to participate in the monthly bake.
New recipes are posted every month on the 16th. Check out our Facebook group to see the participants’ baking results during that time.

All of the Babes have their own interpretation of this bread so please check out their posts for more inspiration:
- Karen’s Kitchen Stories – Karen
- Blog from OUR Kitchen – Elizabeth
- A Messy Kitchen – Kelly
- Judy’s Gross Eats – Judy
- My Kitchen in Half Cups – Tanna
- Feeding My Enthusiasms – Pat
- Bread Experience – Cathy
Happy Baking!
Cathy


Kelly says
Oh my gorgeousness! You got beautiful color, scoring, and amazing oven spring! I was afraid of gumminess so I was checking the temp with a thermometer to make sure it was at least 210º. I don’t know if cooling upside down first helps the bottom crumb or not. I fancied it did, so I tried it, lol! I absolutely adore a grilled cheese with tomato soup. That was my all time favorite lunch when I was younger and went out to lunch with my folks.
Cathy says
Thank you Kelly! I like that word! I’m wondering if I needed to bake it until it was bien cuit.
Kelly says
I definitely was thinking about bien cuit when I was checking for doneness and giving it additional time! But I love those crispy dark onion bits on the outside, yum!
Cathy says
That does sound delightful! Definitely need to let the onions caramelize more next time.
Elizabeth says
How clever, Kelly! I never thought of cooling the bread upside-down! But it kind of makes sense, if you think about the fact that heat rises.
Mmmmmm… Grilled cheese and tomato soup….
Karen says
Wow, you actually were able to score this bread! This loaf is gorgeous!
Cathy says
Thanks Karen! The scoring part was actually easy due to the cold ferment.
Elizabeth says
Purple sweet potato! Cool.
Your bread looks fantastic. And. Tomato soup? Grilled cheese sandwiches? Yes please!
Cathy says
Thank you Elizabeth! And thank you for the challenge! Definitely a learning experience and a delicious bread!
Katie Zeler says
I would have a problem with ‘too many onions’ One can never have too many.
And slicing too soon? Guilty, always…. I would have a soggy bottom lol
Looks beautiful anyway!
Cathy says
Thanks Katie! I’m onion lover as well so I think caramelizing the onions longer is the ticket.
Elizabeth says
I wonder if it helps to take the bread out of the cloche after the internal temperature has reached around 210F and then leave the bread on a rack in the still hot oven. This is what I did when I noticed that the internal temperature was just a little over 200F. I’m guessing that the bread continued to bake as the oven cooled down. (I was really worried about gumminess because I realized I didn’t quite caramelize the onions for long enough.)
Cathy says
That’s a good idea to take it out of the cloche to finish baking. I don’t typically have to do that with other breads I bake in the cloche, but this is not a typical dough.
I do think that caramelizing the onions longer is one of the keys to reducing the moisture in this loaf, but it’s still a high hydration dough even without the onions.
I wonder how this dough would handle without the onions. I might try it sometime for comparison.