This Pain à l’Ancienne Sprouted Spelt Focaccia is a delicious flatbread that utilizes the delayed fermentation method to develop the dough.
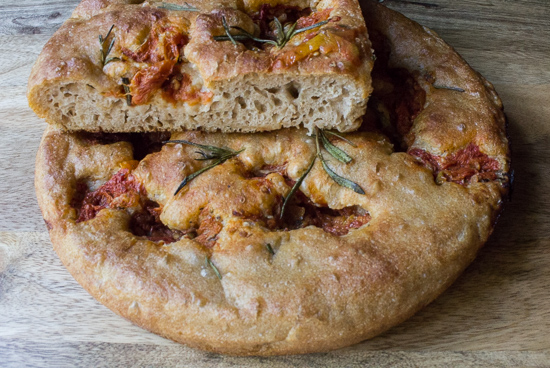
Pain à l’Ancienne Focaccia is the bread of the month for the Artisan Bread Bakers FB Group. It is made from high-hydration dough and can be cold fermented in the refrigerator for up to four days.
What makes the chilled water method so unique?
The uniqueness of this method compared to other delayed fermentation doughs, is that it incorporates chilled water to slow down the yeast activity. The dough is mixed by hand and benefits from several stretch and folds, and then it’s placed in the refrigerator to retard for one to four days.
My version is made with a mixture of about 50% sprouted Spelt flour and 50% all-purpose spelt flour.
Sprouted wheat flour doesn’t necessarily need a long fermentation to develop the flavor since the sprouting process takes care of this already, but I decided to give it a try in this focaccia anyway. I needed to use up some of my sprouted spelt flour so this seemed like a good way to do it.
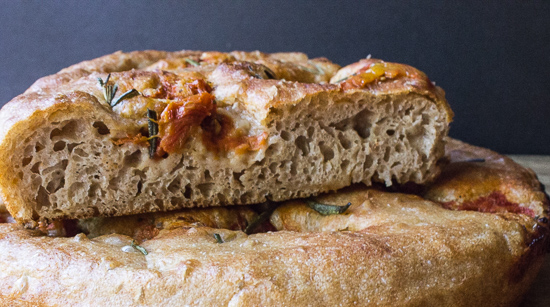
The sprouted spelt gives this focaccia a deliciously nutty flavor that blends well with the roasted tomatoes and rosemary. I enjoyed the thick slices, but if you prefer thinner focaccia, use less dough in each round pan or make one big flatbread on a rimmed baking sheet.
Pain à l’Ancienne Sprouted Spelt Focaccia
Recipe adapted from Peter Reinhart’s Artisan Breads Every Day: Fast and Easy Recipes for World-Class Breads.
Makes: 1 large Focaccia or 2 or 3 round ones (depending on how thick you want it)
Ingredients:
250 grams / ~2 cups + 1 T / sprouted Spelt flour
267 grams /~2 1/4 cups / all-purpose Spelt flour
1 3/4 tsp salt, or 2 1/2 tsp coarse kosher salt
1 1/4 tsp instant yeast
2 1/4 C chilled water (about 55 degrees F)*
1 T olive oil
Extra oil for baking
Herbs, spices, and salt for topping
*Sprouted flour soaks up more water than regular flour. If you use all-purpose flour, you only need 2 cups of water.
Instructions:
Combine everything except the olive oil in a mixing bowl. Mix with a large spoon or a Danish dough whisk until the ingredients are well blended, about a minute.
Let the dough rest for five minutes.
Add the olive oil, and mix for one minute more.
Using a wet dough scraper, scrape the dough onto an oiled counter. Cover it with a large bowl and let it rest for 10 minutes.
Stretch and fold the dough from all four “sides.” Then turn the dough over and shape it into a ball.
Place the dough back into the bowl, cover with plastic wrap, and let it rest for 10 minutes. Repeat three more times, every ten minutes, for a total of four “stretch-and-folds.”
Place the dough back into the bowl, cover it with plastic, and refrigerate the dough for one to four days. I kept mine in the refrigerator for 2 days.
On baking day, remove the dough from the refrigerator about 2 to 3 hours ahead of the time you plan to bake the bread.
Line a rimmed half-sheet pan or two round cake pans (with parchment, if desired) and oil it with about 2 T of olive oil. For round pans, cut parchment paper to fit the bottom of the pan. Then oil the parchment and the sides of the pans. I used two round pans and just oiled the bottom and sides thoroughly. I didn’t use parchment paper and it worked fine.
Gently place the dough into the pan and drizzle another tablespoon of olive oil over the top of the dough.
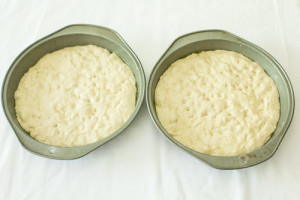
With your fingertips, begin dimpling the dough while pushing it lightly toward the edges of the pan. It should cover about half of the pan when you are done. Cover it and let it rest for about 15 minutes.
Drizzle a little more oil onto the bread and continue to dimple it to spread it out a little farther in the pan. Once it has covered about 3/4 of the pan(s), cover it with plastic wrap and let it rest for another 30 minutes.
Repeat the process every 30 minutes until the dough covers the entire pan(s). You can speed up this process by placing the dough into a warmed and turned-off oven between dimplings.
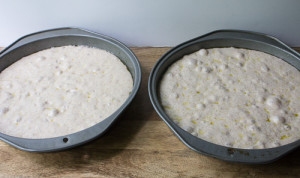
Cover the dough and let it rise at room temperature for about 1 to 2 hours, until it reaches a height of one inch.
Preheat the oven to 500 degrees F. Using a baking stone is optional, but if you plan to use one, let it preheat for 45 minutes. I used a baking stone and placed the cake pans on top of it to bake.
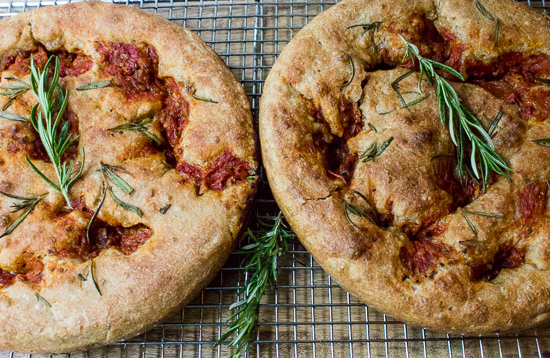
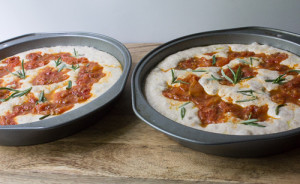
Sprinkle the dough with herbs or other toppings of your choice. I topped mine with roasted tomatoes from my garden, fresh rosemary, and kosher salt. The roasted tomatoes made the dough sink, but the good thing about that was that the tomatoes dripped through the dough.
To bake one large focaccia, place the pan in the oven and lower the temperature to 450 degrees F. Bake for 10 minutes, rotate the pan, and bake for another 12 to 15 minutes, until golden brown on top and bottom.
To bake round focaccias, don’t lower the temperature. Keep it at 500 degrees F. and bake the focaccias for 10 to 12 minutes. If you add moist toppings like I did, it will take longer to bake.
Place the focaccia on a wire rack and let it cool for at least 10 minutes before serving.
Happy Baking!
Cathy
Elizabeth says
Lovely! How clever to drizzle on a little tomato sauce just before baking! (Those are tomatoes from you garden this year?! You DO live in Paradise!)
Cathy says
Hi Elizabeth, actually the tomatoes are from last year’s harvest. I roasted them in olive oil and herbs and then froze several batches. Since they already had olive oil in them, I didn’t add more to the top of the focaccia. I believe it’s the roasted tomatoes in the olive oil that you see not tomato sauce, but it tasted great.
Margot says
what do you think of converting to sourdough for digestive purposes, any ratio advice…maybe a quarter cup?
Cathy says
Margot,
Sourdough starters are typically used to aid in digestion and to develop flavor in breads.
So, if you are referring to making/converting breads in general to using sourdough, then yes, I think it does aid with digestion. Bakeries generally use 20% to 33% sourdough in their breads so for this recipe, that would be 129 grams – 171 grams (~ 1/2 cup to 3/4 cup). To make things easy, I typically just use a cup of (240 mL of 100% hydration) sourdough starter and adjust the other ingredients accordingly, meaning I add less water and flour.
You can certainly use sourdough with this particular focaccia, however, it already includes a long fermentation to develop the flavor and it is made with a good bit of sprouted flour so you don’t need the benefit of the sourdough in this instance. The sprouting process creates the enzymatic activity that is normally handled by the sourdough.