We’re moving right along… to the 38th bread in the BBA Challenge, Tuscan Bread.
Several of the other bakers in the BBA Challenge mentioned they didn’t like this bread because it is salt less. The book also states that the lack of salt makes Tuscan Bread rather dull and flat tasting. To me, it was neither dull nor flat tasting. It had a wonderful, slightly sweet flavor. I really liked it and so did my taste tester!
You do have to “think outside the box” with this bread or should I say, taste outside the “bread” box. Don’t get hung up by the fact that it has no salt. It is definitely a different experience on your palate, but it’s a good one! I don’t know about you, but I probably eat too much salt as it is so it’s refreshing to know that I can make and actually enjoy a salt-free bread. Of course, I spread it with stuff that had salt in it so there you go…
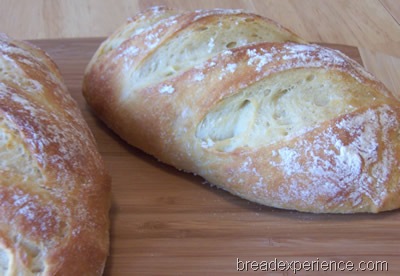
It actually took me 4 days to make this bread from start-to-finish rather than the 2 mentioned in the book. I made the flour paste two days before I made the dough and then I let the dough retard in the refrigerator overnight due to my schedule. This could be why the flavor was so good. As Peter Reinhart explains in the book, the cooked flour paste is yet another way to control flavor by manipulating time, temperature, and ingredients. Well, I’d say it worked!
Tuscan Bread – BBA Style
Adapted from: The Bread Baker’s Apprentice by Peter Reinhart
Makes: 2 Loaves
Ingredients:
Flour Paste:
- 1 3/4 cups boiling water
- 2 cups unbleached bread flour
Dough:
- 2 2/3 cups unbleached bread flour
- 2 1/2 teaspoons instant yeast
- 2 tablespoons olive oil
- About 1/2 cup water, at room temperature
- Semolina flour or cornmeal for dusting
Making the Paste
Make the paste 1 to 2 days before making the bread. It ended up being two days for me due to my schedule.
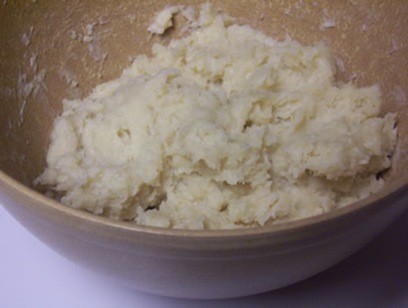
To make the paste, pour boiling water over the bread flour in a mixing bowl and beat until the flour is hydrated and makes a thick, smooth paste. Cool, cover, and leave out overnight at room temperature. I really liked the flavor of the paste. I thought it might taste like the glue paste we made with flour and water when I was growing up, but it didn’t. I didn’t use any special bread flour so I’m not really sure why I liked it so much.
Mixing the Dough
The next day, make the dough by mixing together the flour and yeast in a mixing bowl, then add the paste and olive oil.
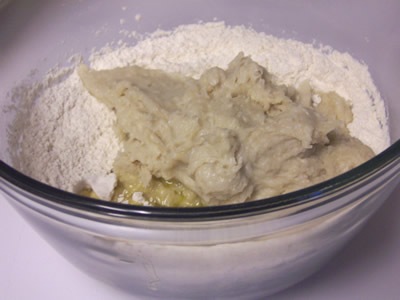
Stir or mix, adding as much water as necessary to make a soft, supple ball.
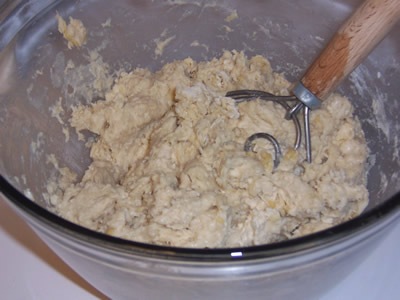
Transfer the dough to a counter sprinkled with flour and hand knead for about 10 minutes or if you’re using a mixer, mix for 6 to 8 minutes. Add more flour as needed to make a dough that is tacky but not sticky.
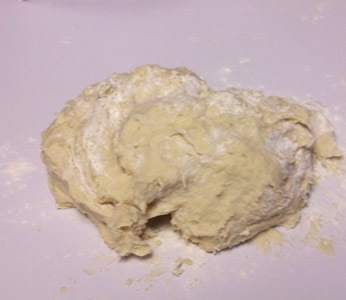
Transfer the dough to a lightly oiled bowl and roll it around to coat it in oil. Let the dough ferment on the counter for 2 hours.
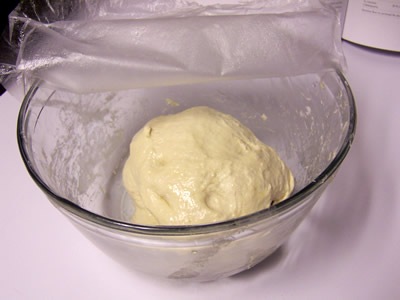
Gently divide the dough into two pieces being careful not to degas it too much. Shape the balls into boules. Cover and let them rest on the counter for 15 minutes.
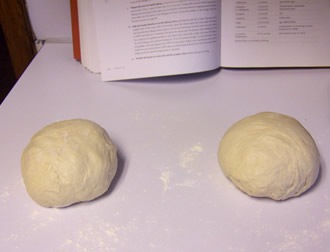
Then shape the boules into batards. To make the batard shape, gently pat the dough into a rough rectangle.
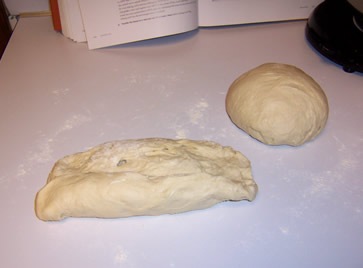
Then without degassing the piece of dough, fold the bottom third of dough, letter style, up to the center and press to seal, creating surface tension on the outer edge.
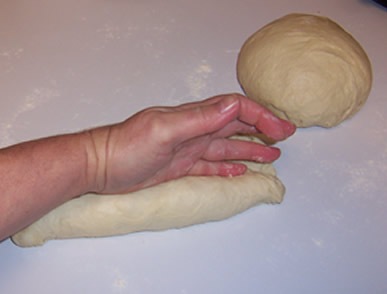
Fold the remaining dough over the top and use the edge of your hand to seal the seam closed and to increase the surface tension all over.
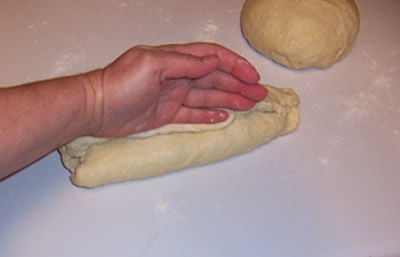
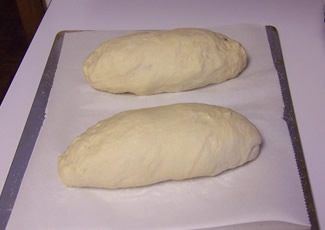
Form the other ball of dough the same way, then transfer the loaves to a parchment-lined baking sheet for proofing. Mist the loaves with spray oil and cover loosely with plastic wrap. Proof the loaves at room temperature for 60 to 90 minutes, or until they nearly double in size.
Baking the Loaves
Prepare the oven for hearth baking by placing a steam pan in place. Preheat the oven to 500 degrees F. and pour 2 cups of water in the steam pan.
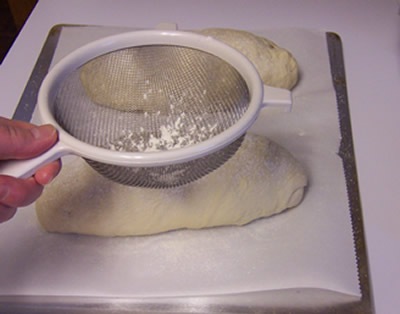
Just before baking, spray the loaves with a little bit of water and lightly dust with bread flour by tapping some through a sieve.
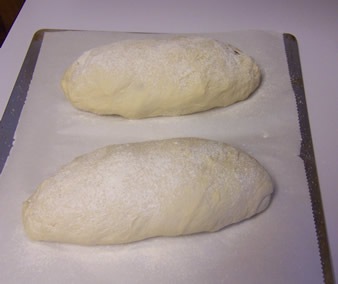
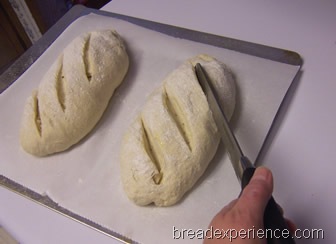
Score the loaves by making 3 slashes using a lame or serrated knife. I used a serrated knife.
Slide the breads directly onto the baking stone. After 30 seconds, open the door, spray the walls with water, and close the door. Repeat twice more at 30-second intervals, then lower the oven setting to 450 and bake for 10 minutes. Remove the steam pan 10 minutes after loading the oven being careful not to splash yourself if there’s any water left. Check the breads and rotate them 180 degrees for even baking. Continue baking for 10 to 20 minutes longer, or until the loaves turn a rich golden color.
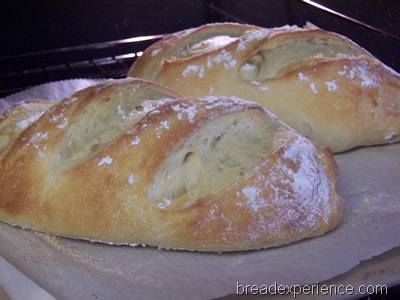
Transfer the loaves to a wire rack and cool for at least an hour before slicing or serving. Once the bread is cooled, it’s time to enjoy a slice and see what you think about salt-free bread. My taste tester thinks it would taste good with almost anything.
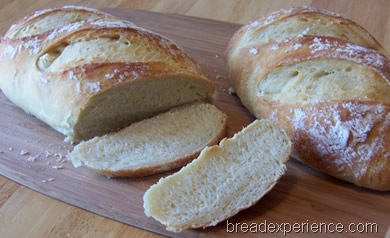
I tasted a piece spread with peanut butter, one with jam, and then another one with plain butter (not at the same time). Each slice tasted great. For one meal, I toasted some slices and served them with homemade Tuscan Bean Soup and some olive oil and herbs for dipping. Yummy!
I also made Bruschetta with some of the bread. I think that was my favorite.
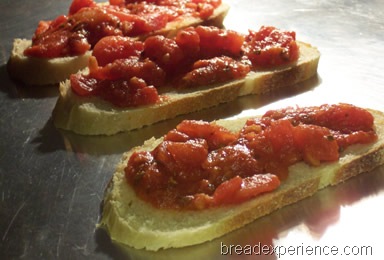
Thanks for joining us this week in the Bread Baker’s Apprentice Challenge. The next bread in the Bread Baker’s Apprentice Challenge is Vienna Bread.
Happy Baking!
Cathy
Femalechef says
I love the looks of your bread…..so pretty!!!
Cathy (breadexperience) says
Thanks Nancy! It tasted great!
Mags says
I’ve read so many bad reviews about this bread that it’s nice to find someone who really enjoyed it. Great job…your loaves look wonderful!
Cathy (breadexperience) says
Thanks Mags! I really did like this bread!
John says
How would describe the interior. My grandma as from Tuscany and died when I was twenty. I had no idea how special that bread was. I think she also put some anis in it, and I ki f of remember that she grou d a out half the flour and mixed it
Cathy Warner says
Hello John, Thanks for stopping by. The crumb (or interior) of this particular bread was soft and fluffy. I wonder if the bread your grandmother made was Il Bollo, an Italian Challah shaped like a ball. It has anise in it. I made a version with Spelt. It was delicious! http://breadmakingblog.breadexperience.com/2011/04/no-knead-holiday-spelt-bread-with-anise.html
John says
Thanks Cathy, the interior of her bread was tough. You could spread cold butter on it. Bread and butter or with sugar if we were good. She was from Campanari near Lucca if that helps. It was not shaped like a ball but rather like the loaf here but she didn’t cut it. What gives the interior its firmness? A truly great website.
Cathy W. says
Hi John, typically breads that are low in gluten are denser than breads that have a higher gluten content – i.e. white fluffy breads have a higher gluten content than all whole wheat breads.
It also depends on how much you knead the dough, the hydration (water-to-flour ratio), if the bread is degased too much during shaping, etc. A lot of factors go into it.
If your grandmother’s bread was really dense, then it sounds like she probably used a whole grain-type flour. It seems like a very interesting bread. I love Italian breads.
John says
I was 20 when she died, 30+ years ago, but it was always the same and always good.
She had a mill in her basement and I think she ground the wheat and mixed it in with some sort of flour.
And yes there are many factors. I try to explain to the unwashed that its a skill and a craft, and it can’t be deconstructed. You need to know what you are doing and be engaged to get good results. I love your web site! Your passion really comes through.
Cathy W. says
John, Thank you for sharing your memories of your Grandma preparing bread. That’s what the bread experience is all about. And, thank you for the kind words about my web site.